Geno’s Limo Service
Geno started a pretty high end limo service, carting people around in Range Rovers.
It’s a pretty sophisticated setup but his prices are reasonable.

Composite Shots ala Bill Fritz Style
I picked up Bill Fritz’s ebook on Edgy Portraits and decided to try his techniques. They work pretty good.
I’m no expert in photoshop and this was actually my first composite image. The book is really good showing some incredible techniques like creating an illustrative look, cartoon look and of course some amazing compositing. I was able to do my first composite shot in minutes with his technique and get a pretty good result. I’ll keep working on it to improve but I got a great start from it and some great ideas.
If you want to pick up a copy of the book, check out his website here.

Darla
What is Darla thinking? Where is she? How mysterious.
Just having fun with Photoshop and created this little black and white of Darla in the Bill Fritz style of portraits.
5 Best Techniques to Get Better Bokeh and Depth of Field
Photographs where the subject is clear but the background is blurry and smooth (even creamy) are very esthetically pleasing. This phenomenon is known as “Bokeh” which refers to the out of focus areas of the image and many photographers attempt to achieve that Bokeh look in as many images as possible. The blurry background look even has another name which is called “shallow depth of field” since the photographer is attempting to make the subject stand out sharply against the blurry background.
An example of Bokeh can be seen in this shot where the bride is in focus, while the groom in the background is blurred out. This is just one example of the pleasing aesthetic of bokeh and blurry backgrounds.

Bokeh draws the eye to the subject in the photo.
In this post, I will give you 5 techniques that you can try to achieve that blurry background effect. These are things I do just about everyday with my camera.
Technique 1 – Set up your camera to Aperture Priority or Manual Mode
The best technique of all to get better Bokeh is to use the camera in Aperture Priority Mode. To get more Bokeh in you photos you have to use a very low aperture setting in your camera. To control the aperture correctly you need to take your camera off of Automatic or Picture mode and set it to Aperture Priority or Manual Mode.
I prefer to set my camera to Aperture Priority Mode and then dial the aperture back to the absolute lowest setting I can. Here is a quick guide on how to change to Aperture Priority Mode on most cameras. How to use Aperture Priority Mode on your DLSR. Because I love bokeh in my pictures so much I now actually leave my camera in Aperture Priority Mode all of the time and adjust the aperture setting to the level of blur that I want in my pictures.
1) Your lens will dictate how low you can go.
One of the most important things to consider when attempting to get better Bokeh is if your lens will actually deliver it. While there are techniques you can use to get Bokeh from almost any lens, certain lenses will give you better bokeh than others.
There is a number that you should pay attention to on your lens. And that is your lens speed. The lens speed number is often indicated on the lens itself and usually is preceded by an F. The lower the number, the better. So for example if you are using the Nikon 85 mm F.1.4 you have a great Bokeh lens. If you are using say the Vivitar 500MM f/8 you probably have a poorer bokeh lens because the speed of the lens is much lower.
The good rule of thumb when buying a lens for better Bokeh is that if the number is 2.8 or less you have a pretty good lens for Bokeh, if its higher the Bokeh might not be as good. Another good rule of thumb is the fact that Prime lenses are constructed to give better Bokeh than non-prime. You can usually tell the prime lenses because they are more expensive. So the more expensive the lens, the better the Bokeh.
This is the Nikkor 85MM F/1.4. I paid a lot for this lens but I believe it is the best Bokeh lens that you can buy for Nikon.

The Nikon 85mm is perhaps the most Bokehlicious Lens in the World. Check out the creamy bokeh it delivers in this portrait picture of Tu.

2) The more light the better
Good lighting in the background is very important to getting good bokeh. In fact the more the background has interesting and good lighting the better your bokeh will be. Here is an excellent article on how to use Christmas lights to achieve some stunning bokeh results. Using Christmas Lights for Stunning Bokeh Shots.
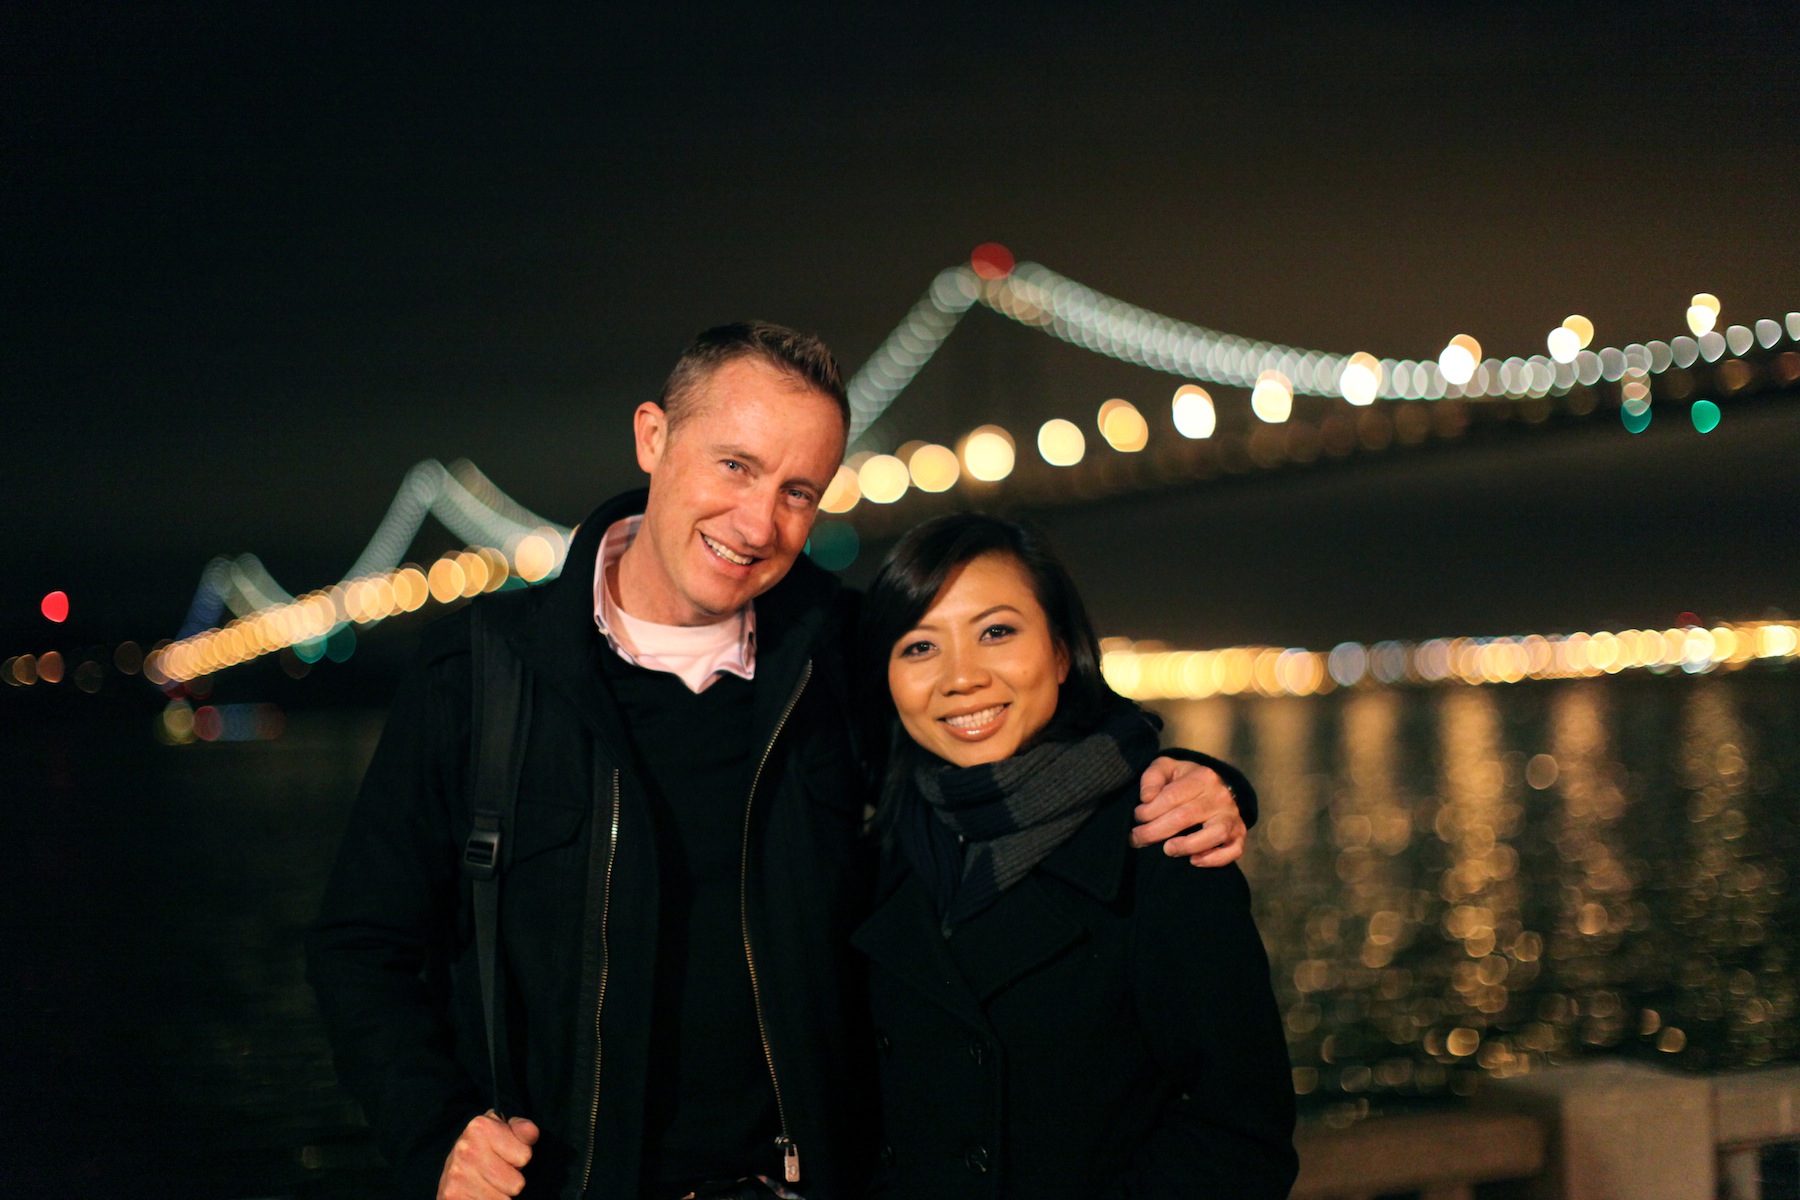
Photo Courtesy of Ryan Anger Flickr

The Oakland Bay Bridge Lights created a nice backdrop with this shallow depth of field.
3) Choose your focus point
It’s important to set the focus point manually and not just let the camera choose the focus point for you. The camera may choose to focus on the background and not the subject in which case you will get reverse Bokeh which is when the subject is blurry and the background is clear. That’s not what you want.
Technique 2 – Get close, Get really close
The second technique for better Bokeh is to get very close to your subject. I like to use this technique for portraits or even when I am taking pictures of something very small. I position my camera to get very close the person and then snap away. The important thing to remember is that you need to at least be further from the subject than the minimum focal distance of the lens itself. If you get too close than the whole image will be blurry.
To get the best result here you should make sure that the background is well lit. If the background is dark then this technique may not really work effectively.
Getting close up to Tu in this shot made for a nice depth of field effect.

For this shot, I got very close to the mother kissing her babies feet. Then I chose the focus point of the camera on the feet. Good Bokeh can create intimacy in a photo if done correctly.

Technique 3 – Fully extend your zoom lens
Do you ever seen wedding photographers shooting with these massively long lenses with their bride and groom 40 or 50 feet away? Many wedding photographers and portrait photographers prefer to shoot with large zoom lenses and then use a technique of lens compression to get nice bokeh around their subjects.
You can achieve great depth of field with Lens Compression by using the same basic techniques as these wedding photographers. First position your subject far from you. Then back up and zoom your lens as far as it can while putting the subject in focus. With the lens zoomed all the way out, you will achieve a nice Bokeh if you have good separation between the subject and the background. Extending lenses is a time tested technique used by many pros.
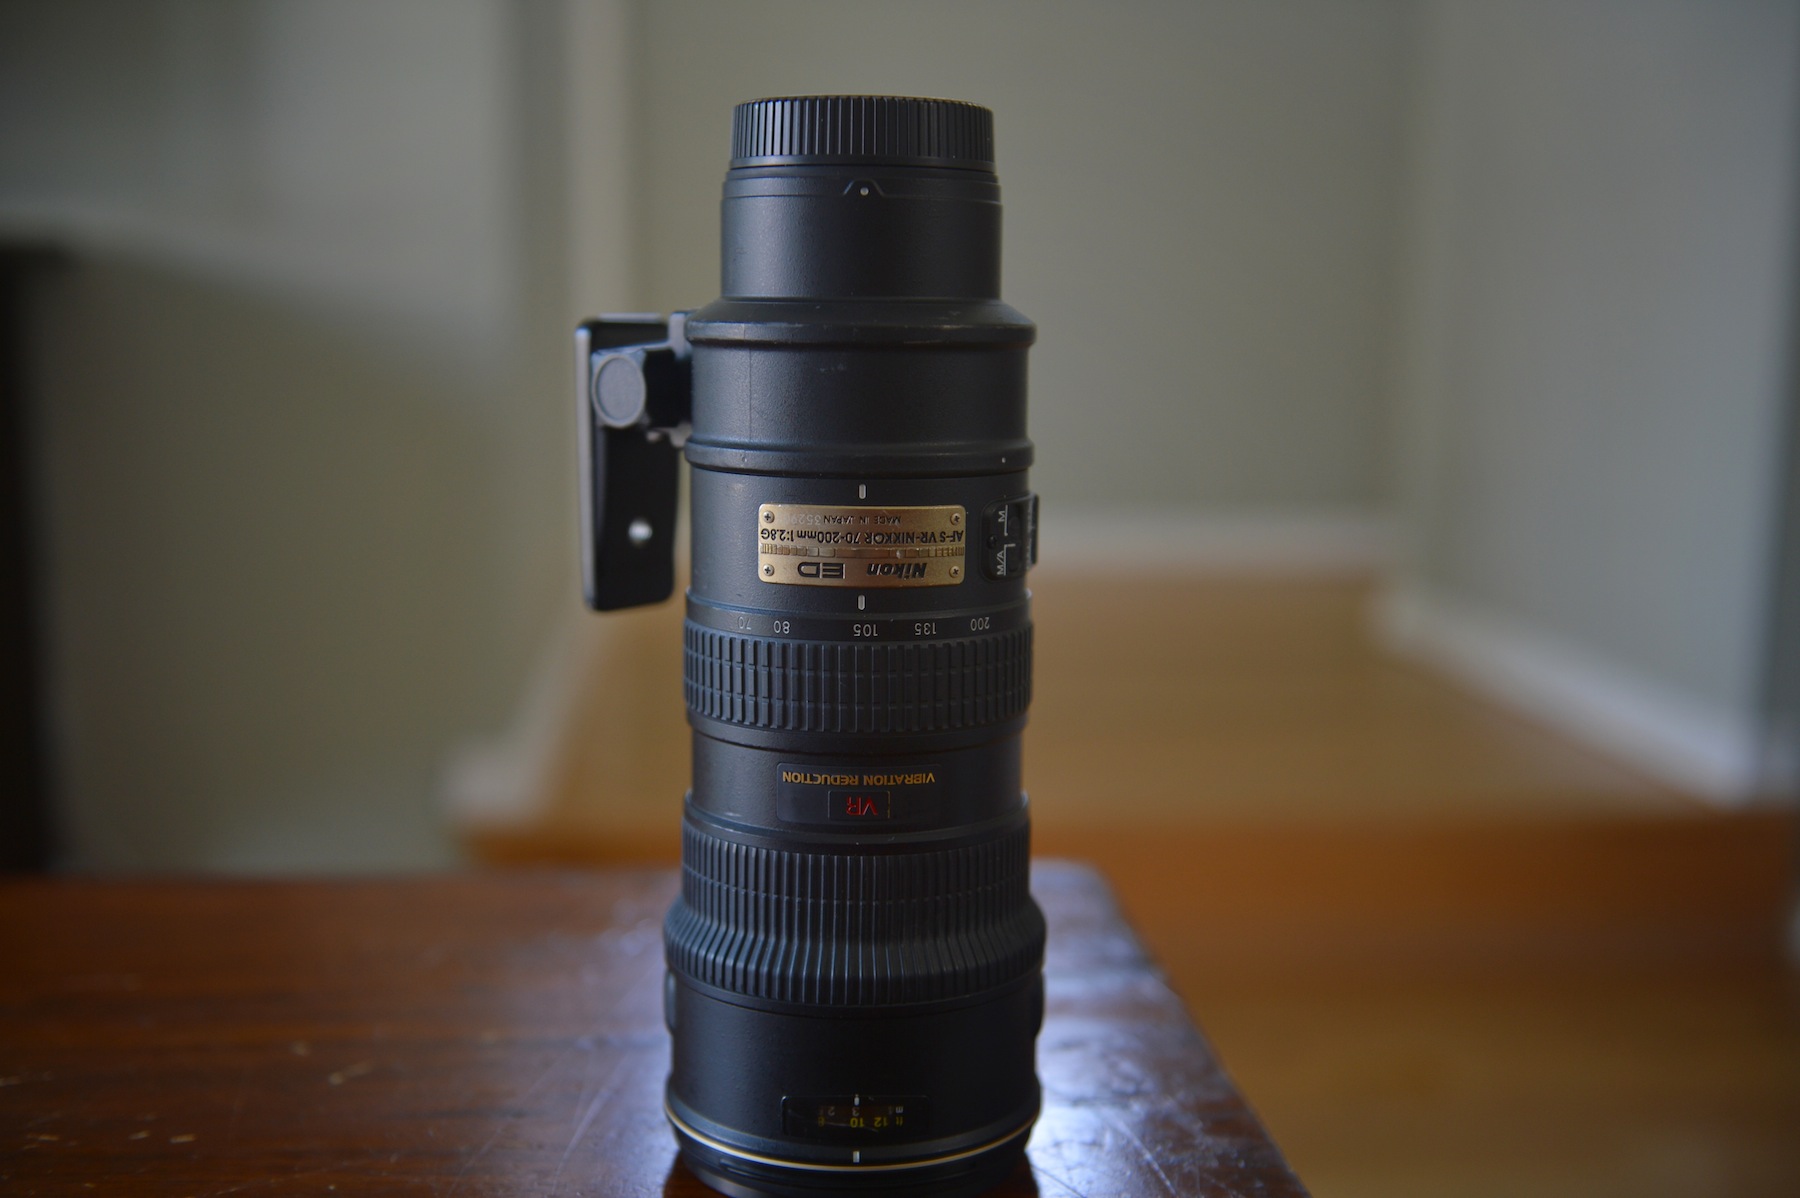
This is the Nikkor 70-200mm f/2.8 which is used by many wedding photographers. It gives a great creamy Bokeh effect when you use the lens compression technique.
Technique 4 – Separate your subject from the background
If your having trouble getting a nice Bokeh in a picture you have to remember that you need to create a separation between your subject and the background. To obtain the shallow depth of field that you are trying to achieve you need to make sure that there is at least 10 feet of separation between the subject and the background. You can’t achieve good bokeh in a picture if the subject is standing against a wall.
To get the shallow depth of field in this shot I needed to make sure Eoin was positioned much closer to me than the background. The effect was a creamy background and a sharp portrait.

Technique 5 – Put something in the Foreground of the picture
Another technique that I like to use when I am trying to get a nice depth of field is to use a wall or tree or something to obscure a portion of the picture. This allows me to have part of the foreground blurry with my subject in the distance. The effect can look quite artistic and pleasant.
For this shot I pretty much pressed my camera up against the fence making sure that about 30% of the foreground was out of focus. I selected my focus point of this orphan from Vietnam and the result came out nice.


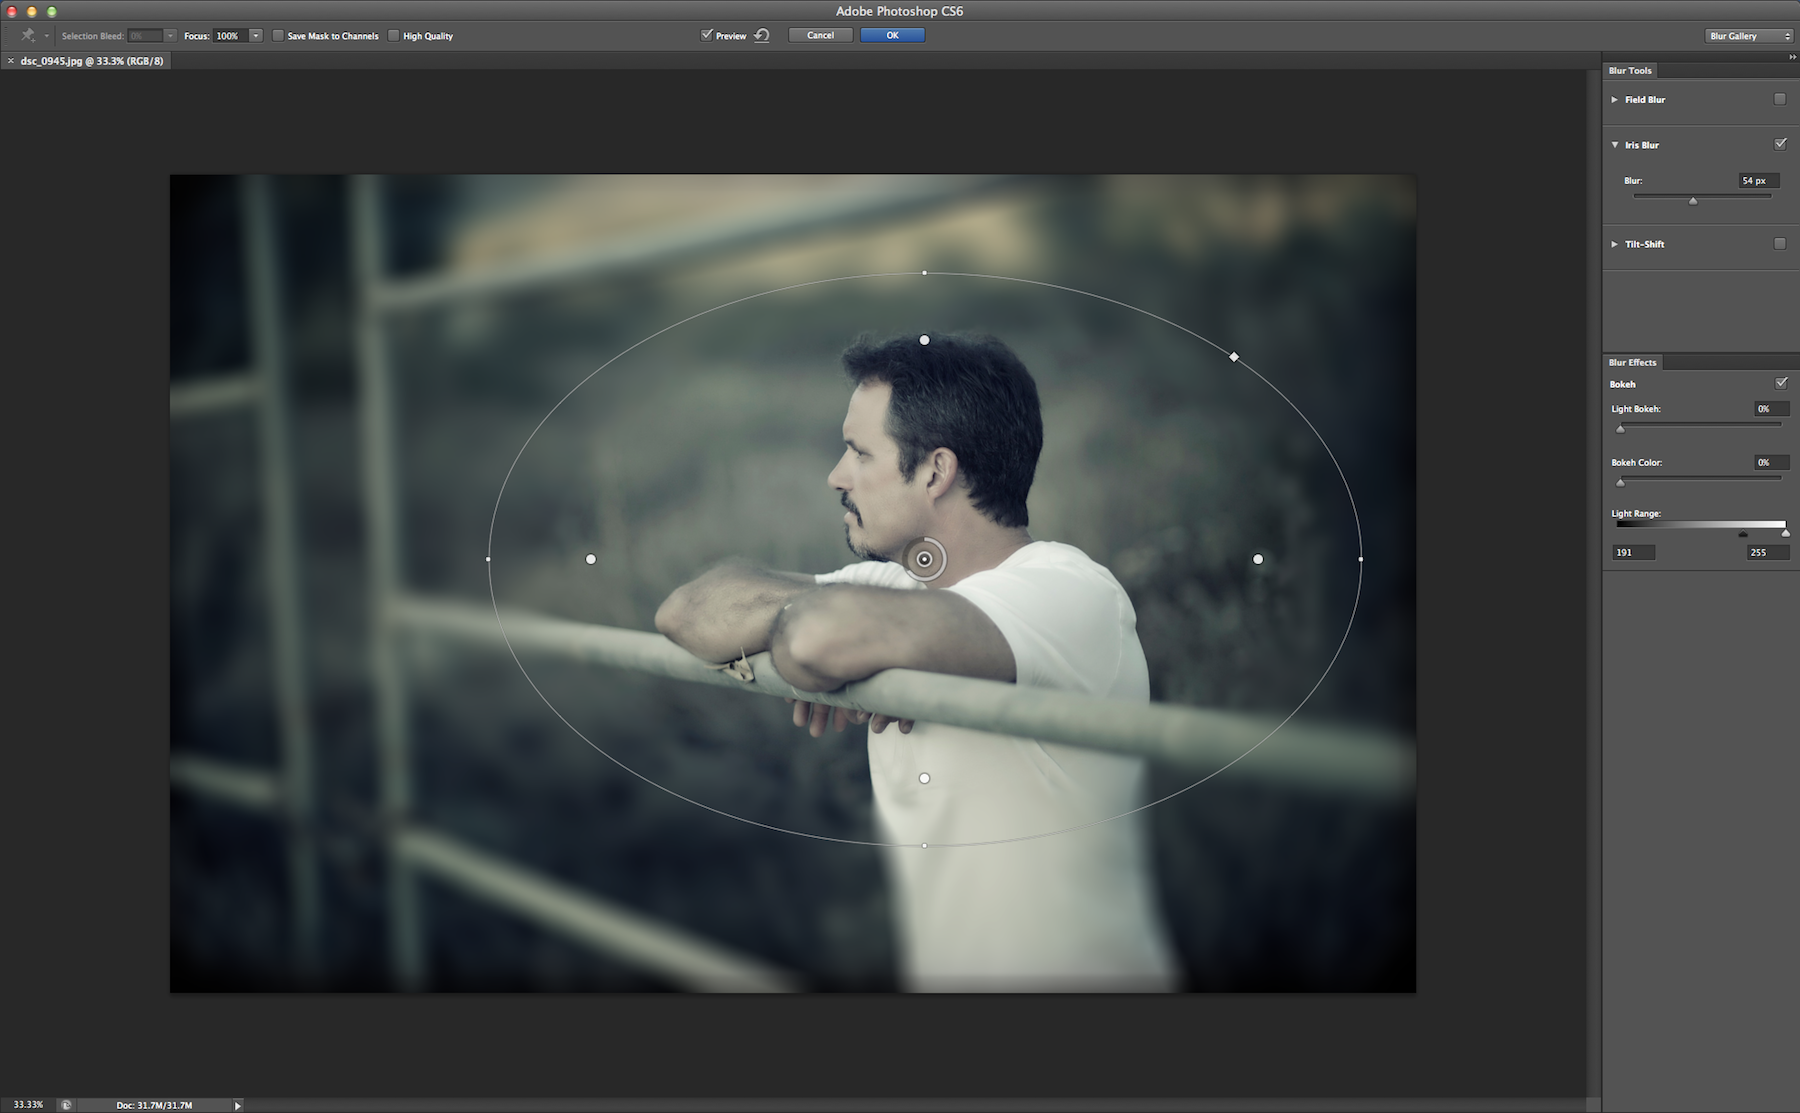
Technique 6 – Create Bokeh with Photoshop
When all else fails you can manufacture depth of field with Photoshop. With the latest version Photoshop CS6 they make it so easy. The easiest technique is to use the blur tool and choose the option of either Iris Blur or Tilt Shift Blur. In about 10 seconds you can have a photo that has some pretty good depth of field even if your photo was otherwise completely sharp. The effect can look nice regardless of how well it comes out.
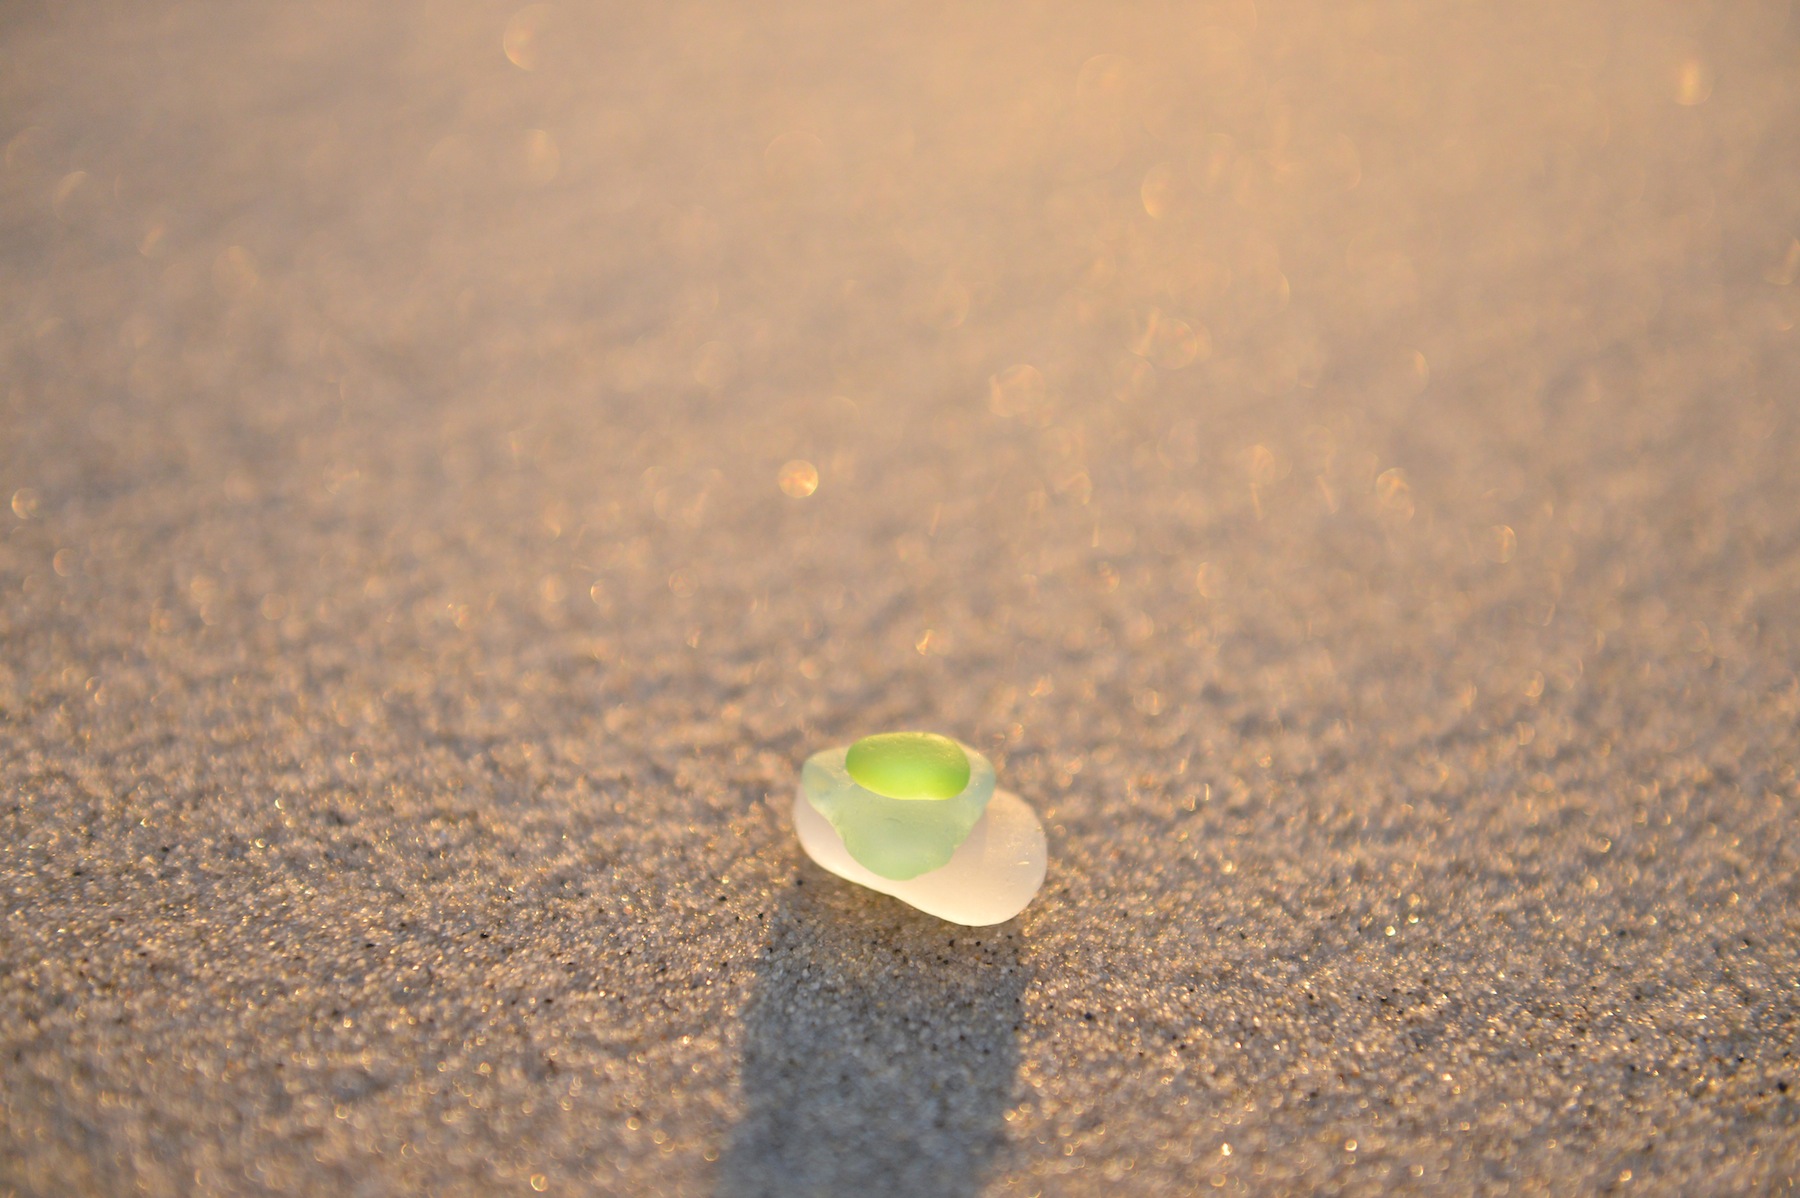
In this photo I applied the Tilt Shift effect to this picture of Sea Glass and I was able to achieve a nice depth of field on the picture.
Experiment and try different combinations
In the end, achieving good bokeh is kind of a hit or miss experiment. If you know the things you can control such as camera settings, lens choice, composition and the subjects position relative to you and the background than you can fully control the Bokeh and depth of field for each picture. In a rapidly moving setting achieving this is super difficult and you can end up with a lot of bad pictures or a completely awesome picture.
My recommendation is to experiment in all types of settings with all of the techniques in this blog post. If you have any questions, you can email me at [email protected]. Thanks for reading and happy photograph hunting.
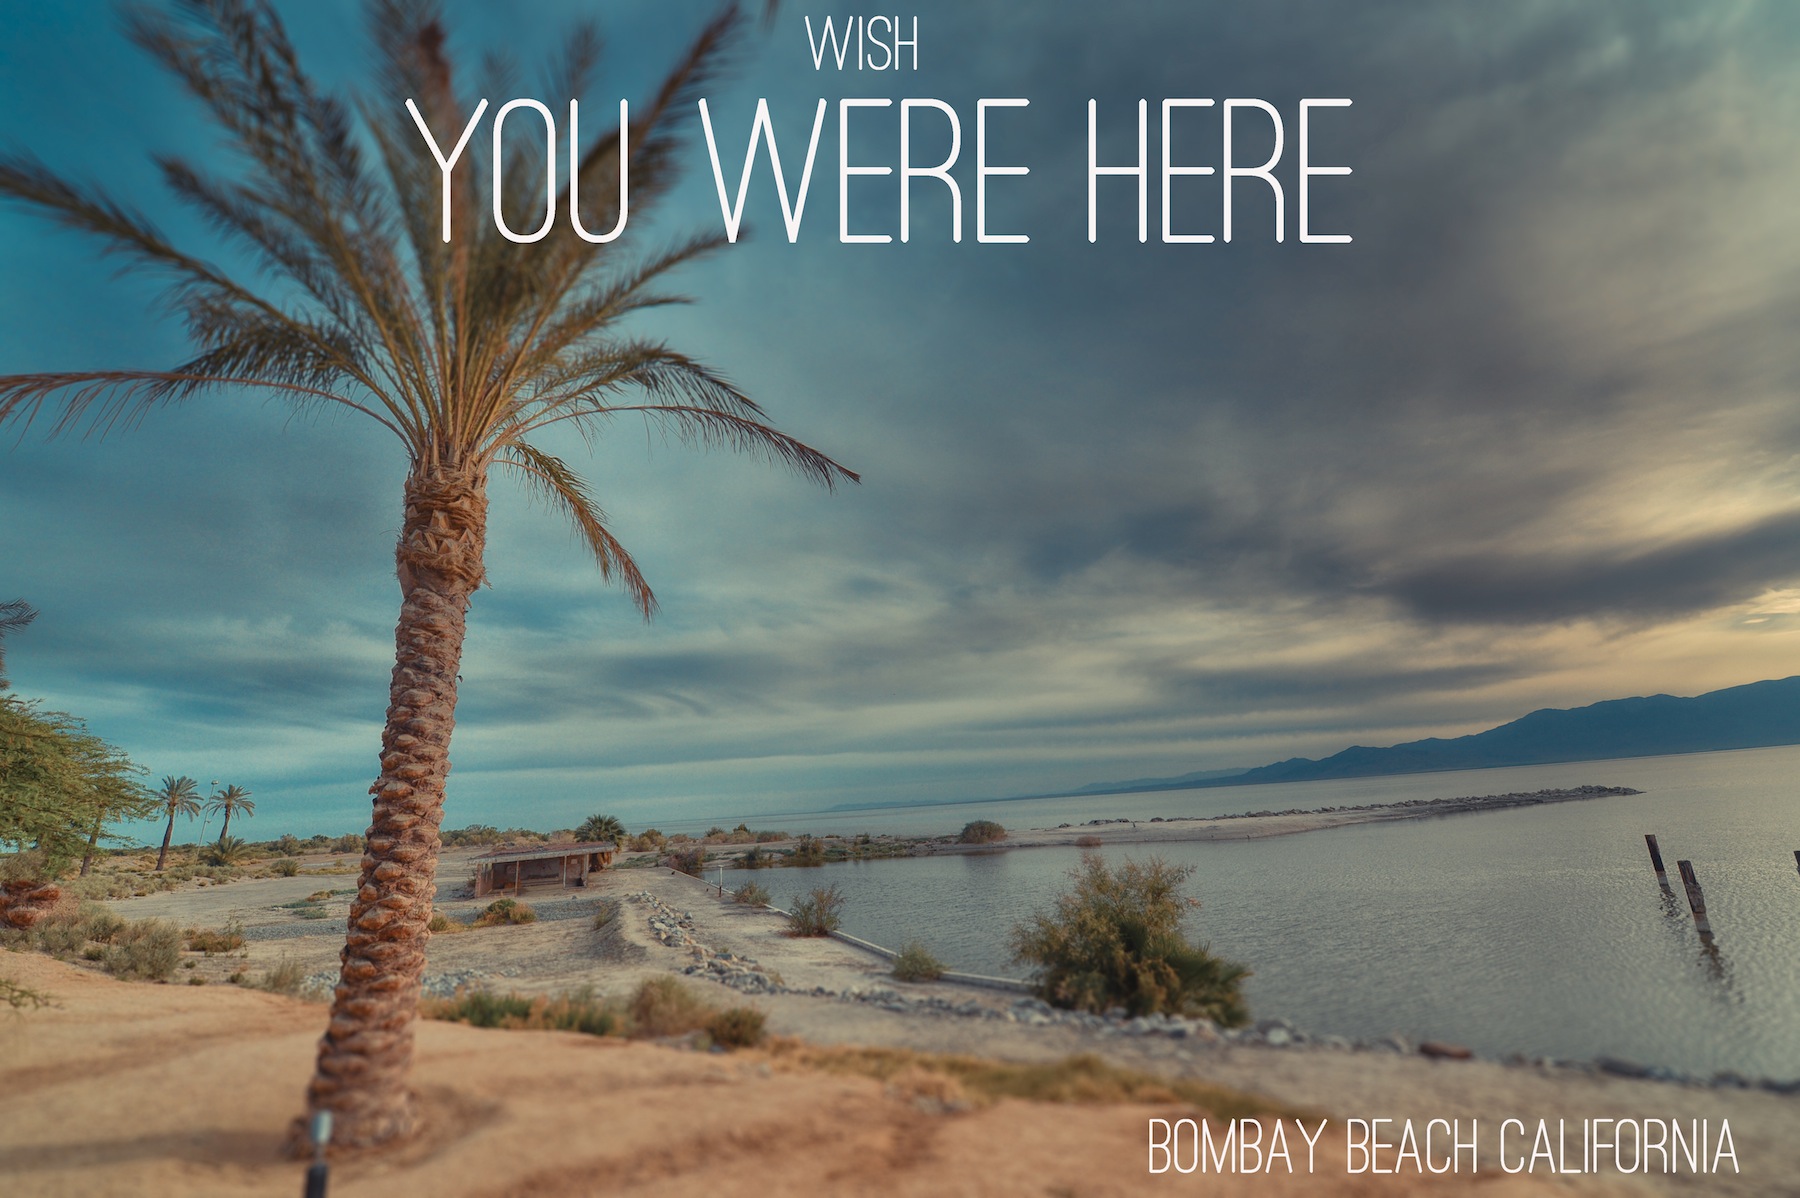
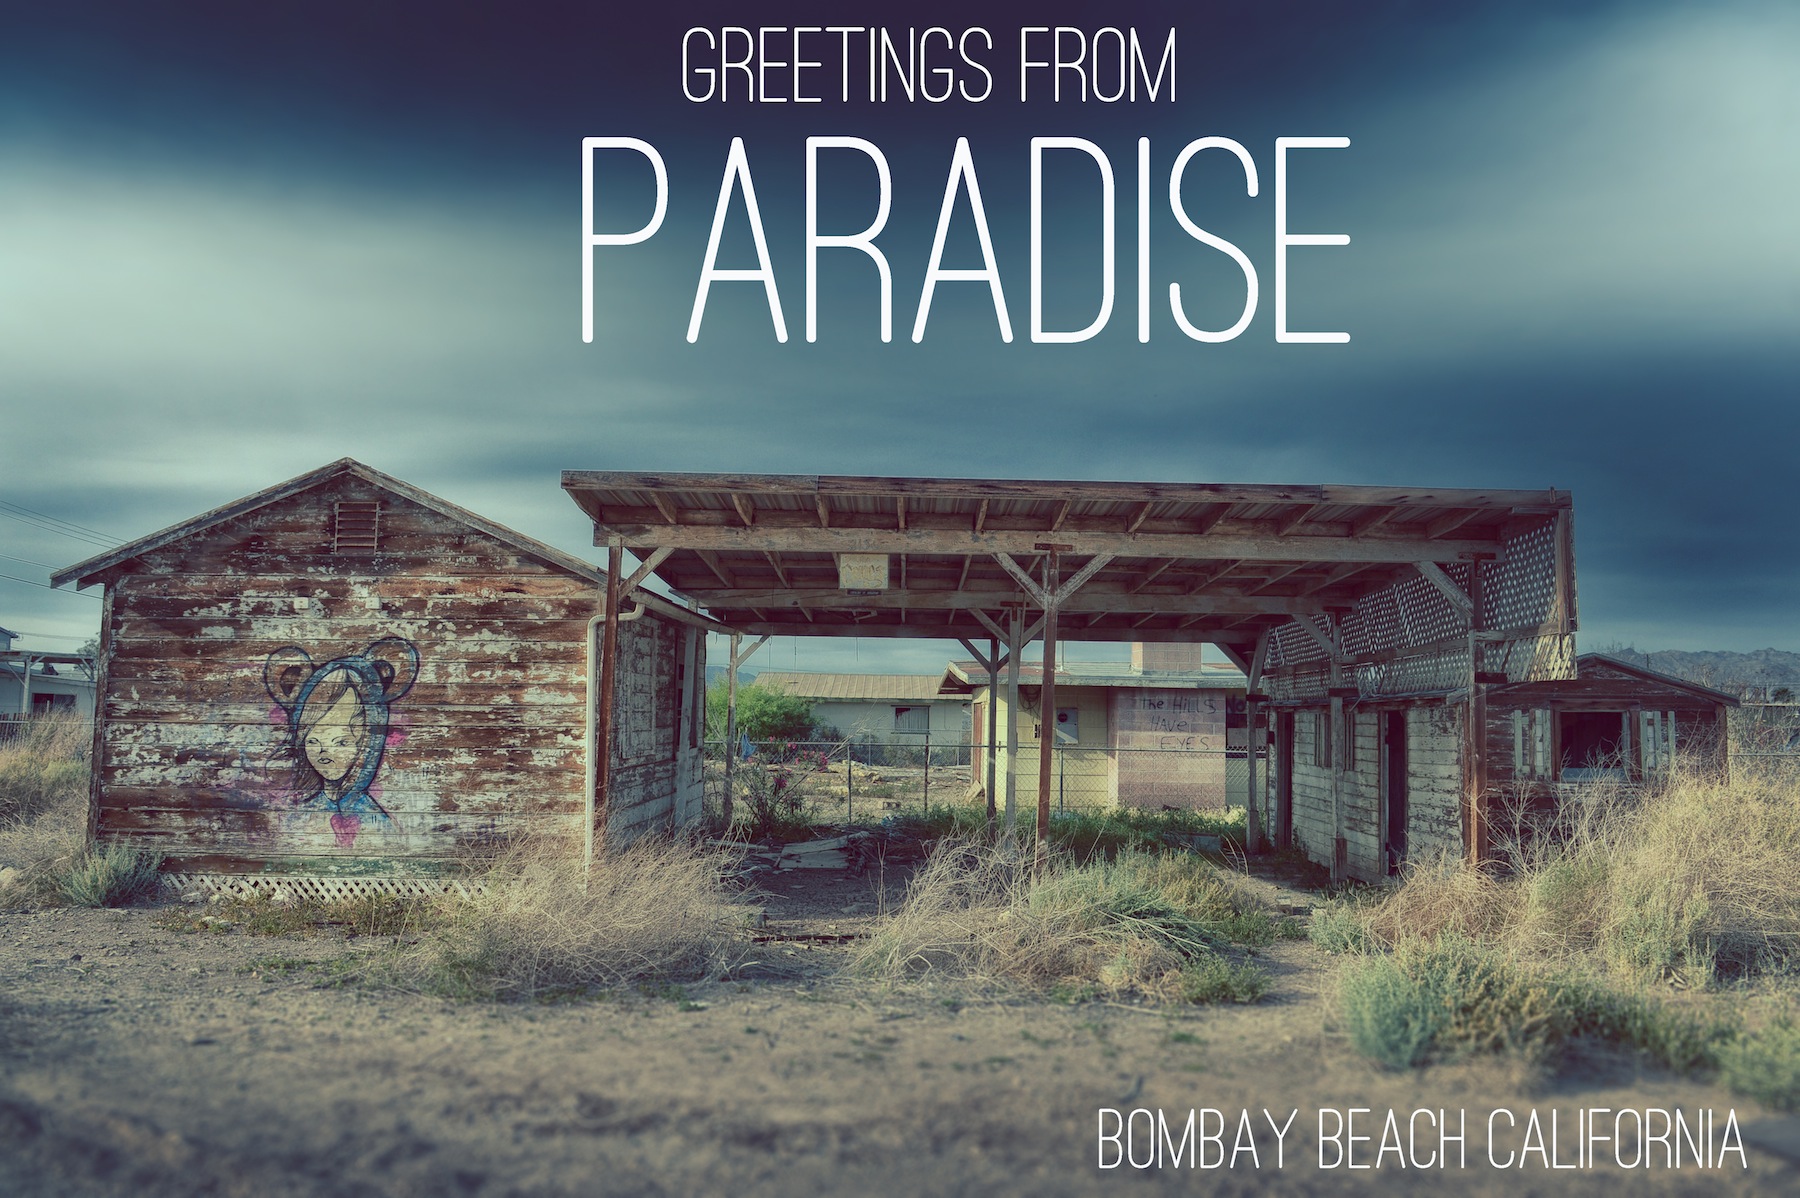
Postcards from Bombay Beach
There is nothing like getting a postcard from someone from a beautiful beach resort to make you jealous. Here are some Postcards from what was once a beautiful beach resort called Bombay Beach located in the Salton Sea.
The Salton Sea is drying up. Fish are dying and it isn’t quite postcard perfect anymore but here are my renditions of postcards you might receive from Bombay Beach today.
If you find yourself in the area. There are quite a few really cool places to visit around the Salton Sea. Bombay Beach is just one of the quirky and awesome places. You can check out Salvation Mountain – Check out My Post Here. You can also check out Slab City and East Jesus which is minutes away from here as well. Finally, if your headed to the Salton Sea you can find more information about it on my blog post here – The Salton Sea. As you might be able to tell, I love this place. It is so cool.


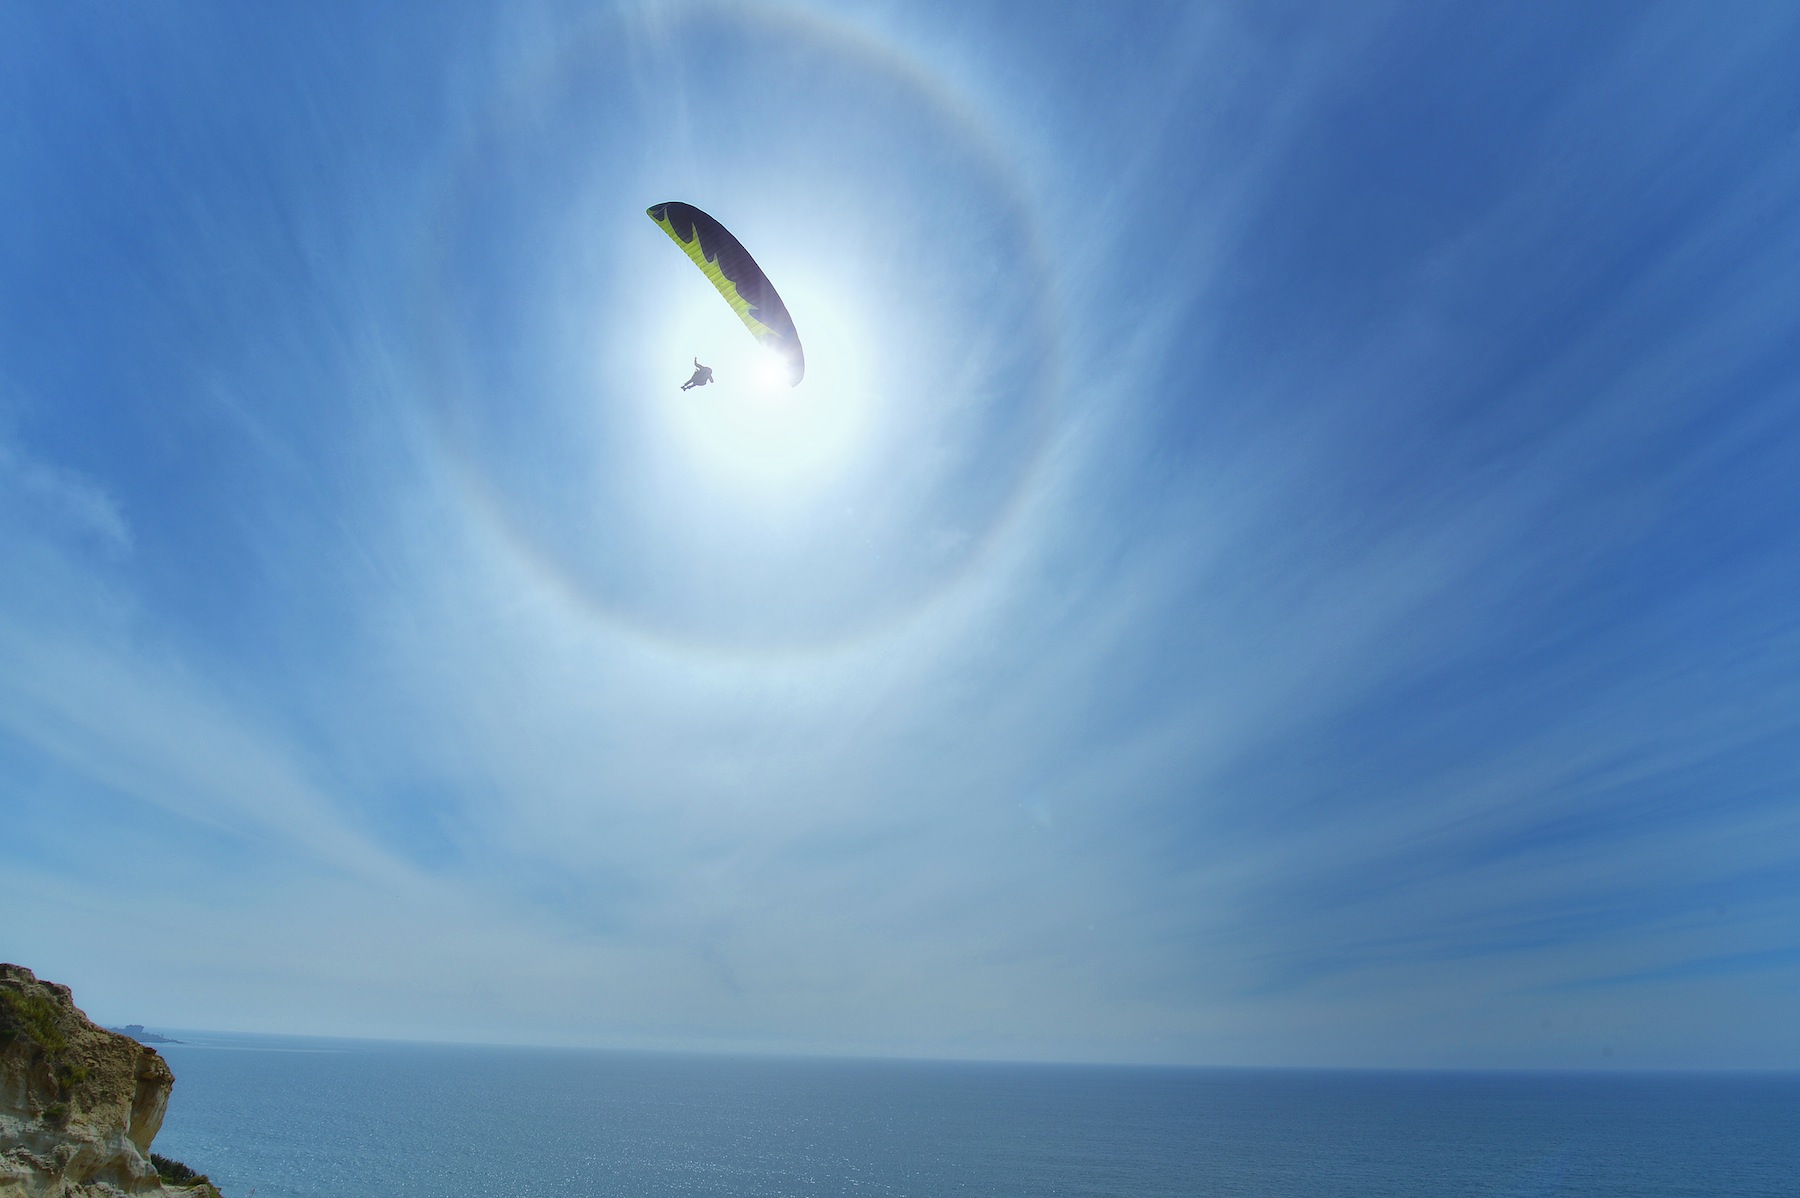
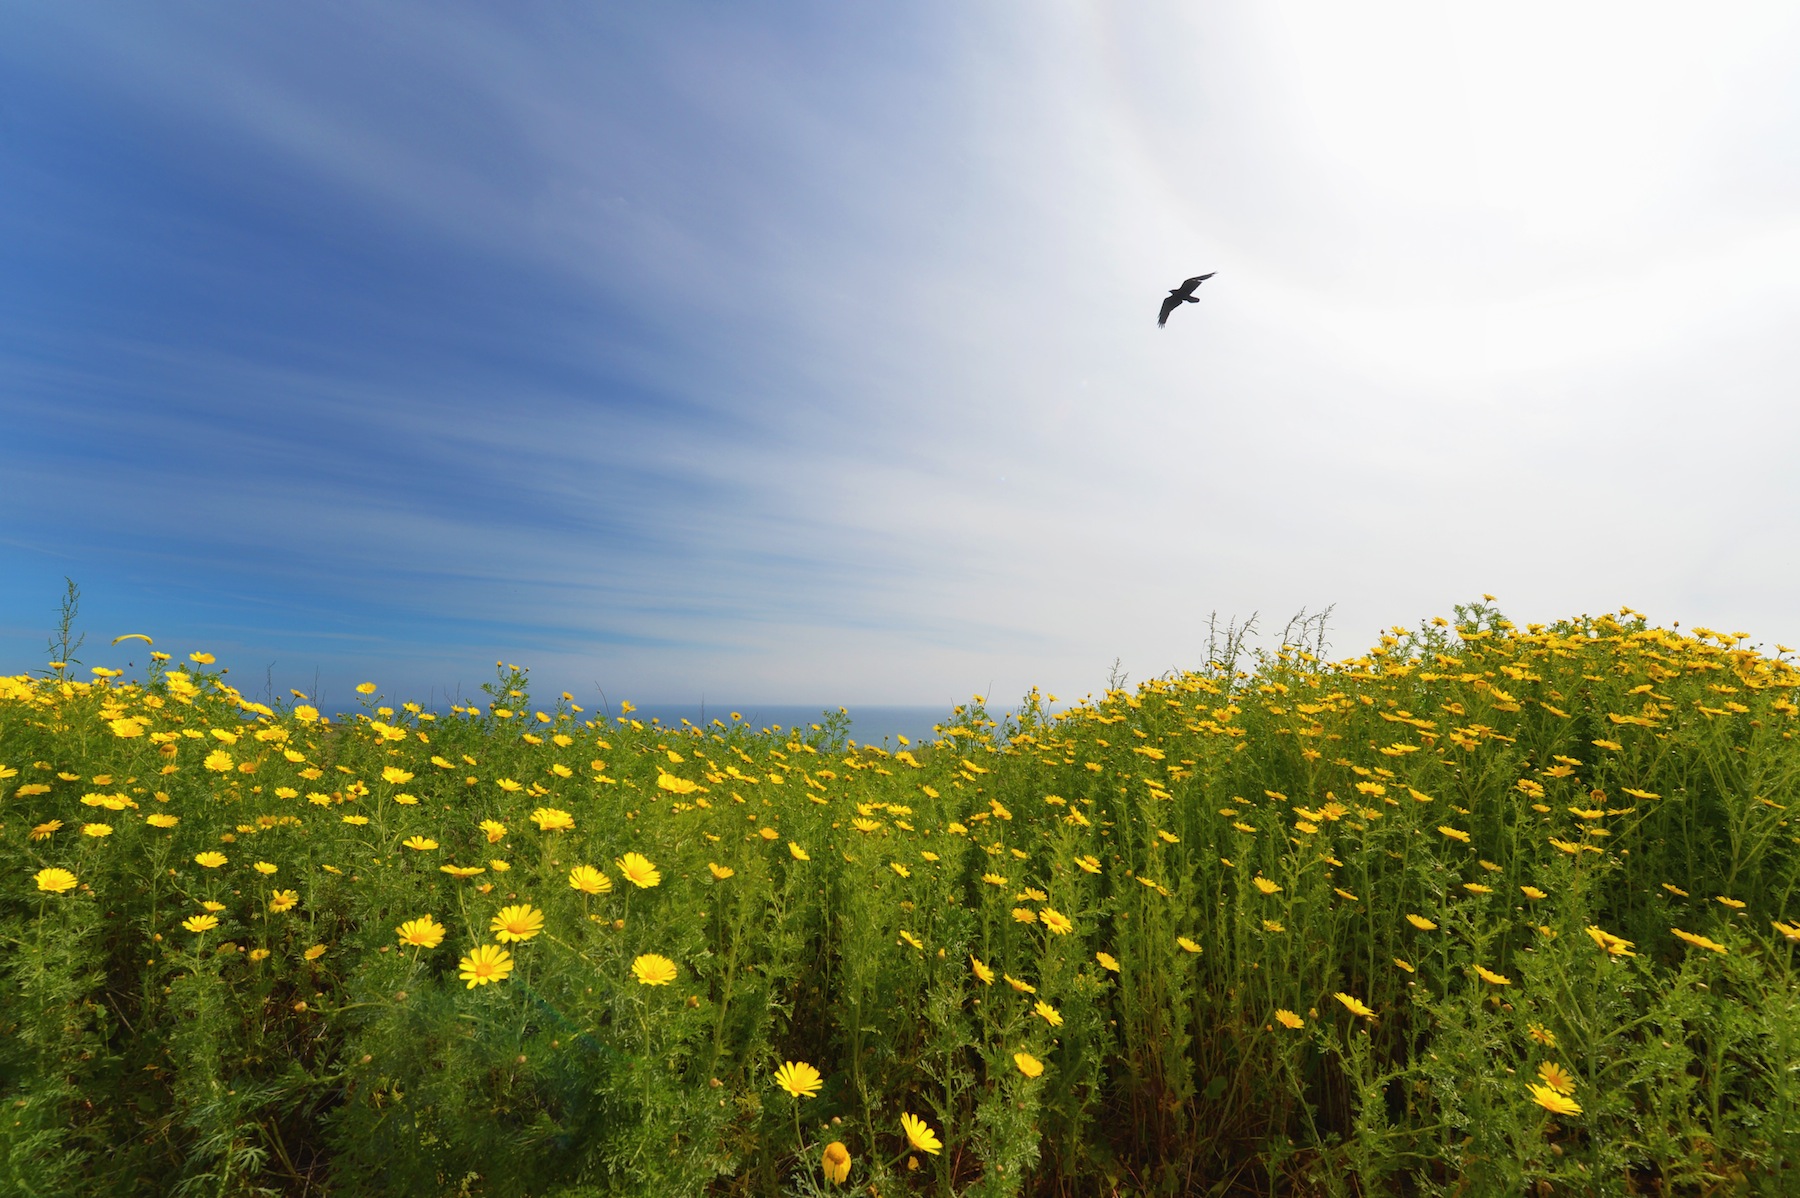
Torrey Pines GliderPort is a Superb Place for Photos
Torrey Pines GliderPort. It is a National Landmark of Soaring and is one of the best hang gliding places in the country. Basically people have to make a leap of faith and jump off the cliff with their wings. It is quite scary but it is another beautiful place in La Jolla.
I went up there today to see how it was and it was beautiful. I would recommend trying this place at sunset or early morning. Here is how you get there. (Google Map It)
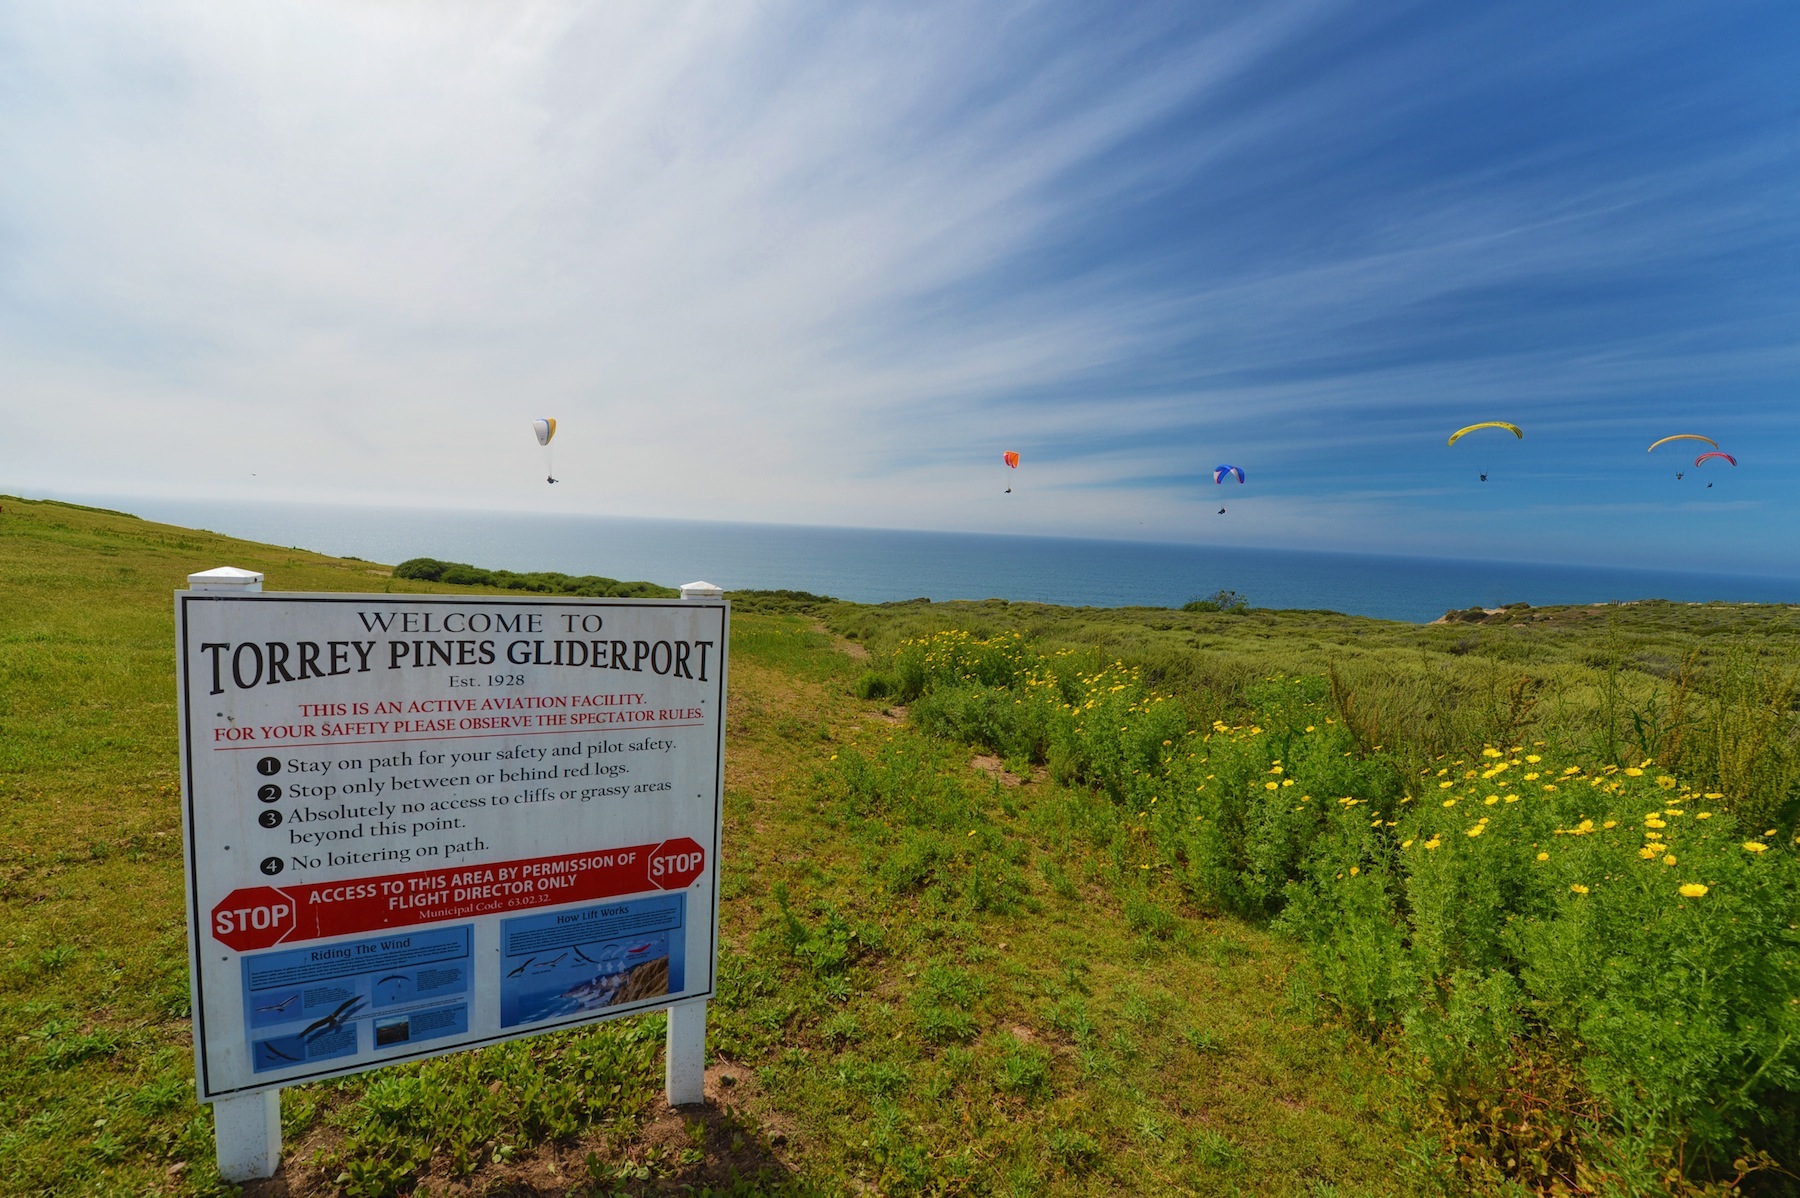
There are lots of cones around and they get pretty mad if you cross into the area where they are taking off and landing. You can get photos by walking around and down the cliffs a bit. There are some good shots but the ones I like best were with the rolling hills and the colorful canopies of the hang gliders.
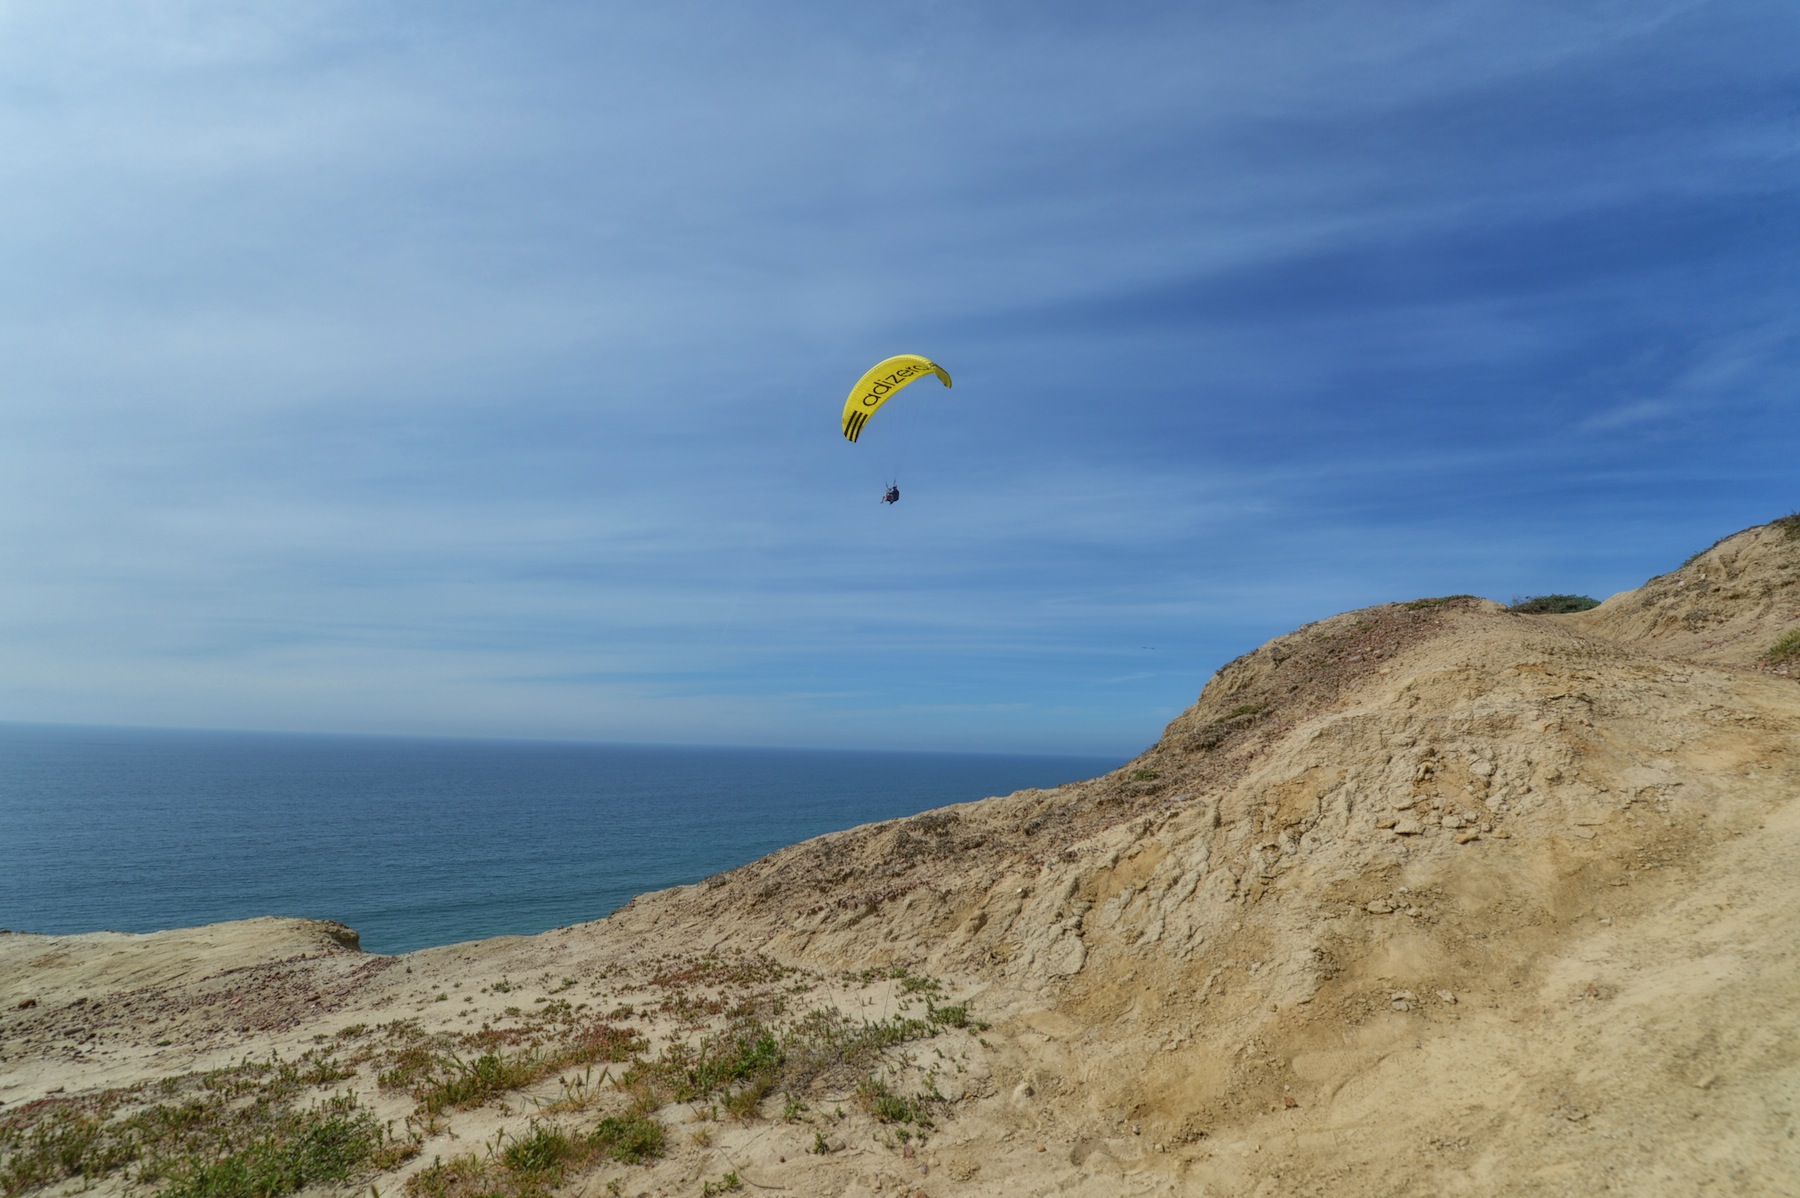
The shots taken from below can be pretty awesome too.
If you hike down the very dangerous cliffs you can get to Blacks Beach. 2 people died last year trying to hike down these cliffs and scores more had to be rescued. It’s good to stay on the beaten path here.
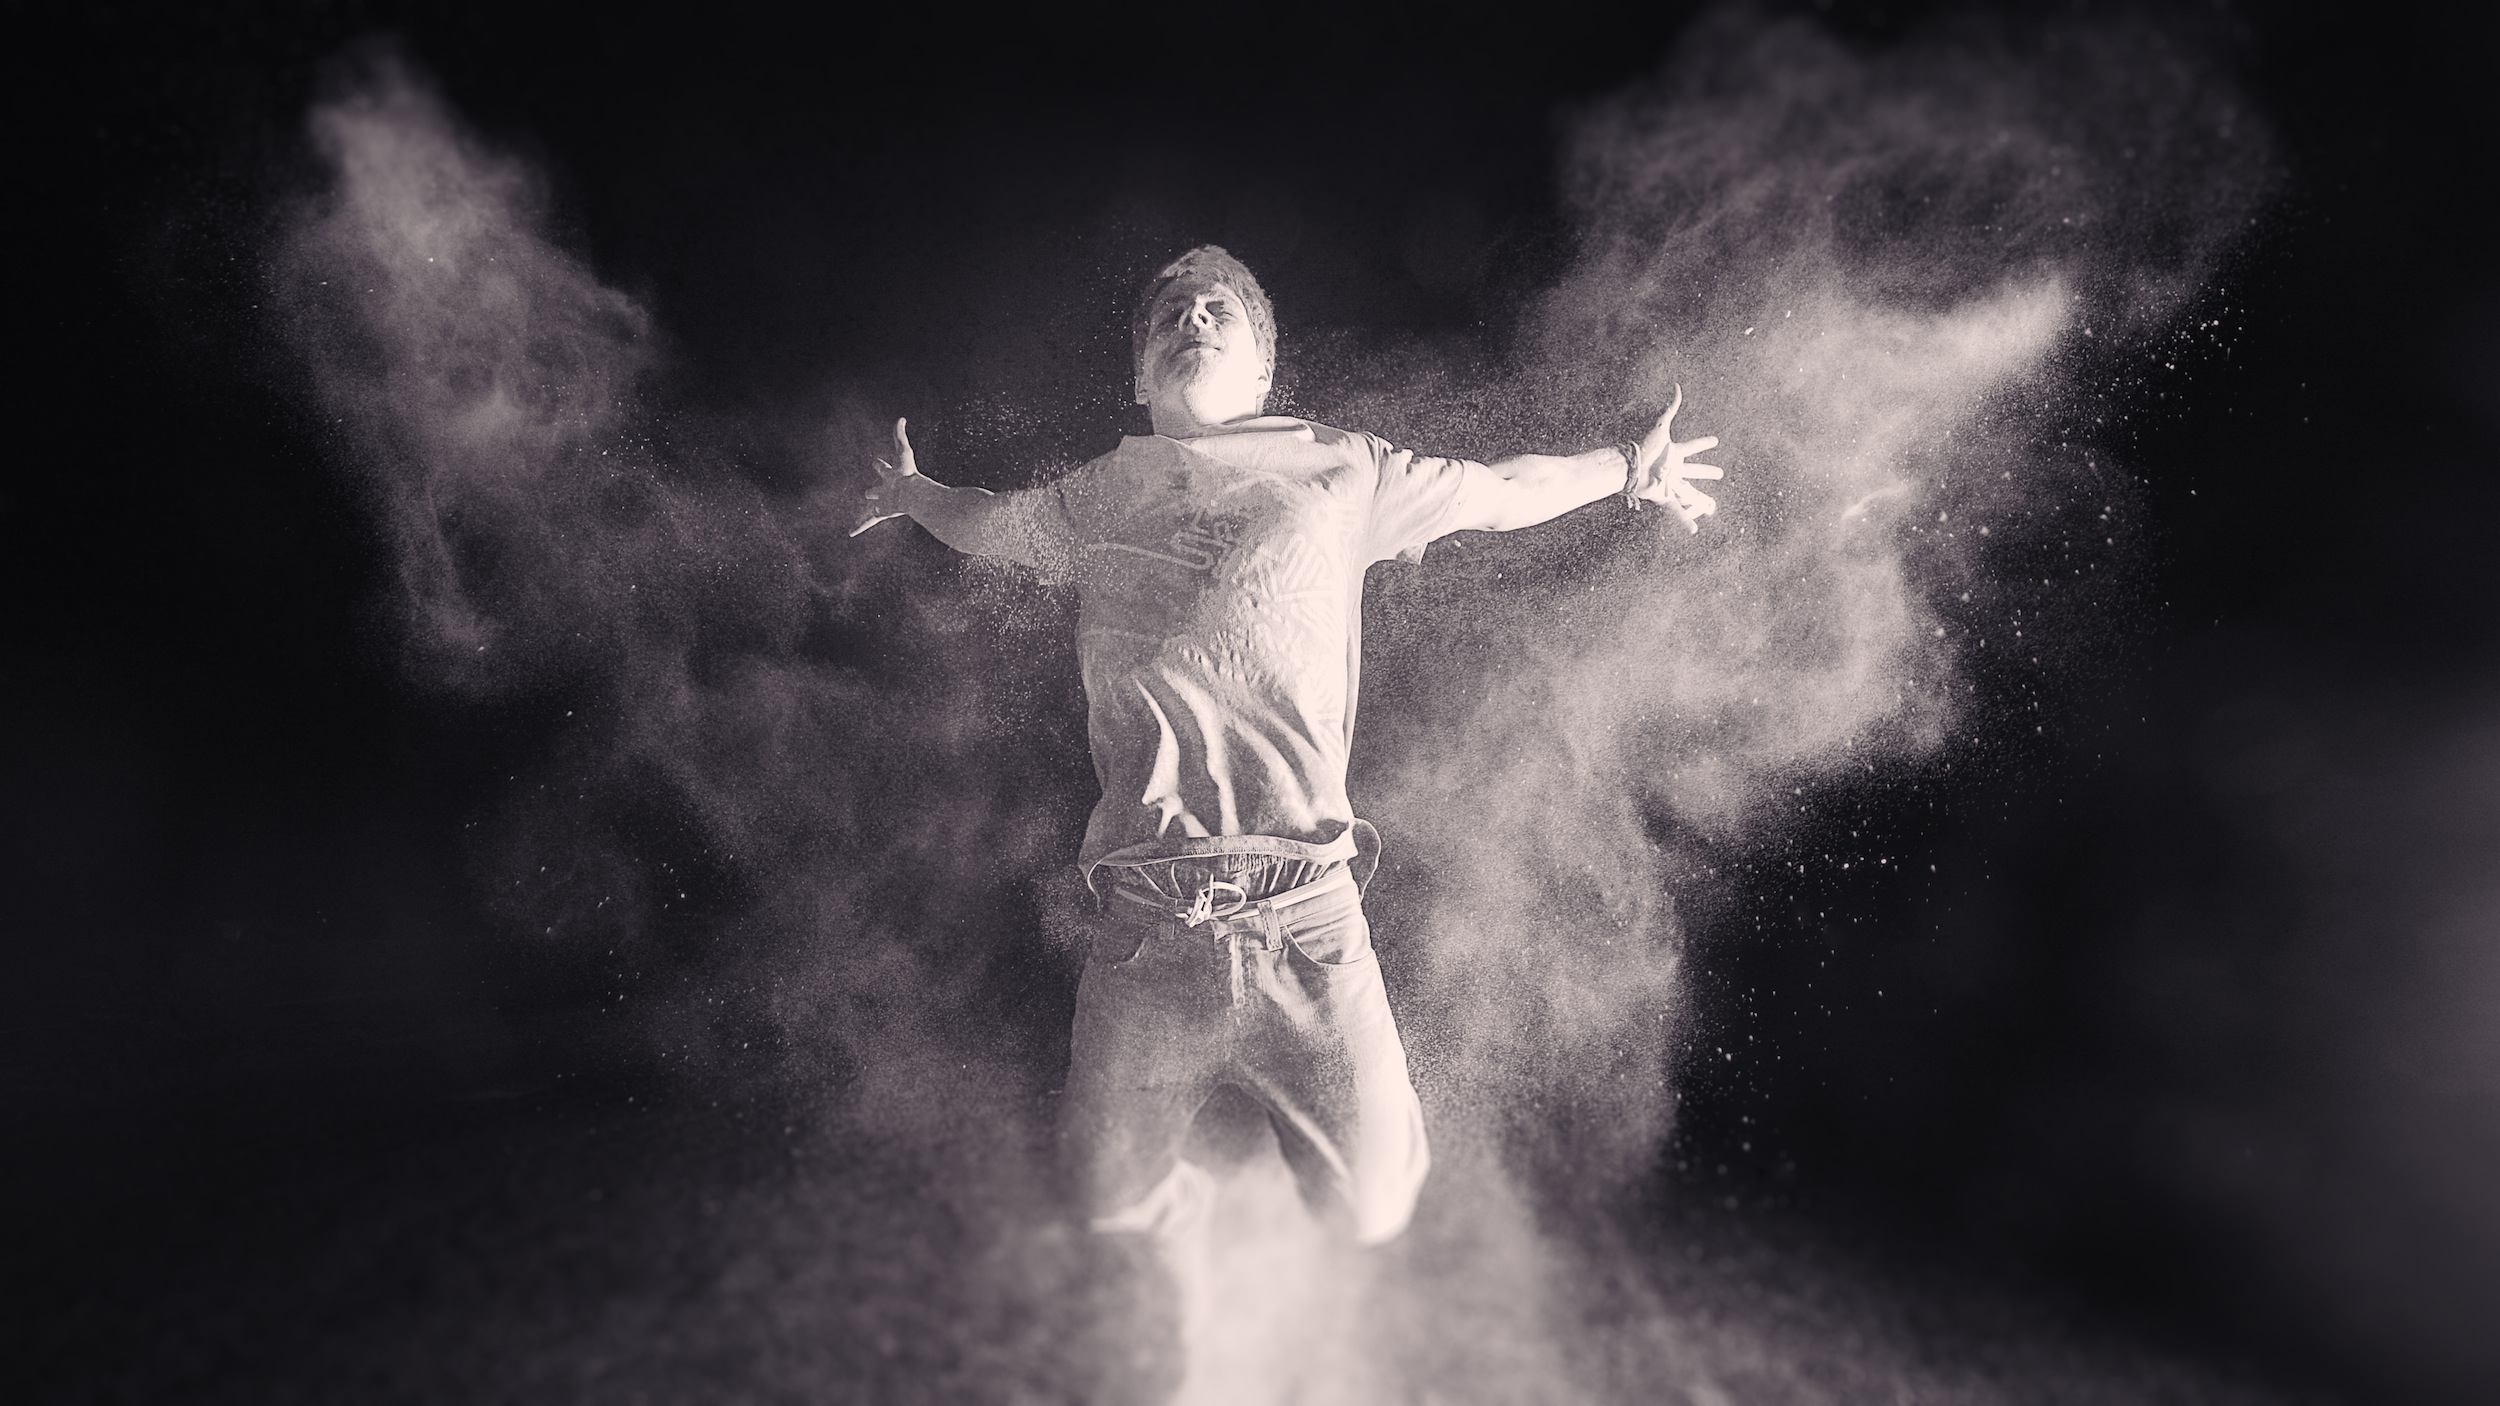
Splat Photograph Featured by 500PX
My photo Splat, which featured Parkour and Flour motion, was featured today for a contest held by 500px. The contest was called Rorschach which is the famous ink blots that they would use to understand your personality.
You can check out the entire gallery here: http://500px.com/blog/573/weekly-monday-contest or you can check out my profile at 500px here for all of my images: http://500px.com/frankiefoto.