
A Collection of Particularly Gloomy Shots of San Diego
Its June. That means June Gloom, although it has not been particularly bad. I thought I would share a collection of more gloomy shots of San Diego.
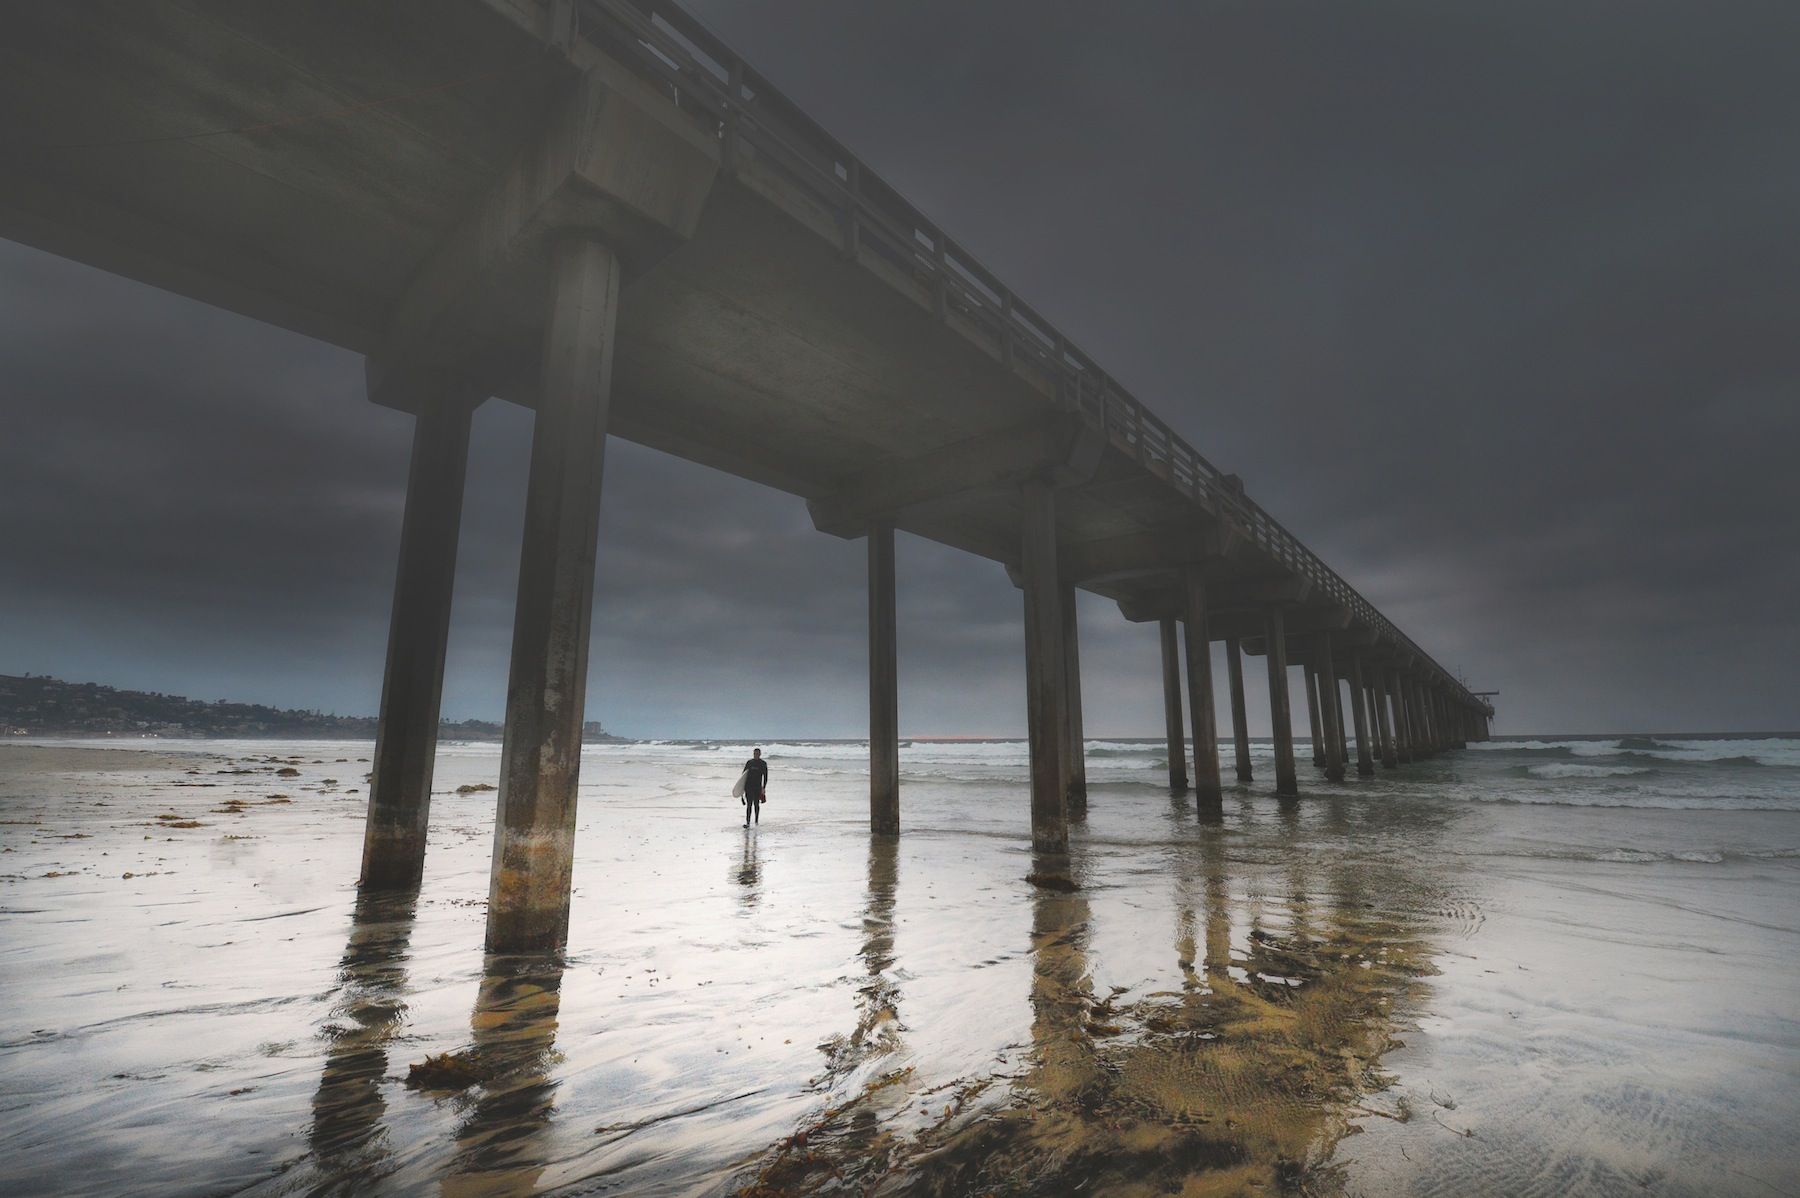
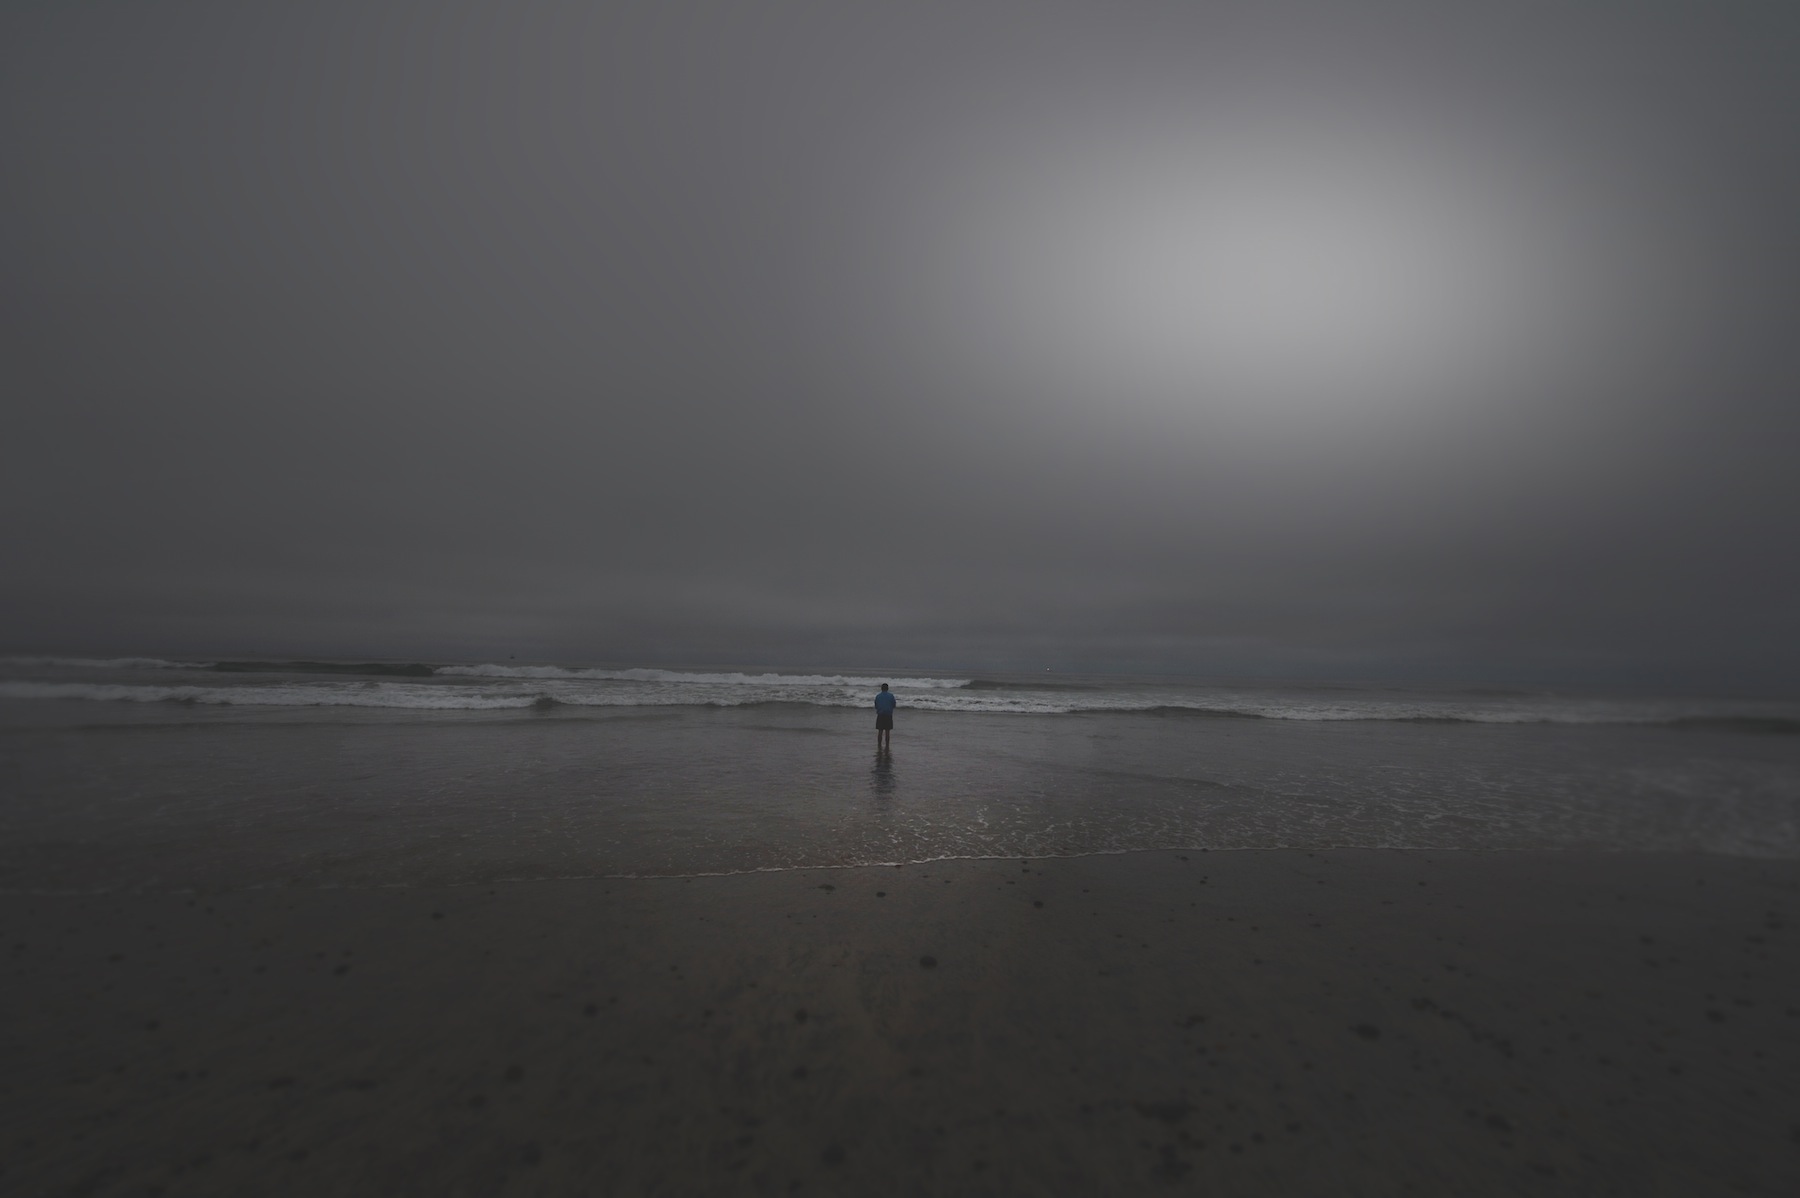
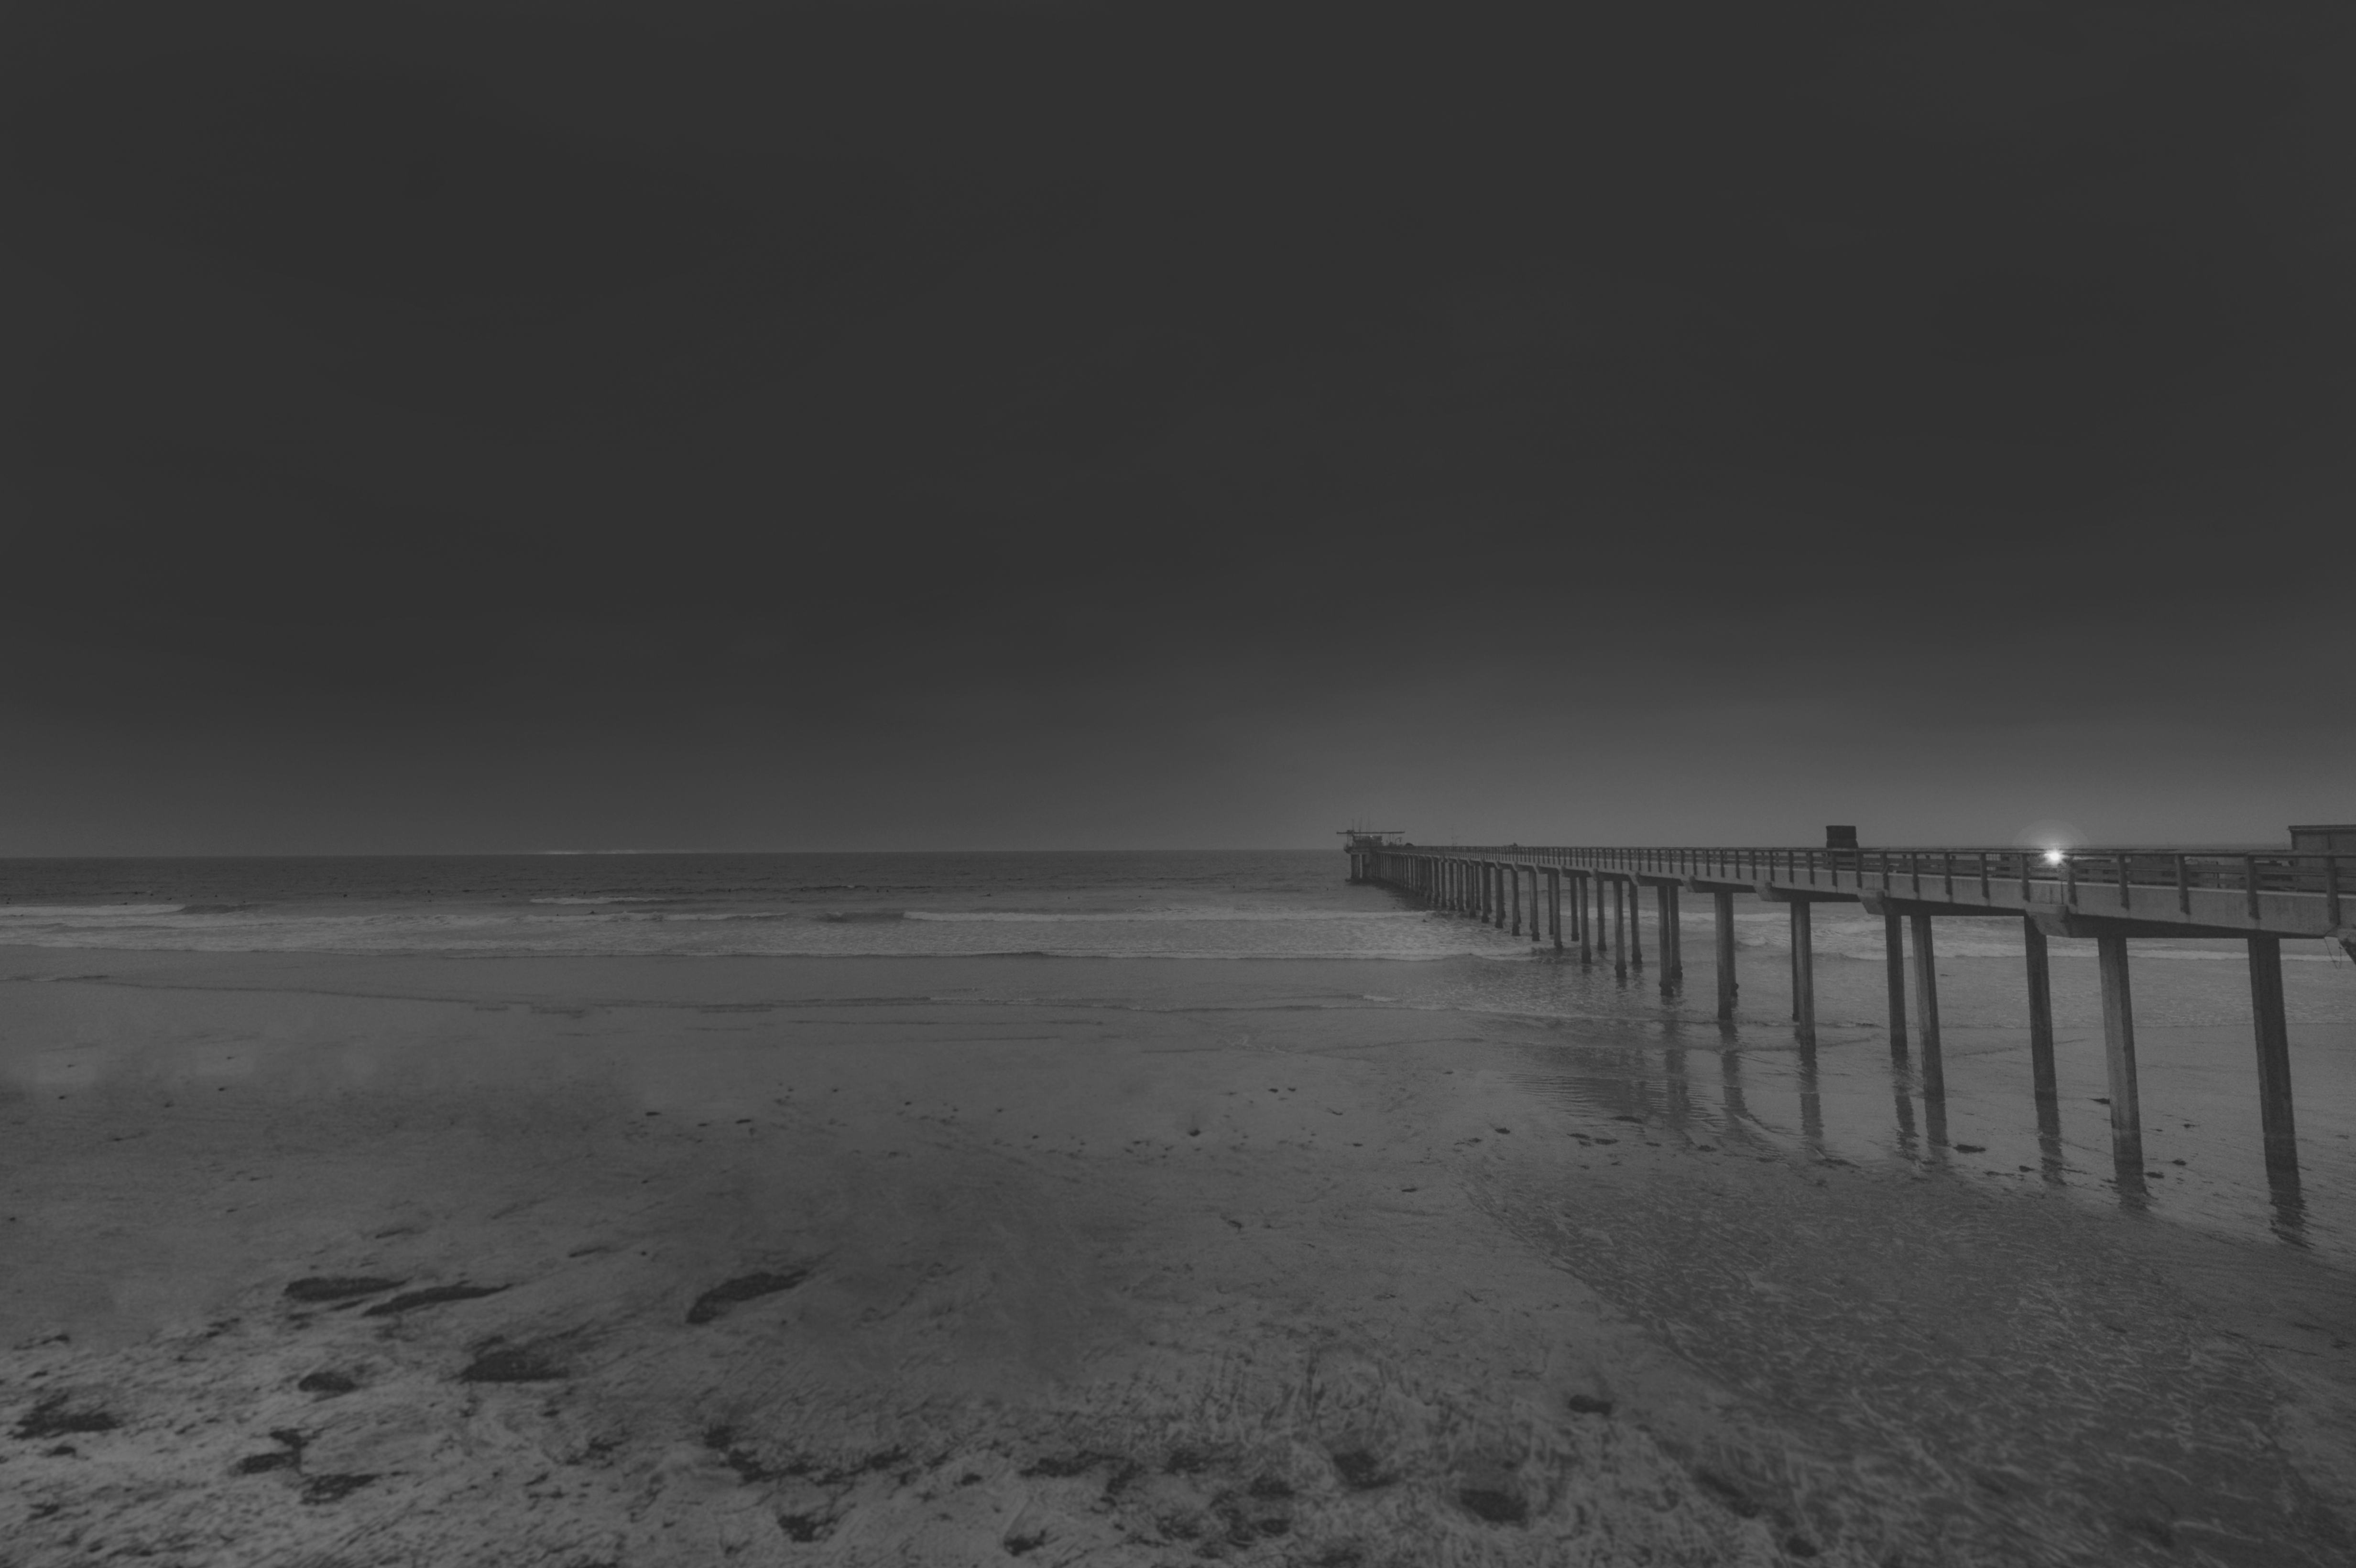
Man walking towards Scripps Pier.

Evil Dr Seuss Tree in La Jolla.

End of another dreary day Surfer walking home.
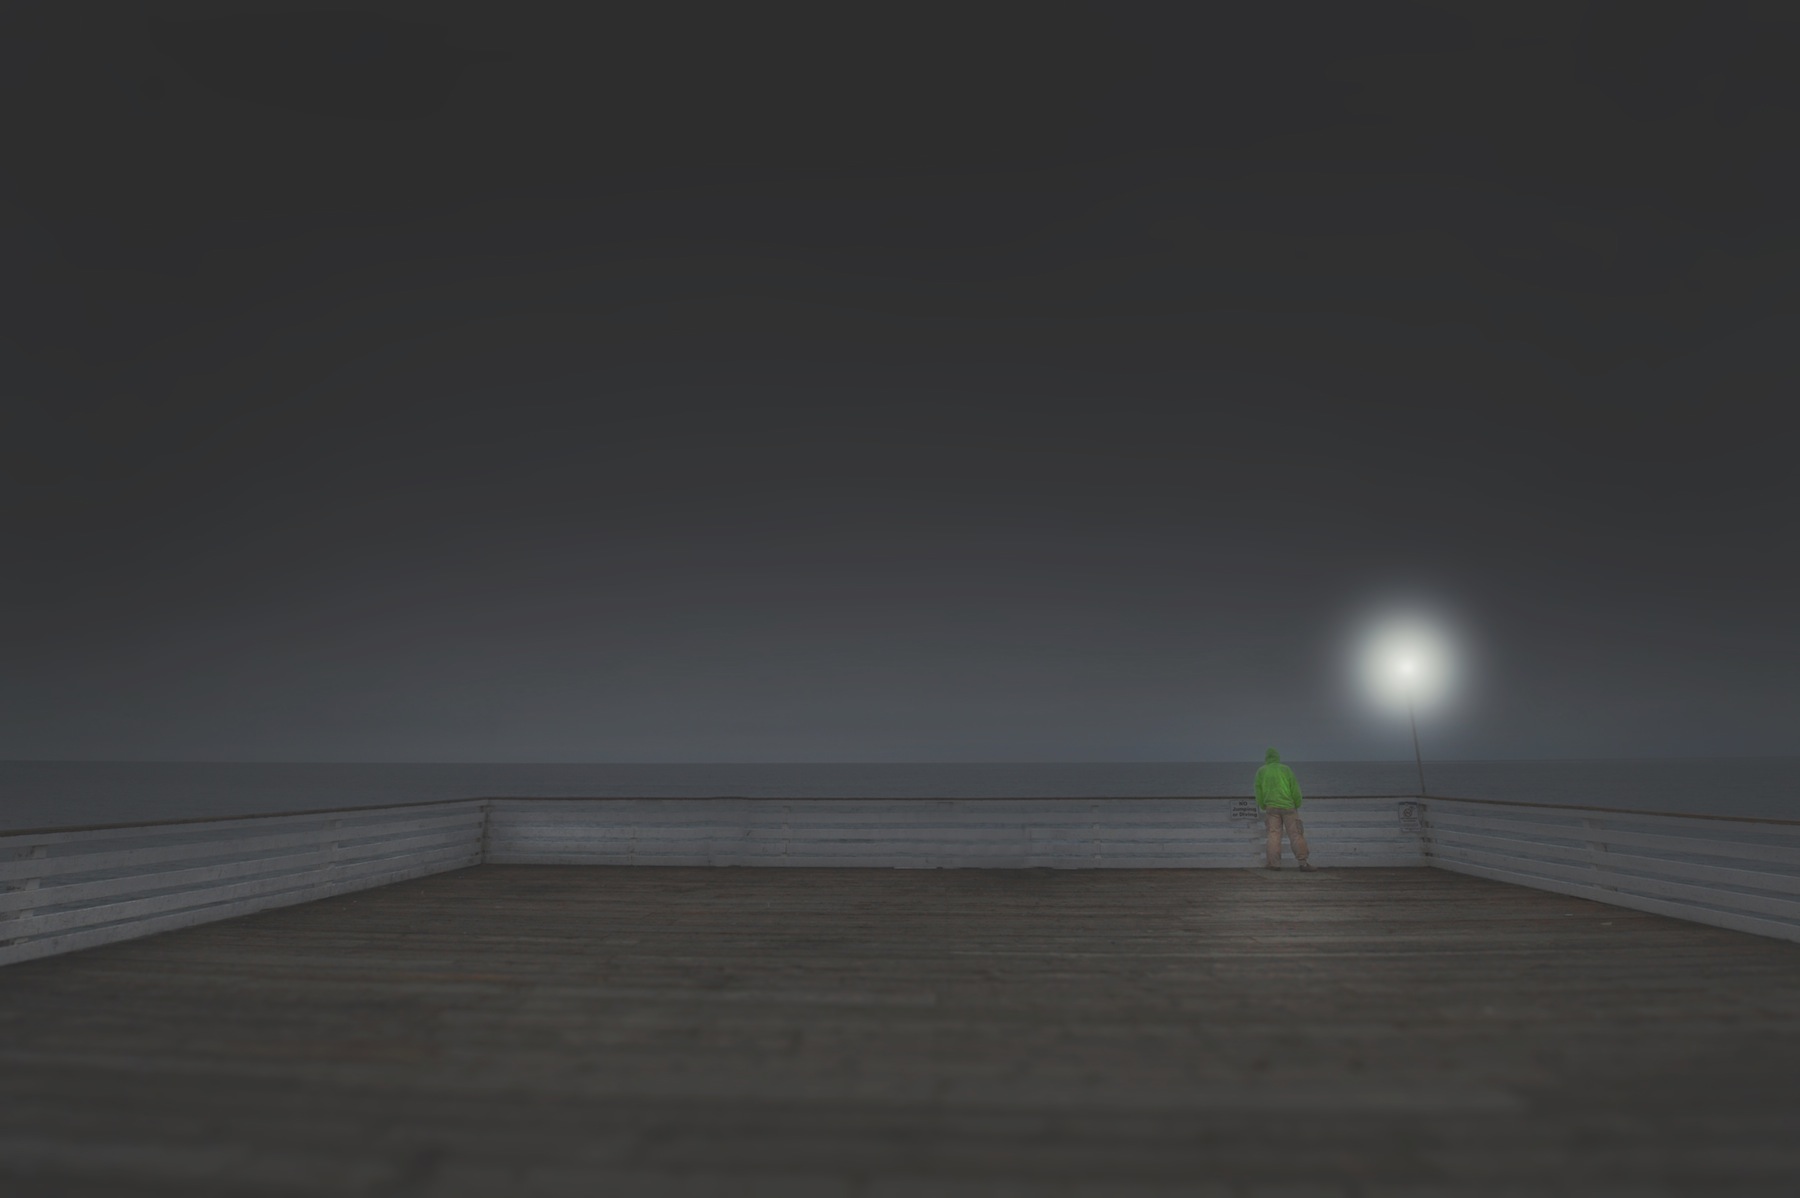
Crystal Pier Pacific Beach looking glum.
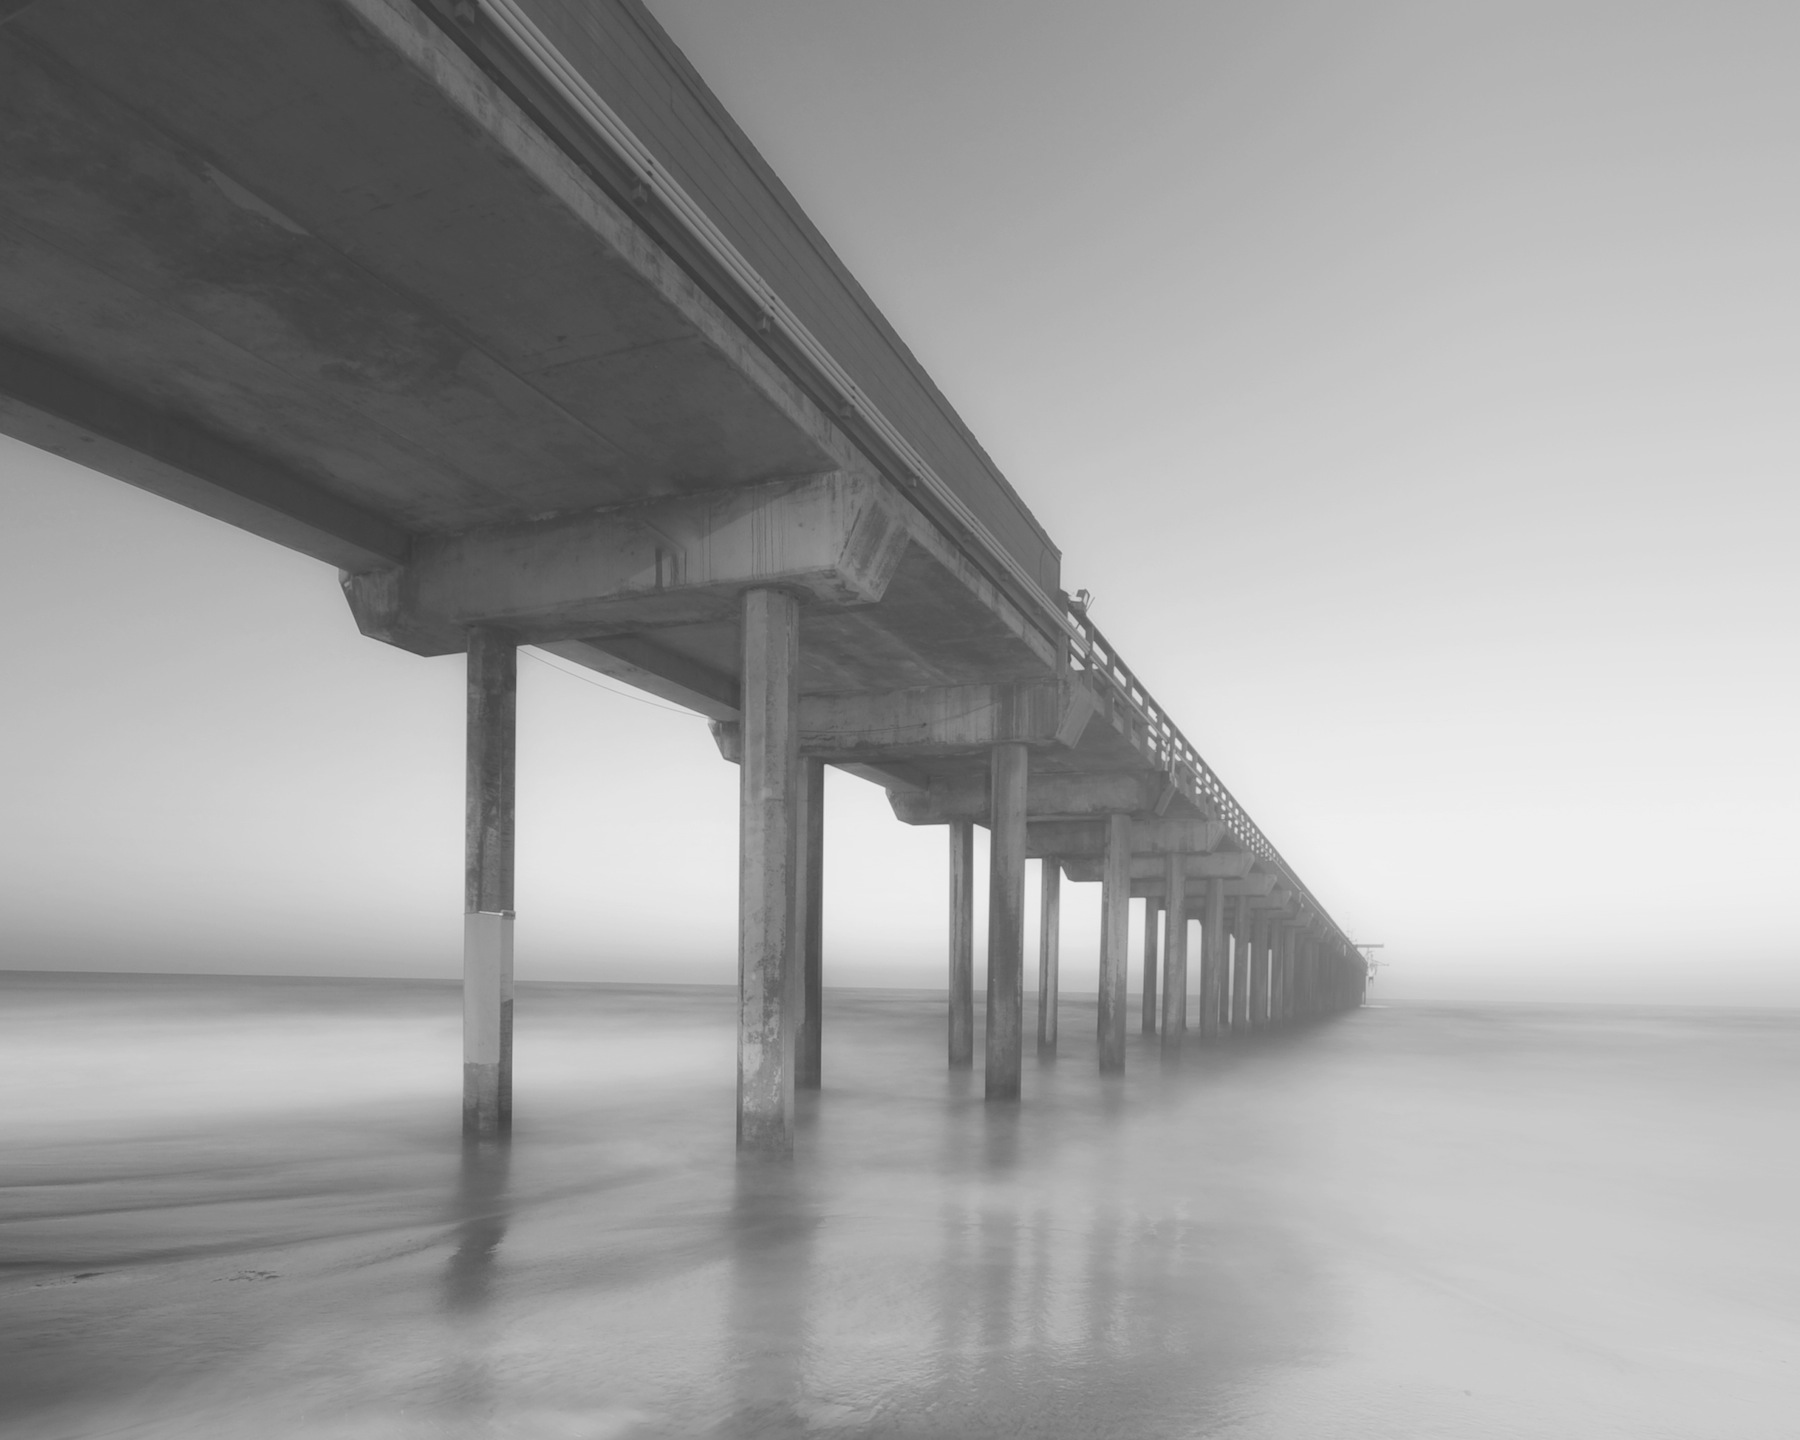
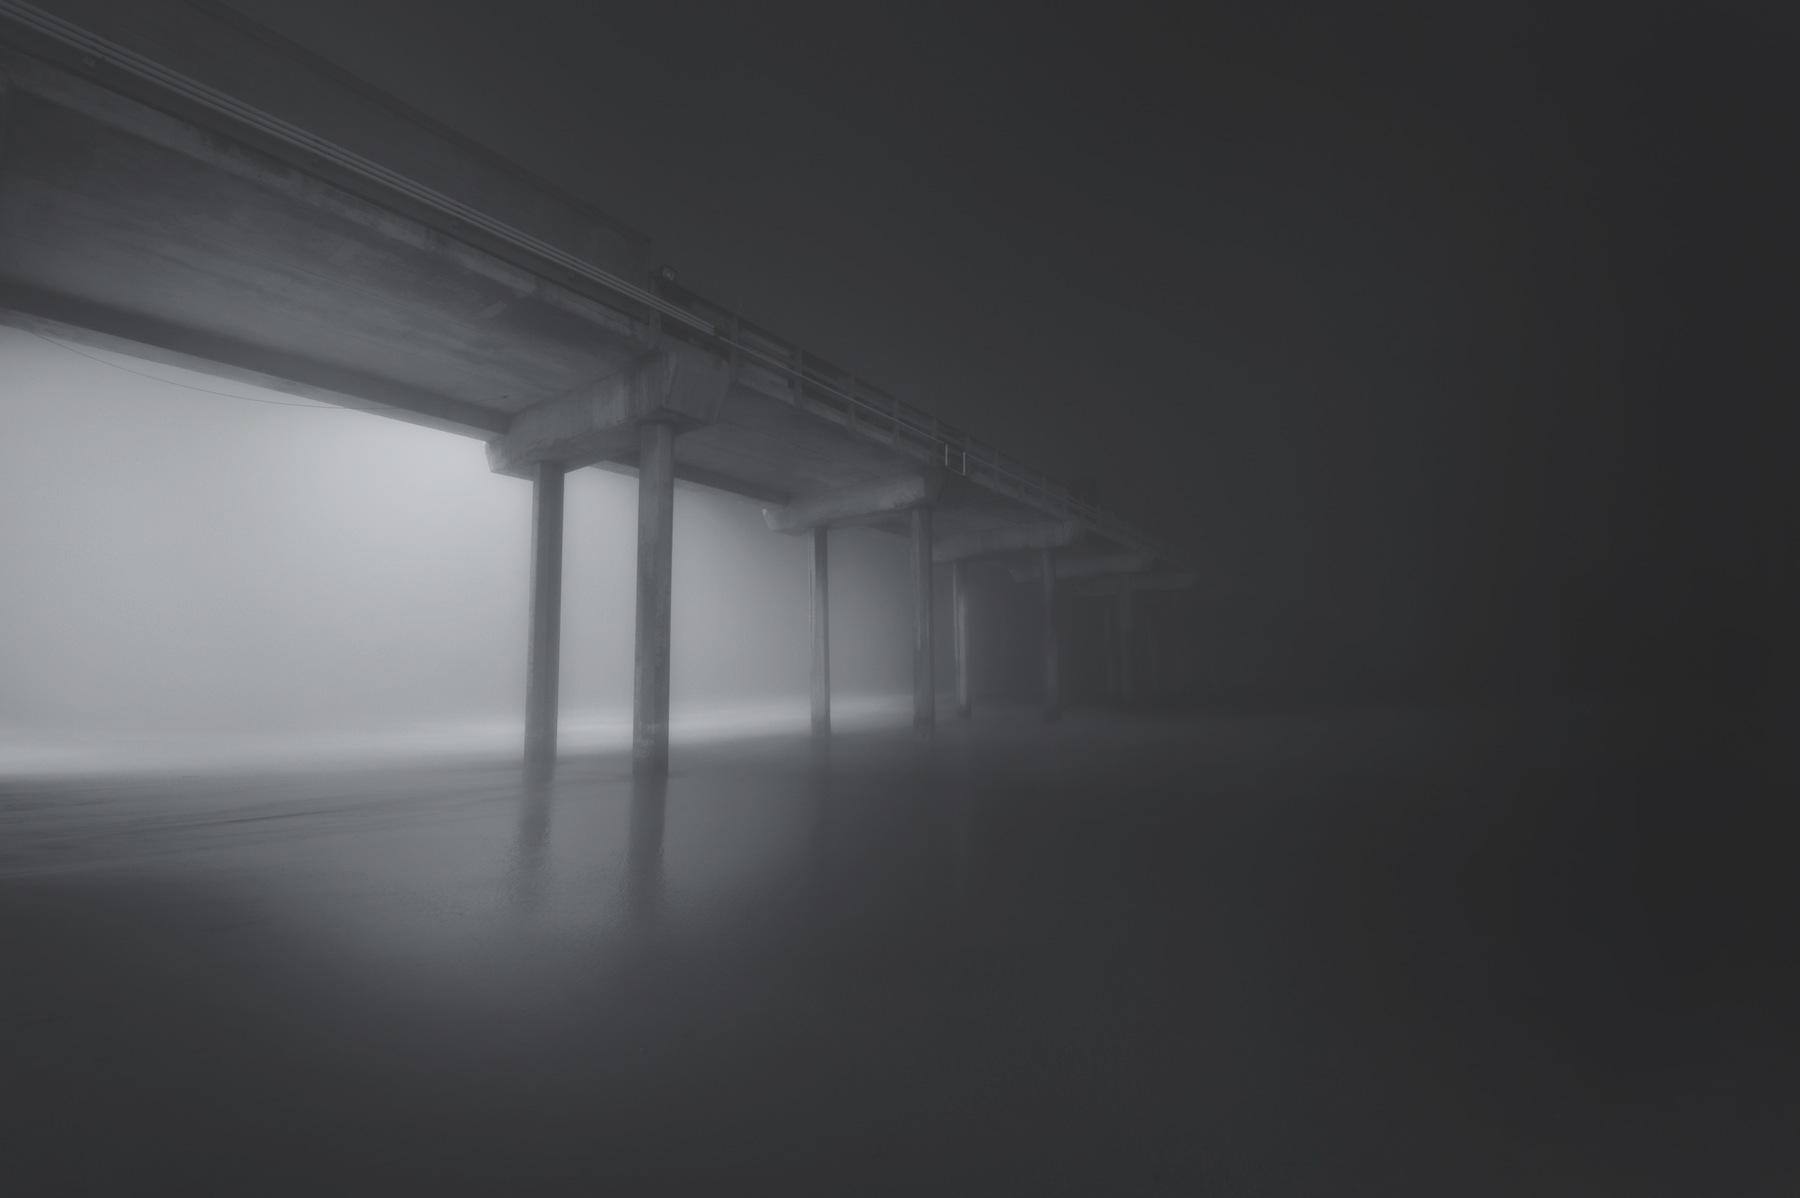
Scripps Pier in Fog
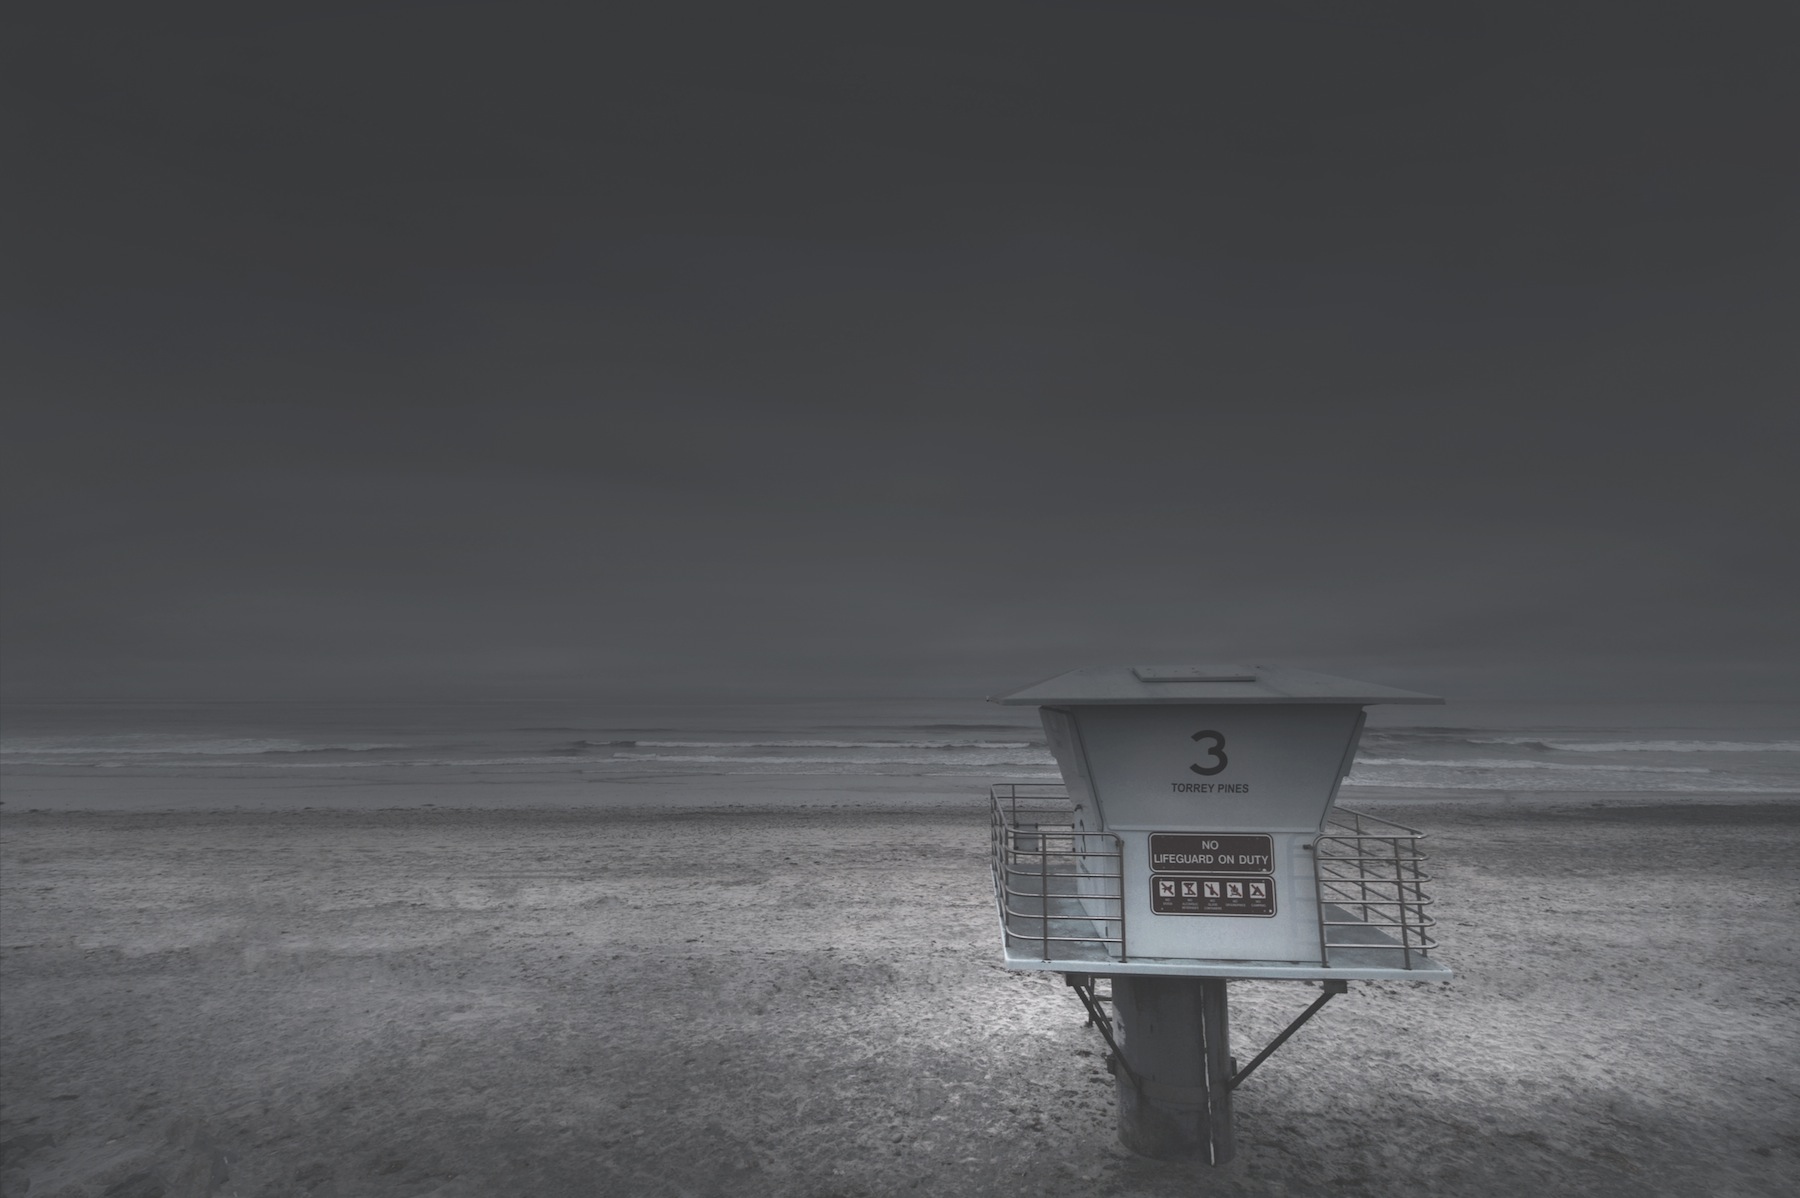
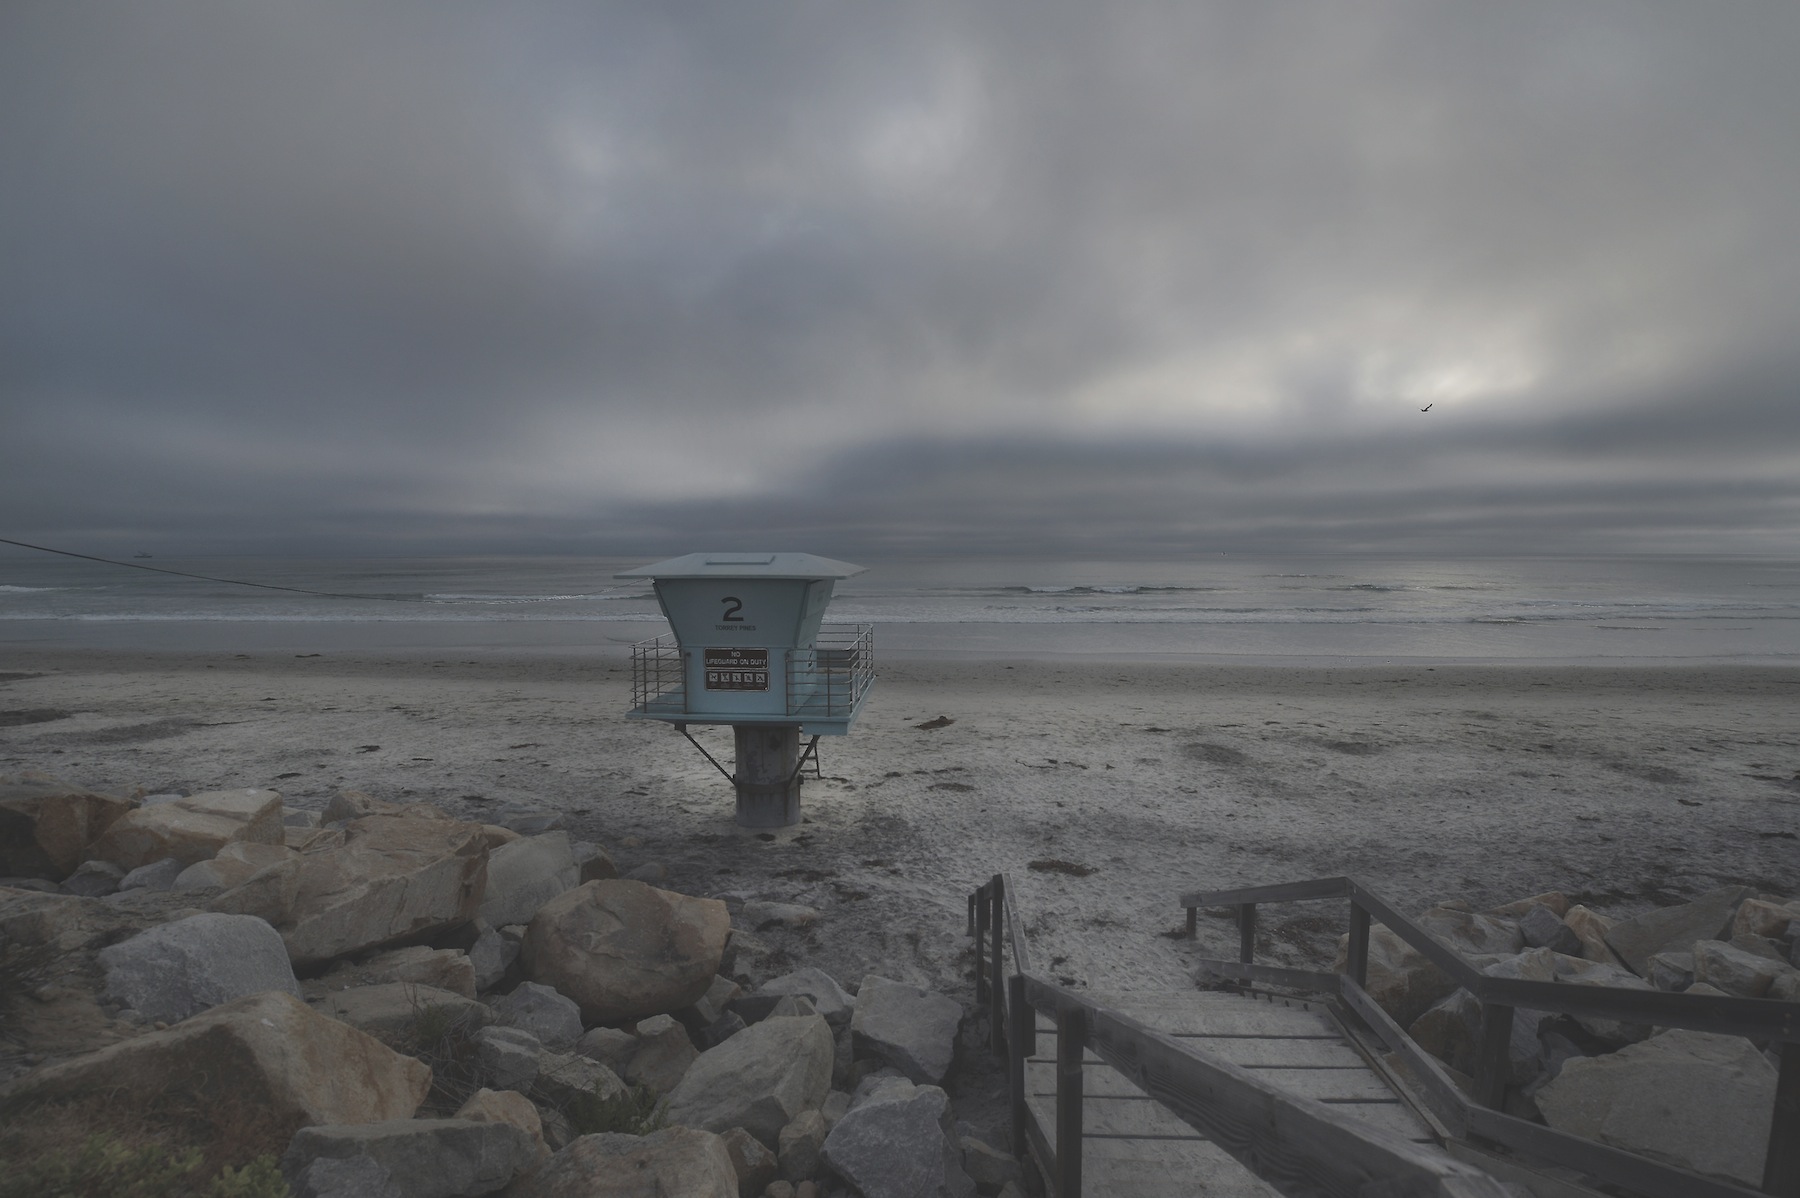
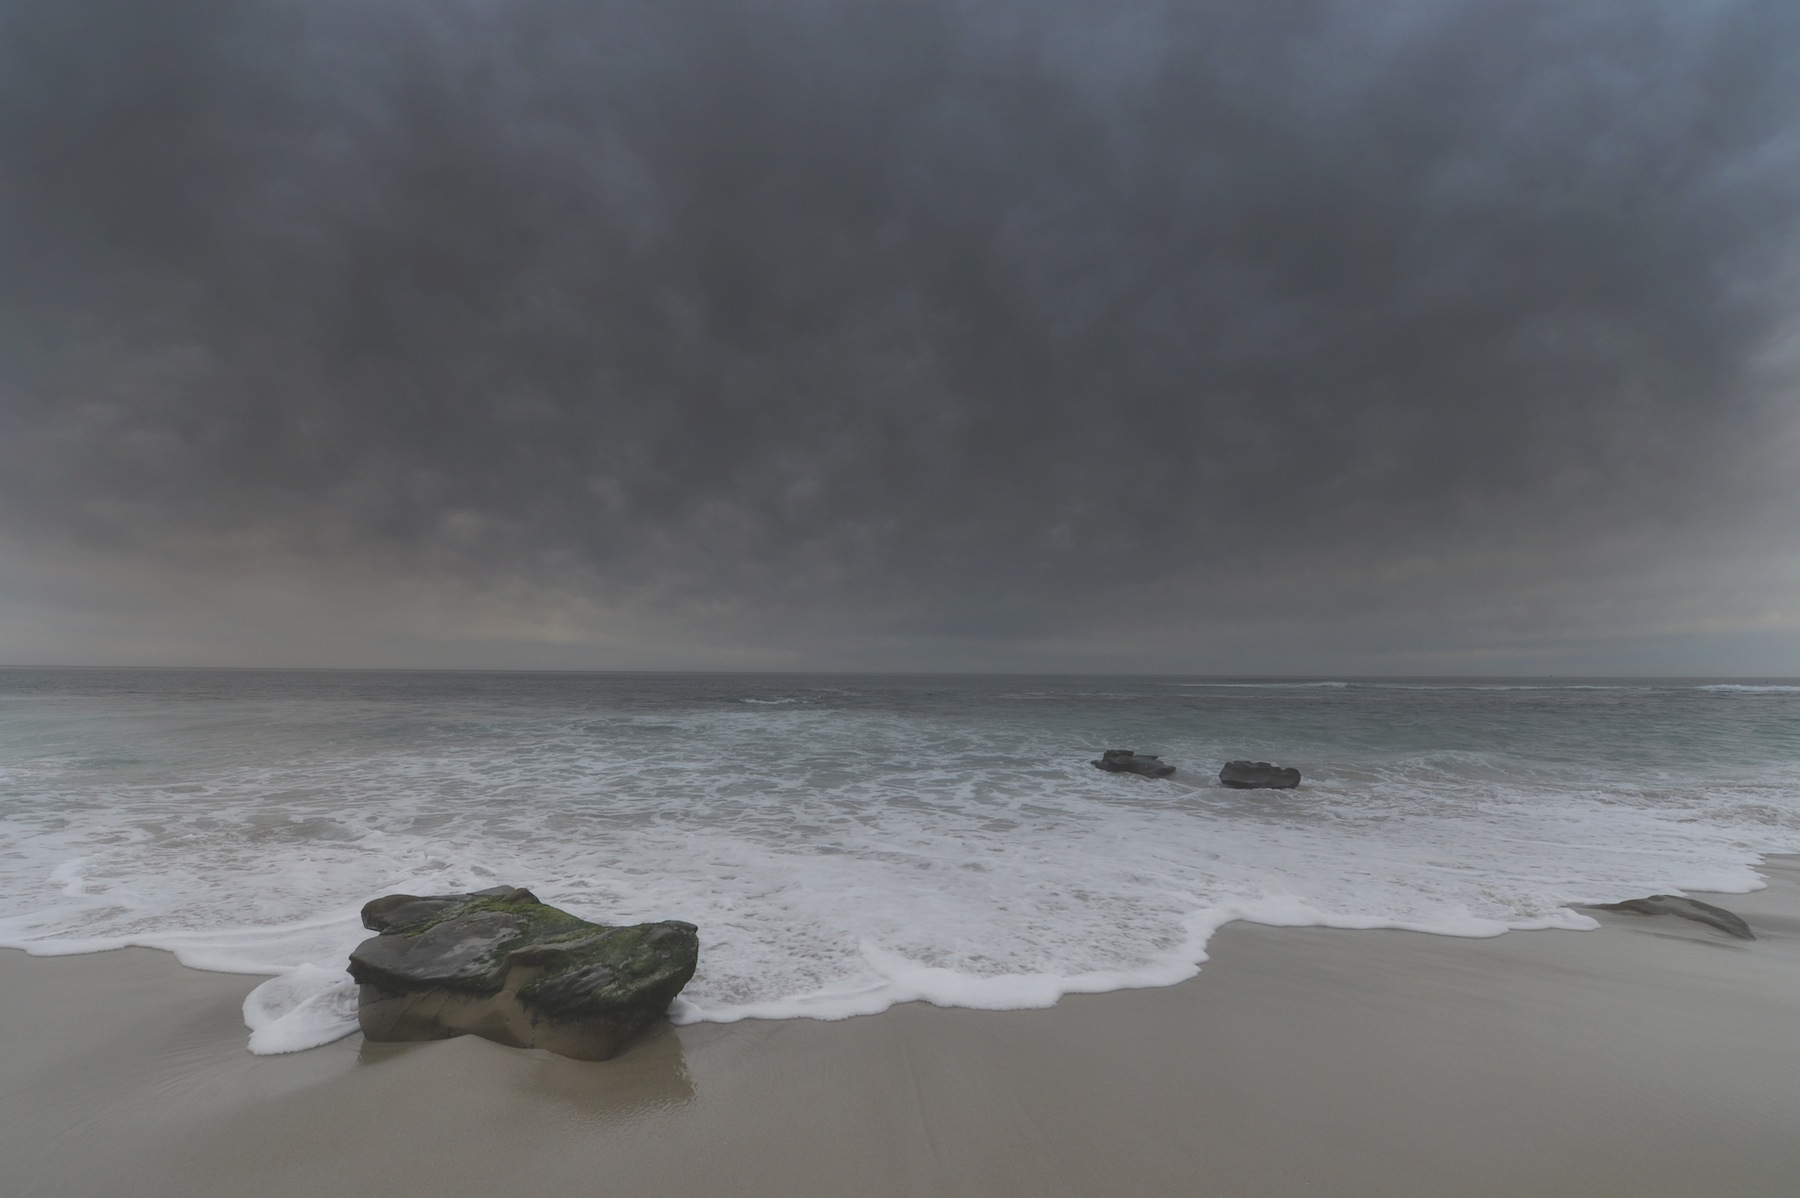
Torrey Pines State Beach looks depressing here.
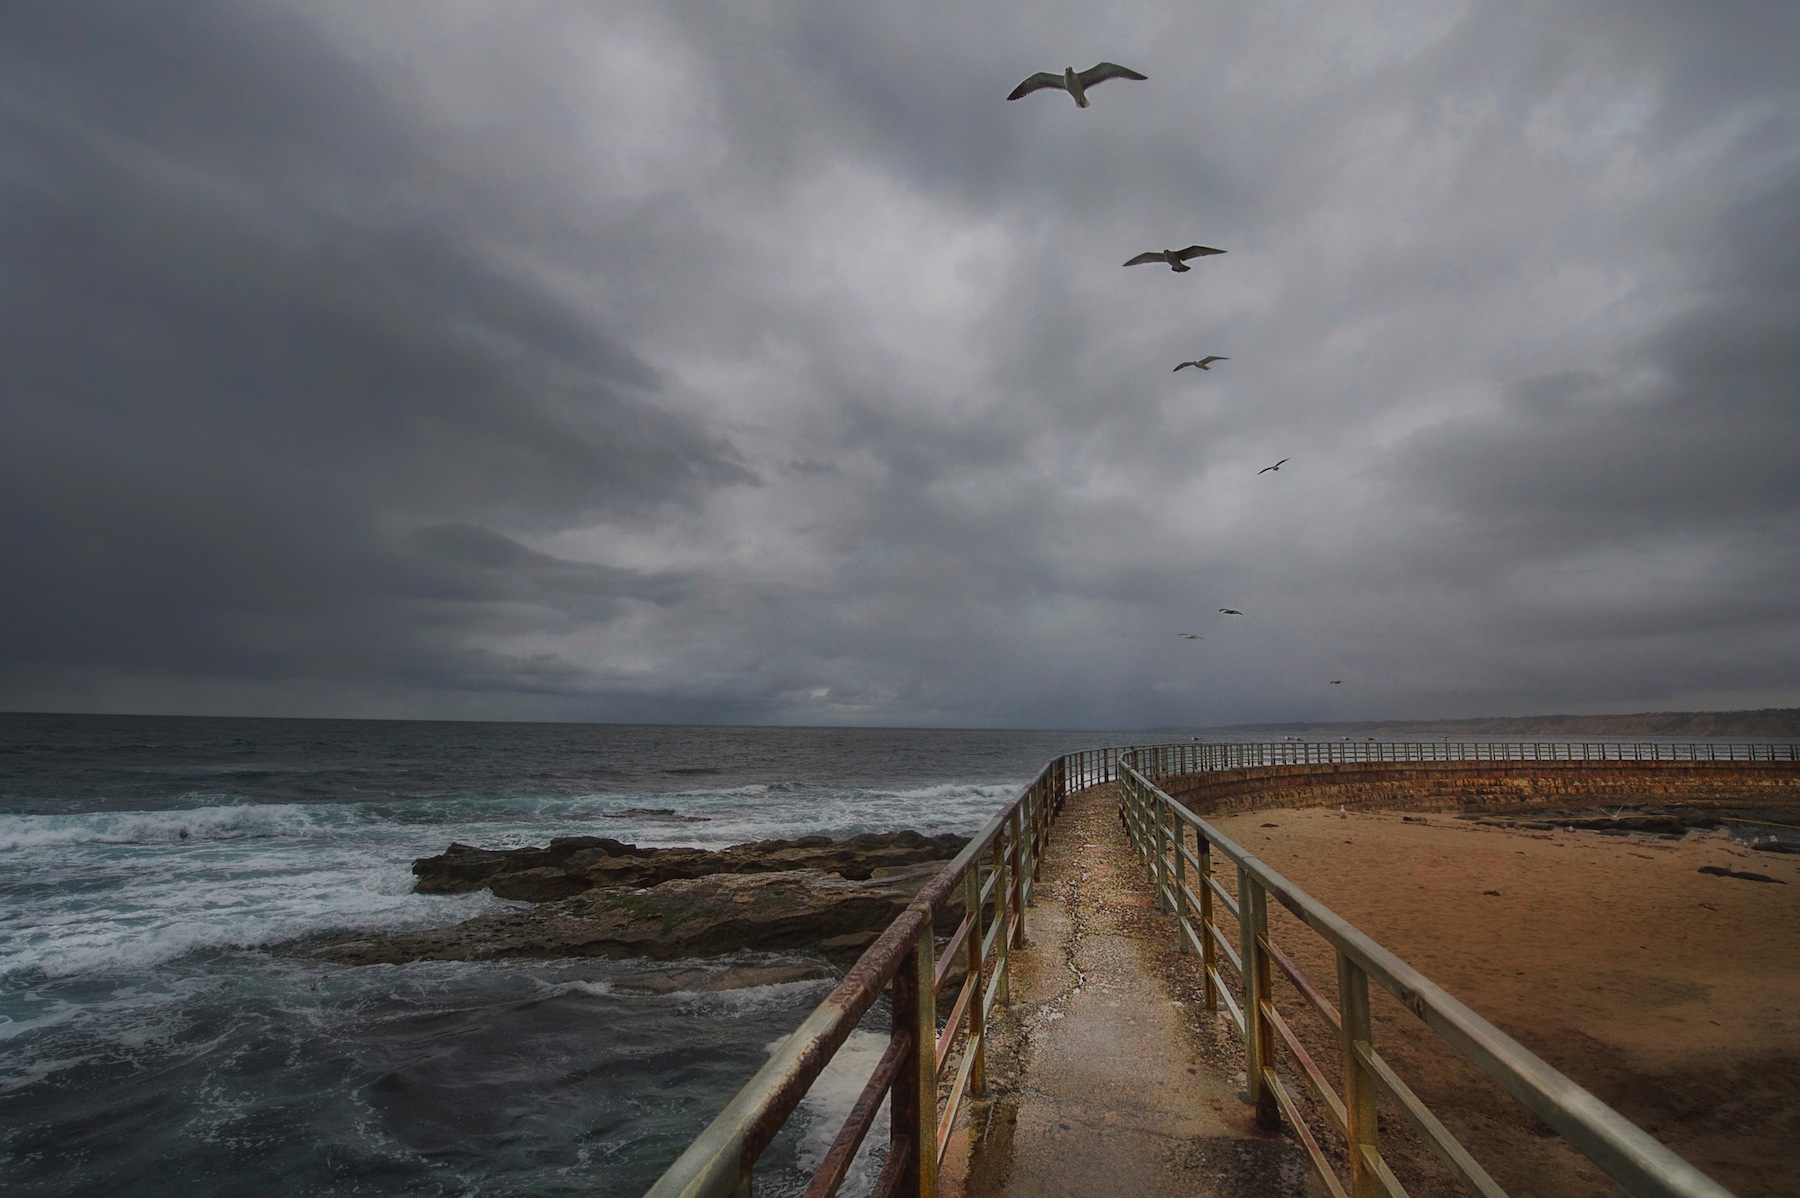
Seagulls soaring over a very drab Children’s Pool.
Man fishing on Torrey Pines State Beach.
Moody Scripps Pier in Fog.
LifeGuard Hut #2 in Scripps
Scripps Pier La Jolla before nightfall on a gloomy day.
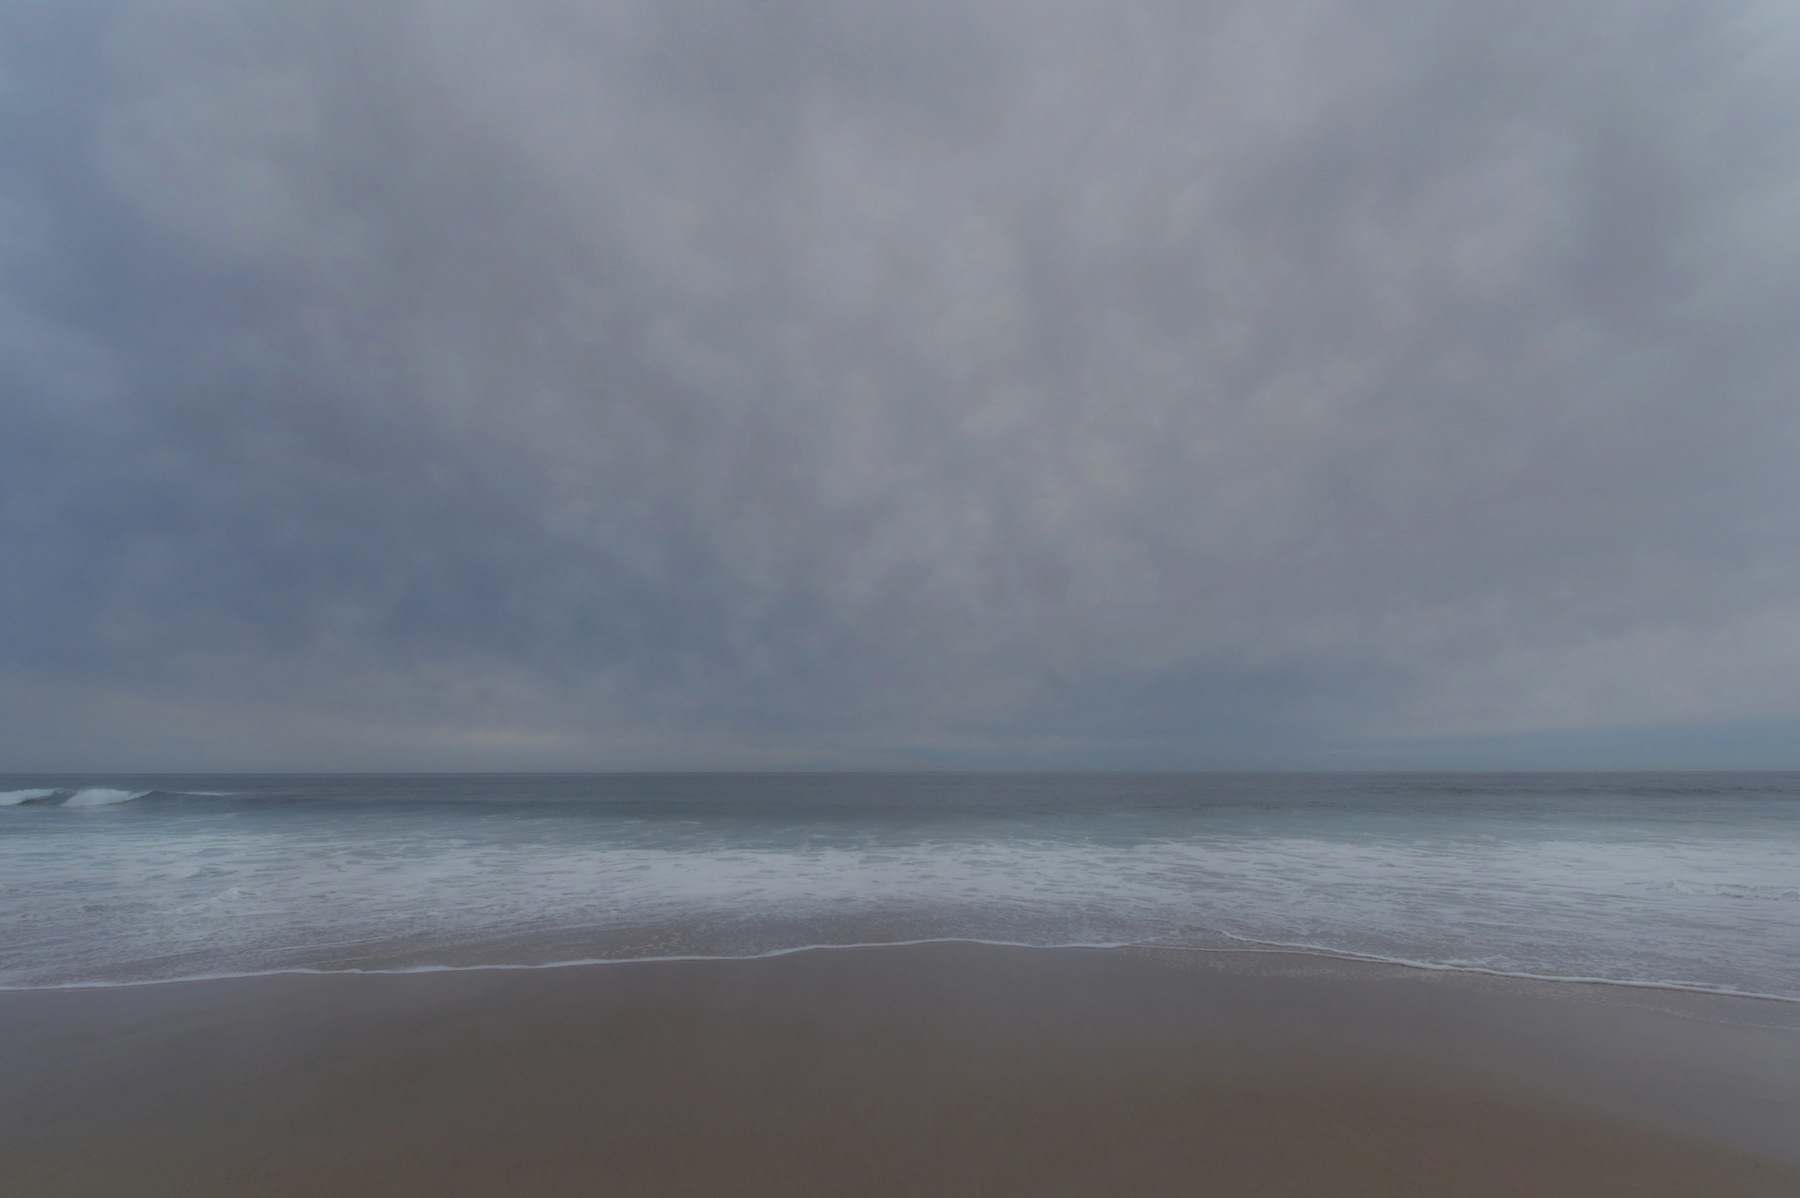
Marine Street Beach is desolate.
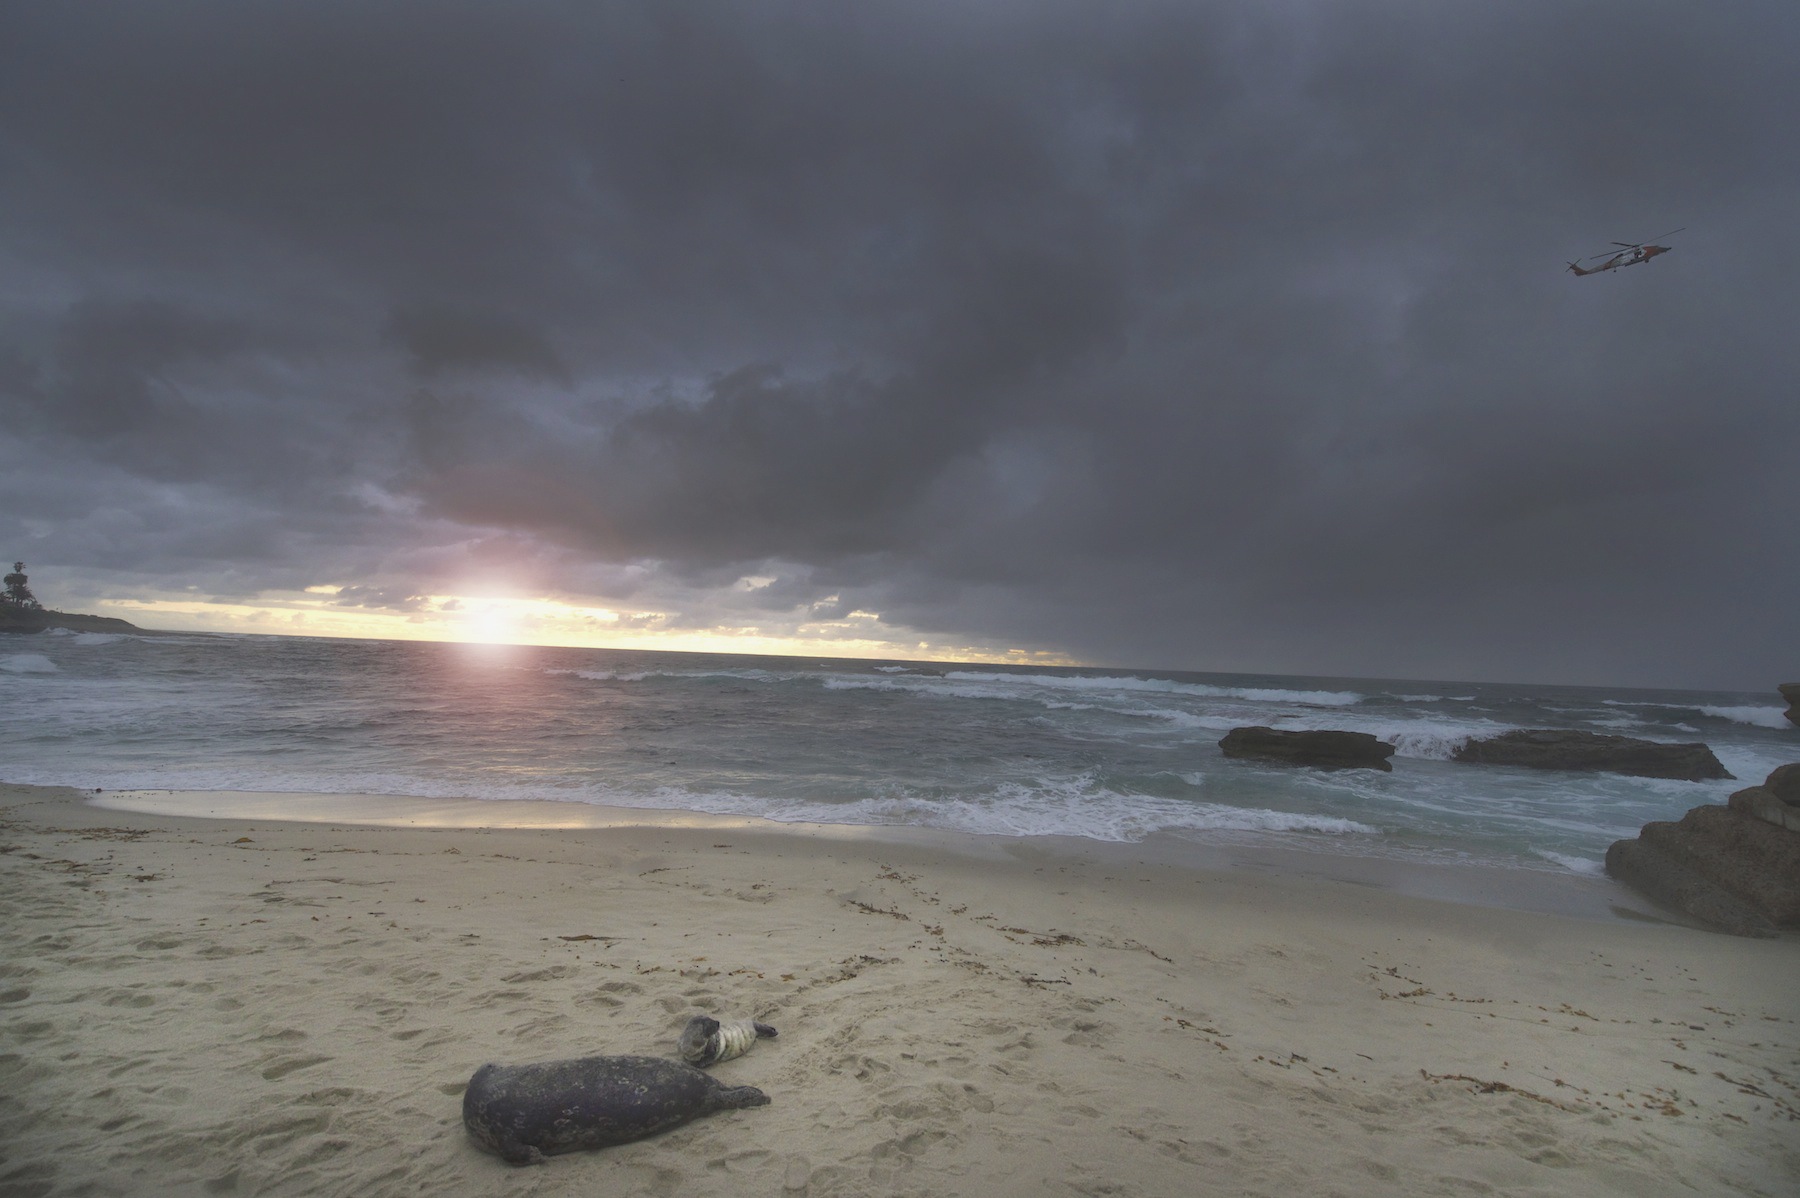
A baby pup seal watches the Coast Guard Chopper in the distance.
Sometimes the gloom is beautiful.
Photography Addiction – Chasing the High of a ‘Magic Moment”
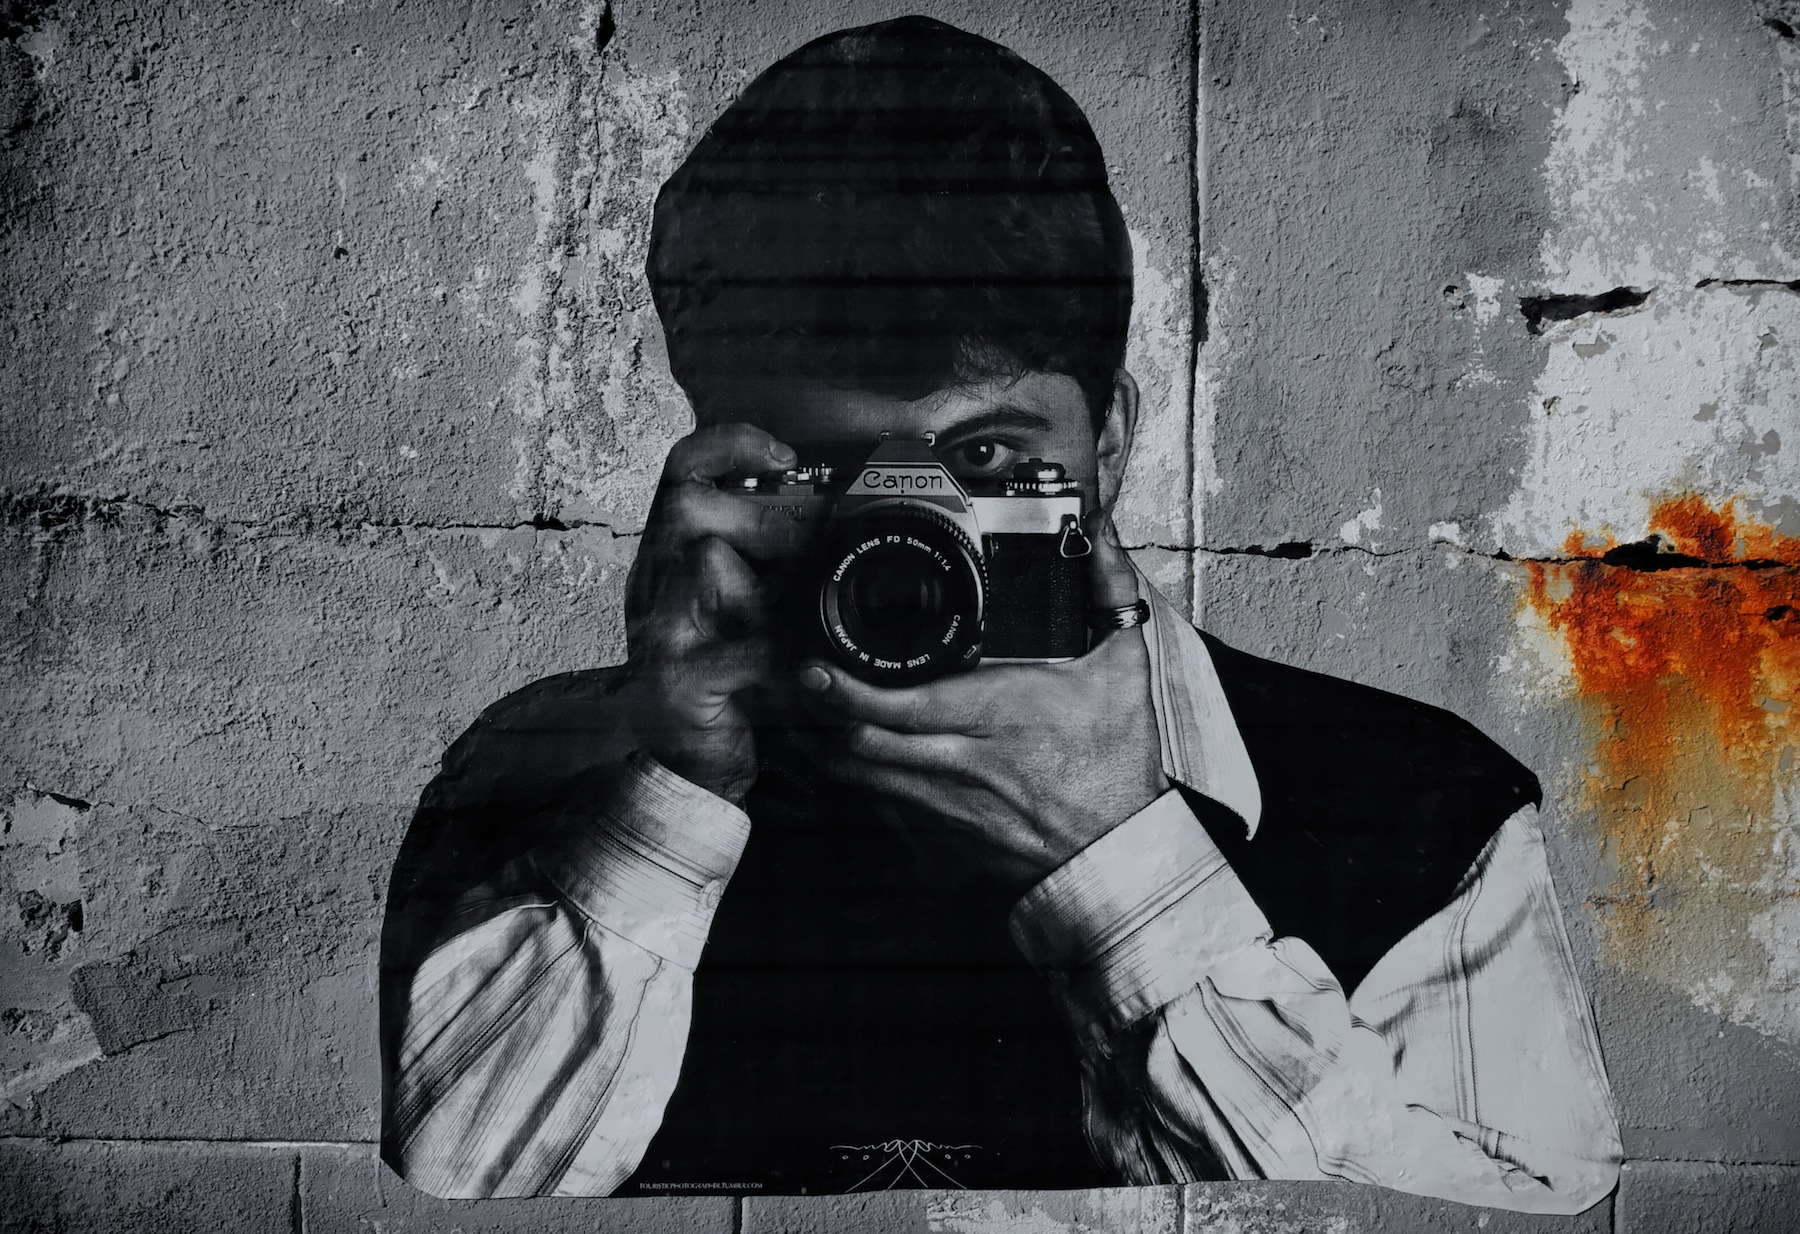
I snapped a picture. I looked down at my viewfinder. I snapped another picture, I looked back down at the viewfinder again. It was all wrong. It was all horrible. The lighting, the composition, the focus. Everything was wrong.
The photos were turning out terrible and I was getting worried if I would even catch a single good shot of the couple that I was taking pictures of that afternoon.
My fingers instinctively began adjusting the Shutter speed, the ISO and Aperture with each picture. I was progressively trying to make something happen with the scene that was happening before me. How could I make the photo cool, how could I capture something special? How could I capture something magical?
I bent down and shot. I laid on the ground and shot. I shot from above, from below. I was getting nervous. Actually, I am not sure nervous is the right word, maybe a stronger word like panic is more appropriate. In spite of my best efforts, I wasn’t even catching good pictures, let alone something I could be proud of.
I was chasing a magic moment and I needed a fix. I needed that fix Now.
Another potentially Magic Moment otherwise ruined by sloppy camera work.
And this is pretty much how it is every time I take out the camera. Well, at least for a little while each time. I start off stressed out, bumbling around until I finally capture something I like. Sometimes, something clicks beyond the shutter. Those times are too few and too far in-between. Something magical just happens – and I guess like any photographer that is my addiction. That addiction to find that moment pulls me back. It pulls me back to my camera everyday even though odds are high it won’t happen.
The Magic Moment
In photography there is a term for a photograph that inspires a reaction, an emotion, a feeling. They call it the Magic Moment. It happens when everything comes together at once to create a picture that captures a moment in time evocatively. The light, the composition, the focus, the activity, and a thousand other things magically happen all at once to create a photograph that one can be proud of.
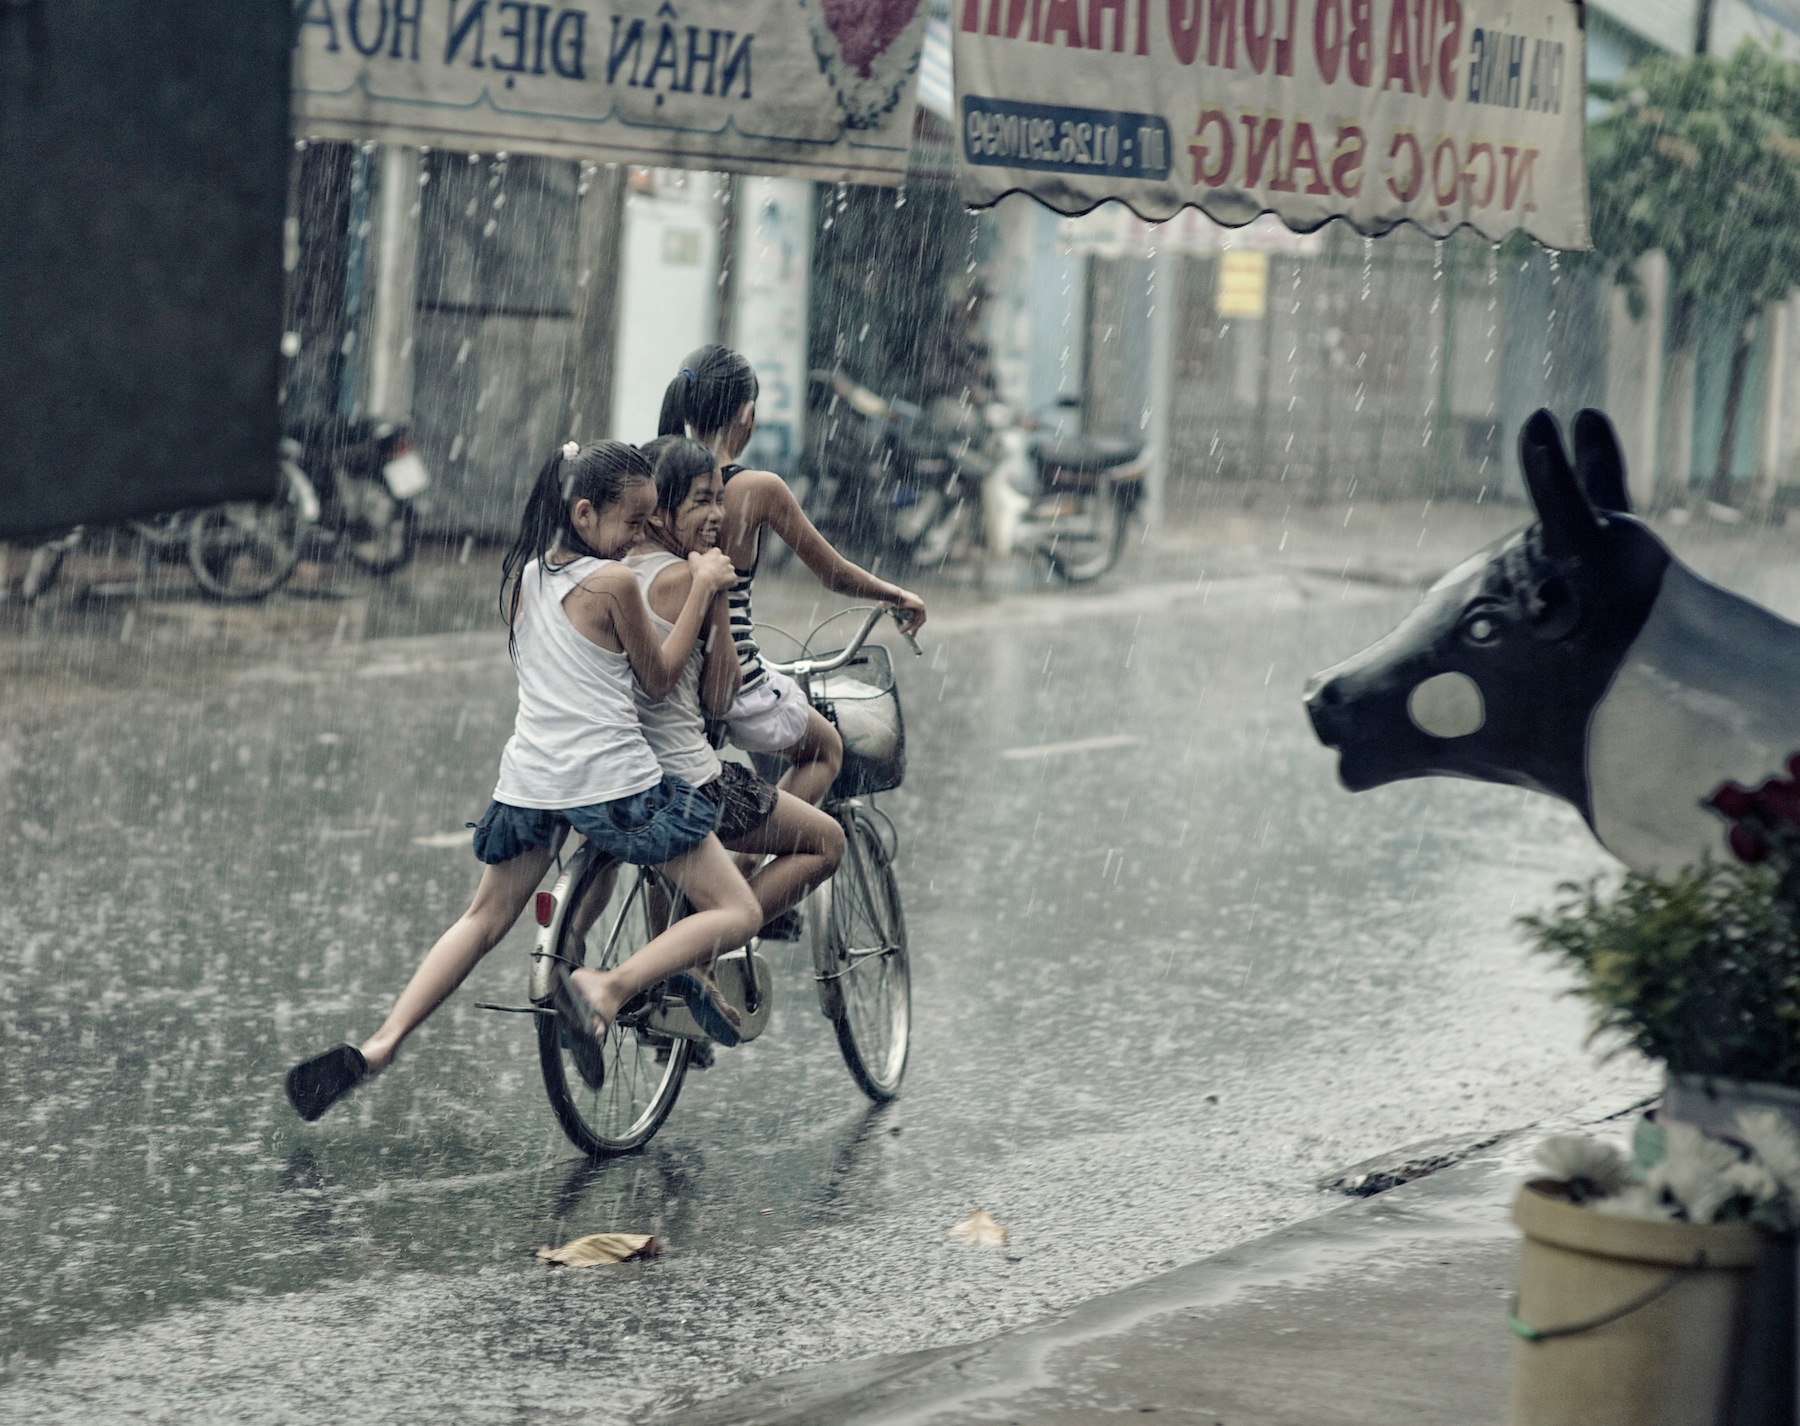
I sat outside a house for 2 days taking pictures of people passing by on this street. I must have taken hundreds of pictures. I hated all of them, until I felt I caught a magic moment with these girls riding by on a bike, laughing as the monsoon rains pelted them.
The Magic Moment is completely subjective and maybe thats what makes it even more elusive. I may think I have captured a magic moment while someone else may think the photograph is lousy. I guess the real magic happens when a photograph is generally considered magical by many. My dream in life is capture at least one of those. One photo that I think is magical, and others do to.
When is someone a “Photographer”?
I read many articles that present a view on what makes someone a photographer. Most of the views have to do with either the experience level of the person, their commitment to photography, or in many cases whether they make money doing it.
I guess I have my own view. I think someone, anyone is a photographer when they are addicted to capturing that magic moment. When photography becomes your drug of choice – you are a photographer.
When you look around and constantly frame each scene around you into photographs in your head – you are a photographer. When you rack your brain at all hours of the night for things to take photos of – you are a photographer. When you wake up at 4am in the morning to take sunrise pictures of a beautiful place – you are a photographer. When you wish you had your camera with you and you curse yourself for not – you are a photographer. I don’t care if you have an iPhone or a Hassalbad H4D-200MS, you are a photographer when you are addicted to the magic of photos. Anyone can be a photographer if they love it in their heart.
You cannot force the Magic Moment
I guess photographers have picked a lousy drug. Most other addictions can be bought or acquired with a little work. A photographer cannot go out and buy a magic moment. No, a photographer must toil away, brushing off frustration and self doubt constantly to get their fix. The magic moment cannot be forced.
 I went to this pier everyday. Looking for a magic moment. I was defeated everyday – except for one brief second when these birds decided to soar into my frame.
Putting the Odds in Your Favor – 5 Ways to get Closer to Magic
I realize that a magic moment can’t be forced. But I’ve discovered that over time if I do certain things, if I follow certain rules than I increase my odds of capturing a magic moment. These are some of those rules that I follow.
1) Bring your camera everywhere – My friends sometimes ask, “Frank, Why do you bring that camera everywhere”. I guess it’s one of those questions that if you have to ask, you probably wouldn’t understand the answer anyway. I bring my camera everywhere because I never know when something is going to happen. I can’t force the magic but I can improve my odds by bringing my stupid heavy camera everywhere I go. It’s kind of a pain in the butt actually.

I’m glad I had my camera when I saw this scene unfold during a trip to New York. A seemingly empty street , than BAM a makeshift parade with shopping carts happened.
2) Focus yourself, then focus your camera. – I was going out to shoot with a friend and he gave me some interesting advice on how to take pictures. It was interesting because it actually had nothing to do with my camera, or with the lighting or with the lens. He said, “Frank, you need to focus yourself before you focus the camera”. Basically he told me something extraordinarily simple – I had to focus in on what I wanted to get from a picture. I needed to go to the right place, at the right time of day with the right equipment and the right attitude. If I was missing any of those things my chances of success were greatly reduced.
If you don’t focus yourself first, your pictures will probably disappoint you.
3) Spend money to get the best equipment. I know it’s not a popular belief but good camera equipment does in fact improve your pictures – sometimes dramatically so. If you are using a full frame sensor and prime lenses the chances of catching a magical moment in the way that you want improve greatly. To me every penny I spend on excellent equipment is well worth it. If I spend 8 hours a week taking pictures thats a huge investment of my time. I feel like if I want to maximize my time I am going to go out with the best equipment I can afford.
I know I said that you can’t buy or force the magic moment but having the best equipment can sure help you capture it beautifully when it does happen. If you’re thinking about buying a camera and your serious about photography buy the best you can. No one ever regrets having a camera thats too good, they only regret having a camera that doesn’t do what they want.

I suppose I spent a ridiculous amount of money on a D4 and this 14.24mm Wide Angle lens but it takes ridiculously awesome landscape shots and when it does, it makes me ridiculously happy.
4) Keep Persevering. Keep Shooting – I heard a great quote once – Perseverance is Omnipotent. The world is filled with unrewarded genius and talent. I believe one thing is always rewarded in this world and that is perseverance. It’s highly democratic. Anyone can take an amazing photo if they just keep trying and trying and trying until they do. I hate 99% of the photos I take. So I figure that my curse in life is to take 99 shots to make me happy once.
Sometimes I get so low when I start comparing my photographs to others I see on 500PX, or SmugMug or any of the other photography sites. The frustration can be enough to make me quit sometimes. But I don’t think I will. I will just keep shooting, and hoping.
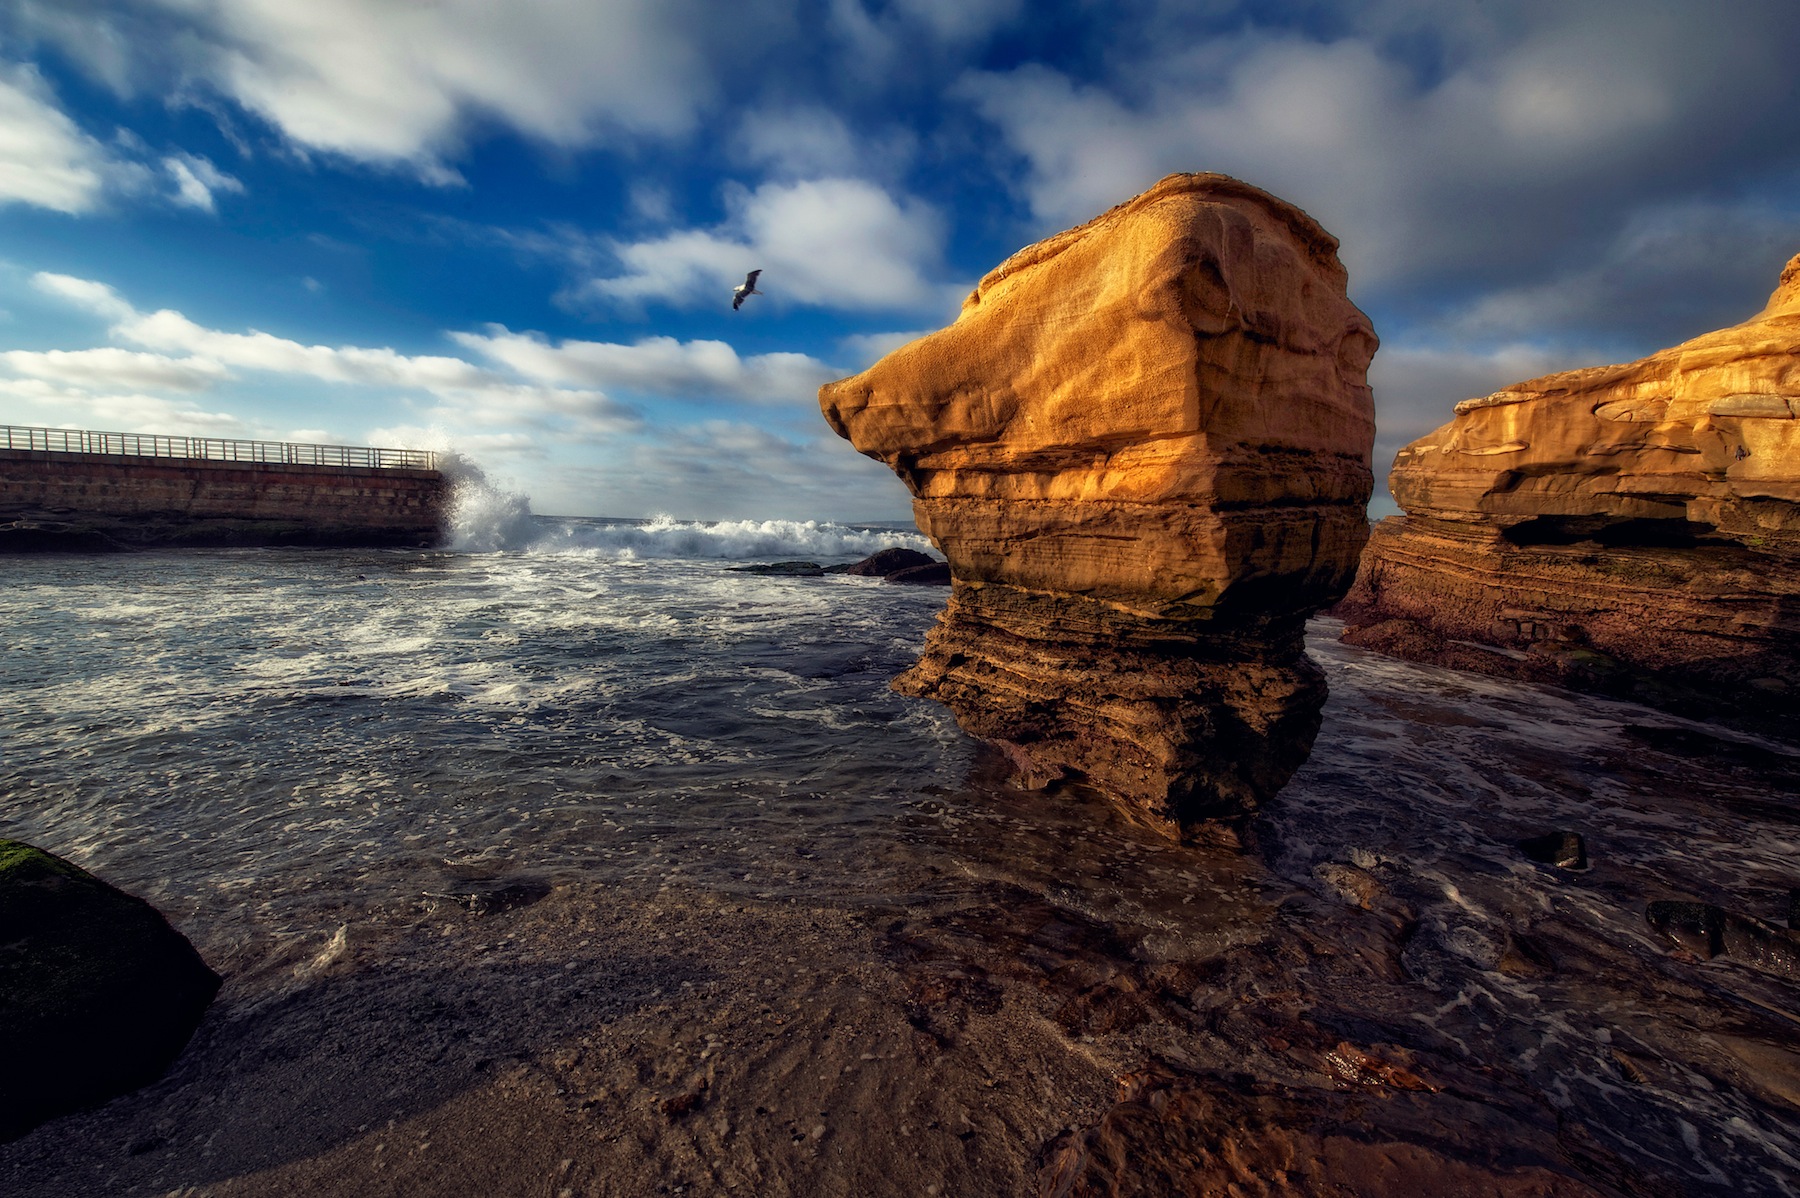
I find myself going to the same cove every few days to capture the shot I want. I get home. I’m disappointed. Finally one day, I captured something I loved – a true magic moment. I am glad I kept trying. Now I have this photograph forever.
5) Trust the Voice in your Head – I was in Banff National Park Canada (one of the most beautiful places in the world) and I noticed something extremely odd. Photographers were stopping their cars in these big groups and taking pictures in the same locations. It was as if they were all taking cues on where the best spots to photograph were based on where other photographers were. I got out of my car a couple of times to look at a couple of locations where these groups were forming. I didn’t see anything spectacular about the location and I started to question myself.
The fact is that many people don’t trust their own inner voice on what looks good and what makes a great photograph . They rely on taking cues from others and in the end, they end up taking pictures that look like everyone else’s picture. That is the furthest thing from a magic moment that you can get. To capture a magic moment, I always to try to start with something different and unique to me and the way I see. Only then can I capture something magical.
Chasing the Magic
I’m no magician, and to be honest sometimes I feel like my camera is a broken wand. But I’ll keep trying to pull rabbits out of my hat and waving that broken wand until I find something magical. Even if its just for me and even its something small. That’s photography. Thats why I love it.
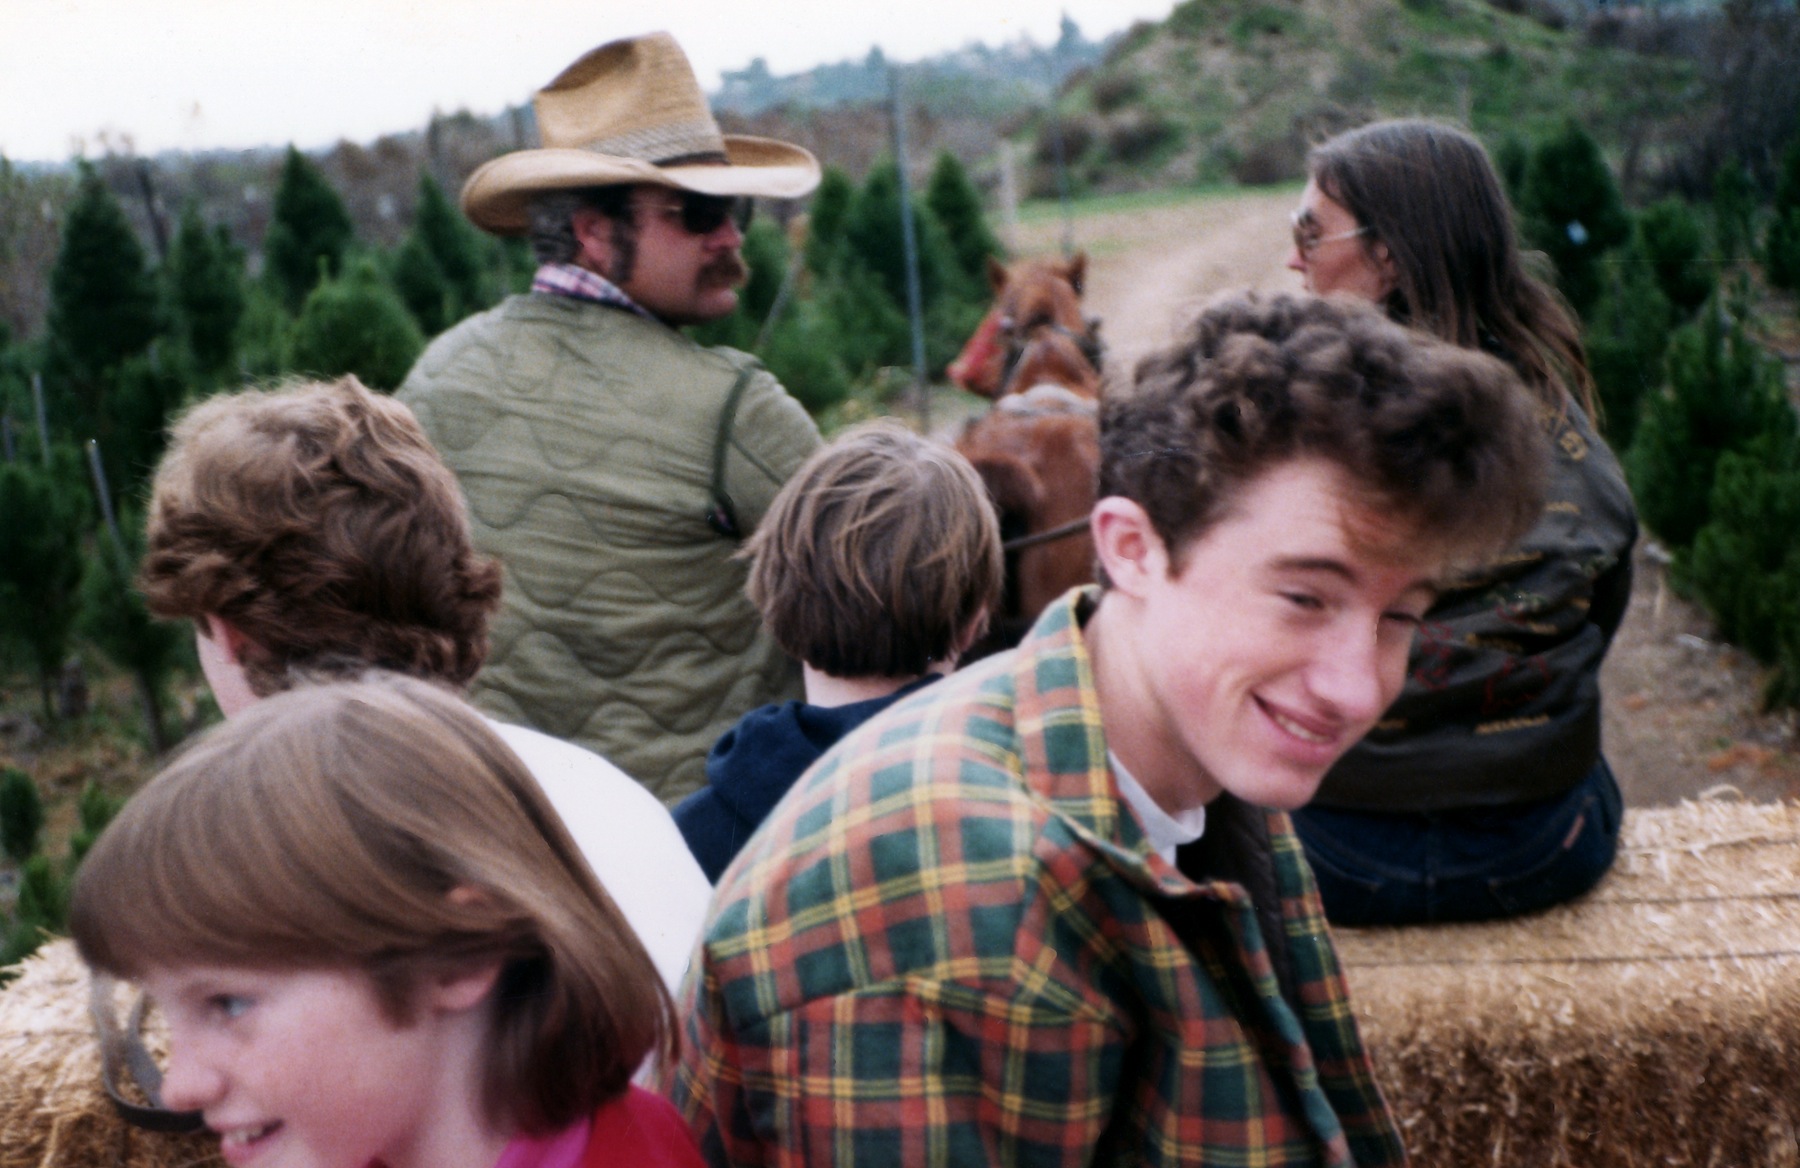
How to Photograph Kids by a Former Poorly Photographed Kid
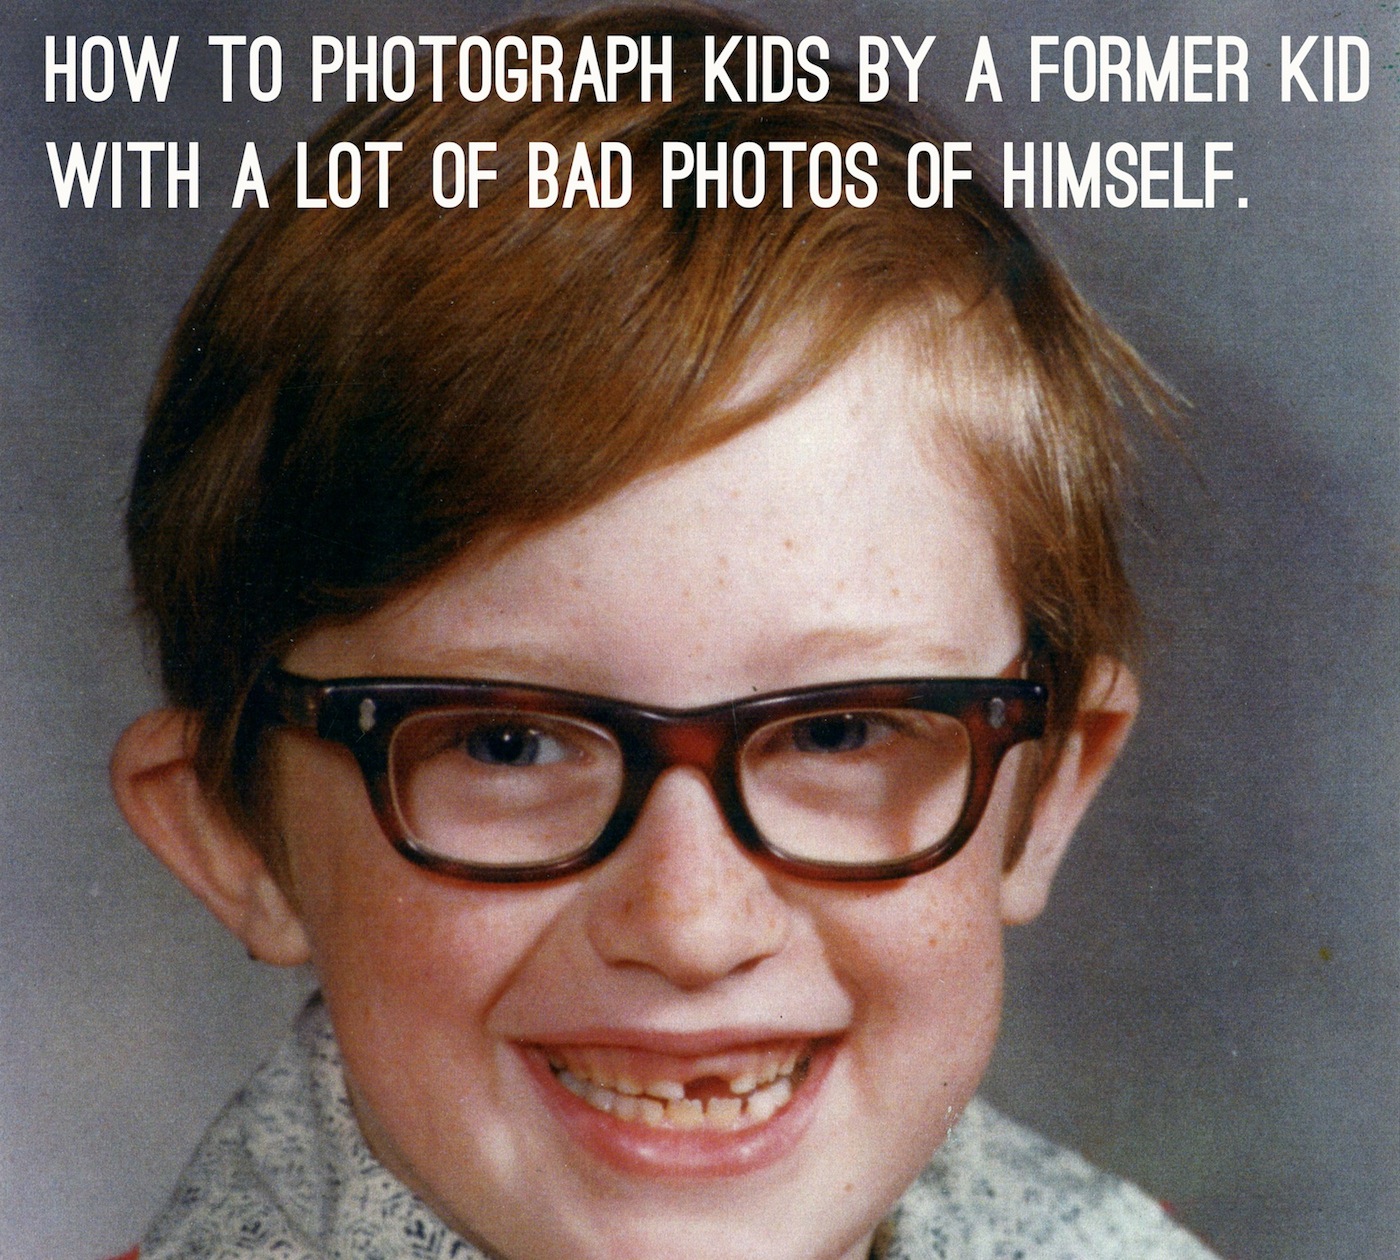 I am a former kid. I have lived through the trauma of bad photos taken of me by my father. I was not photogenic and admittedly he had a cheap camera. He had a knack for catching the incredibly awkward moments of childhood in a way that now makes me cringe. If I could go back in time and give my 1970’s dad a few tips on how to take better pictures of me I would.
As a former kid recovering from the trauma of bad photographs, I feel like it is my duty to future kids of the world to give parents and photographers some tips I have learned on how to take some great photos of kids. Or at the very least photos that won’t make your kid cringe when they get older.
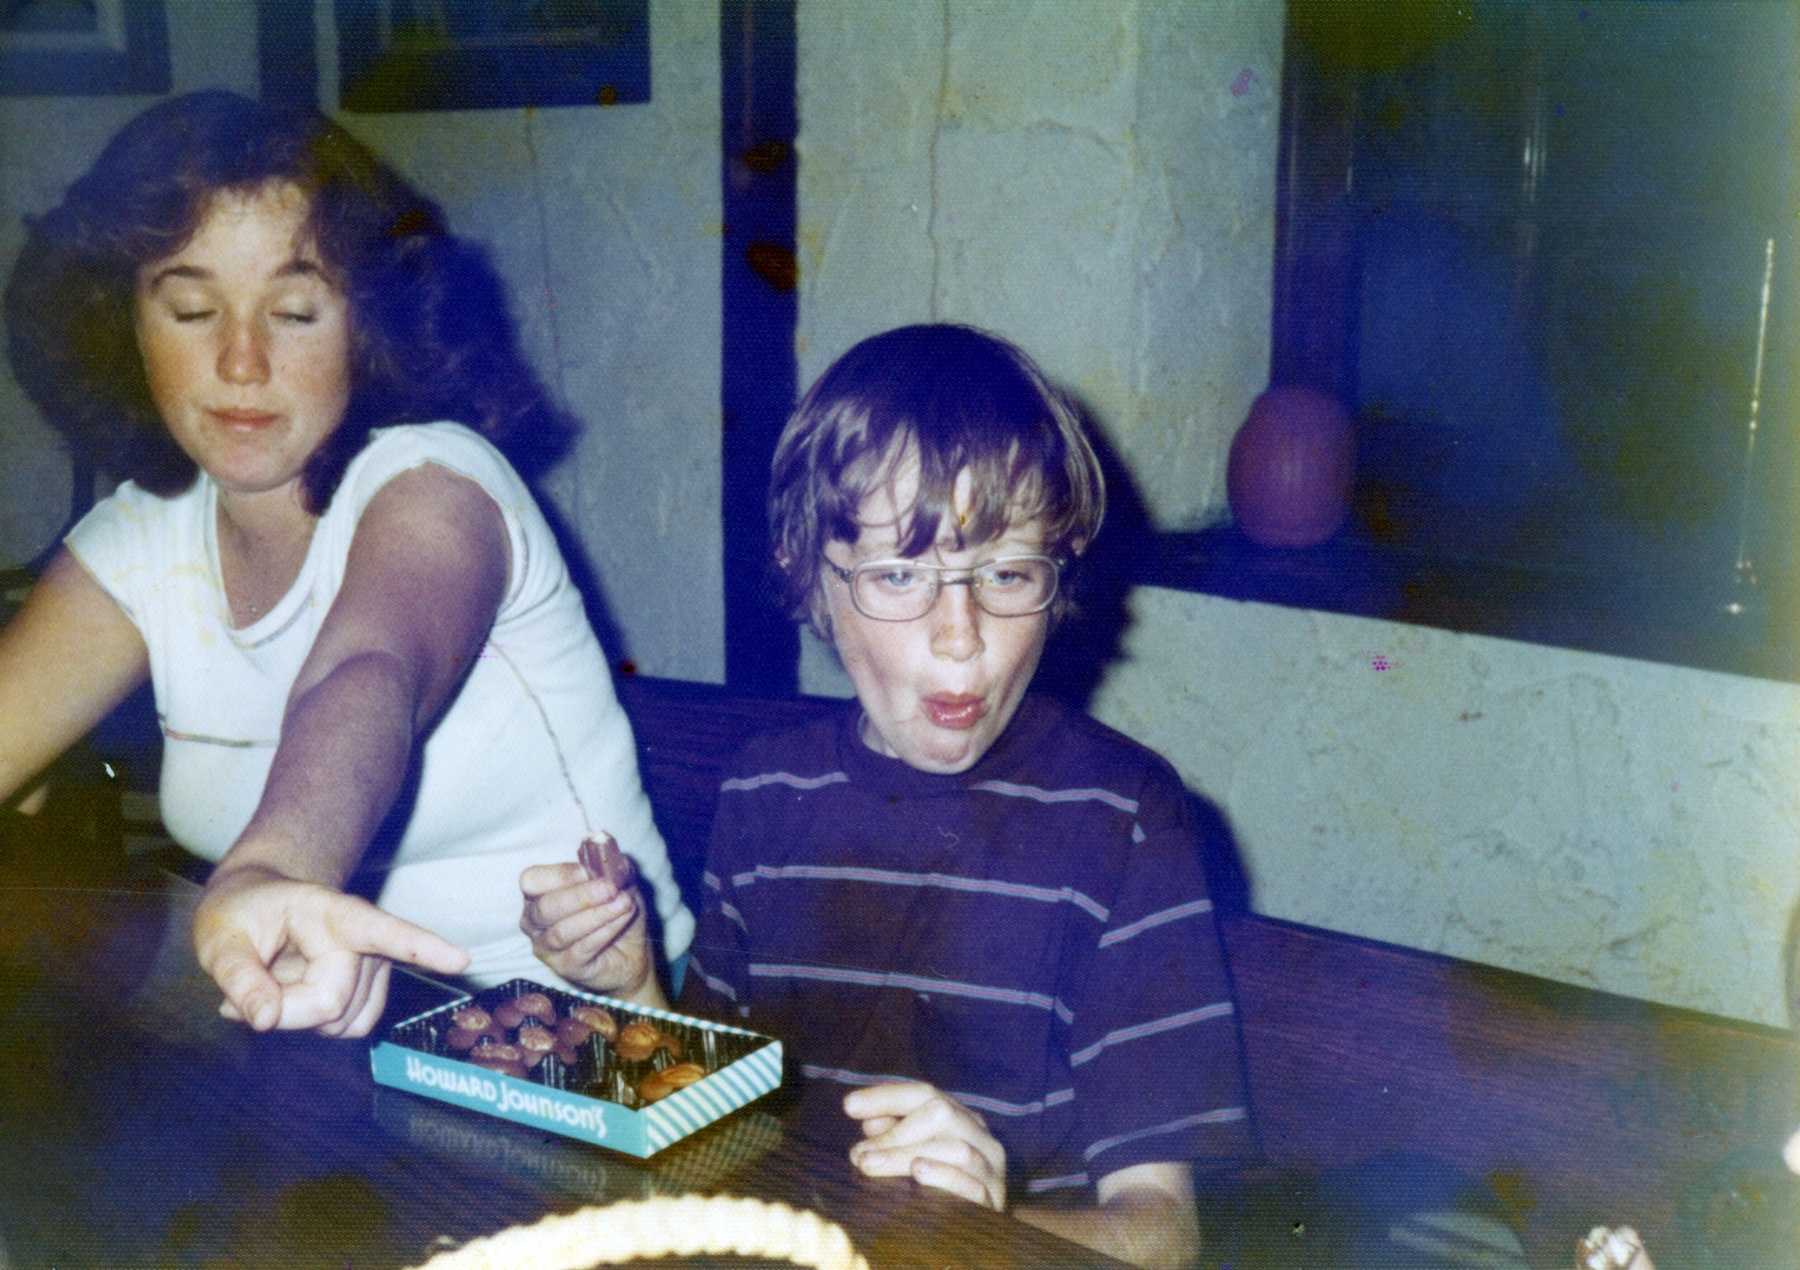
Two things come to mind. First, great thanks to my dad for timing this perfectly and second why am I wearing such horribly dirty T-Shirts in every picture?
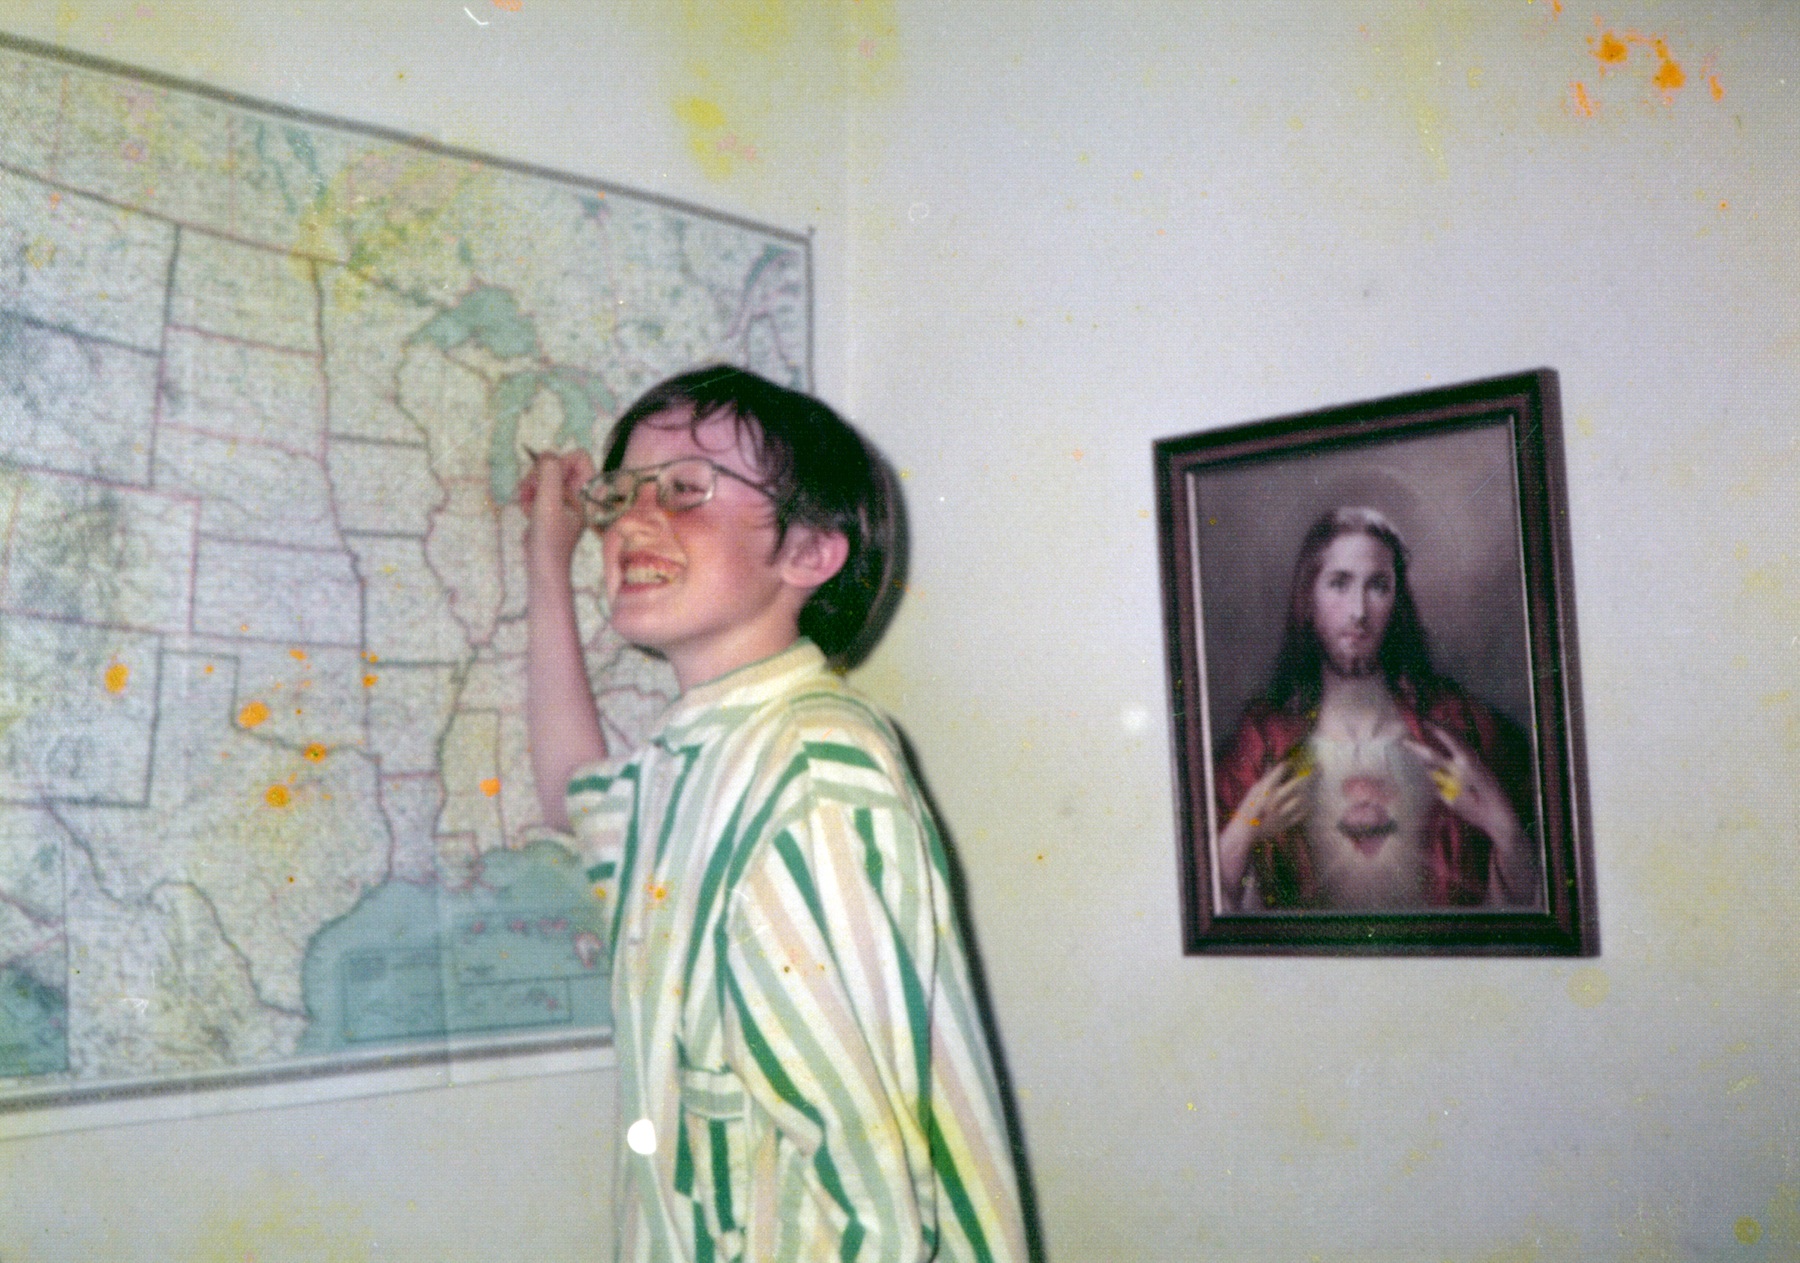
Thank you Dad for this picture of me in Prison Pajamas pointing at somewhere in Michigan.
At least now I know that those feelings of complete teen awkwardness were not just in my mind.
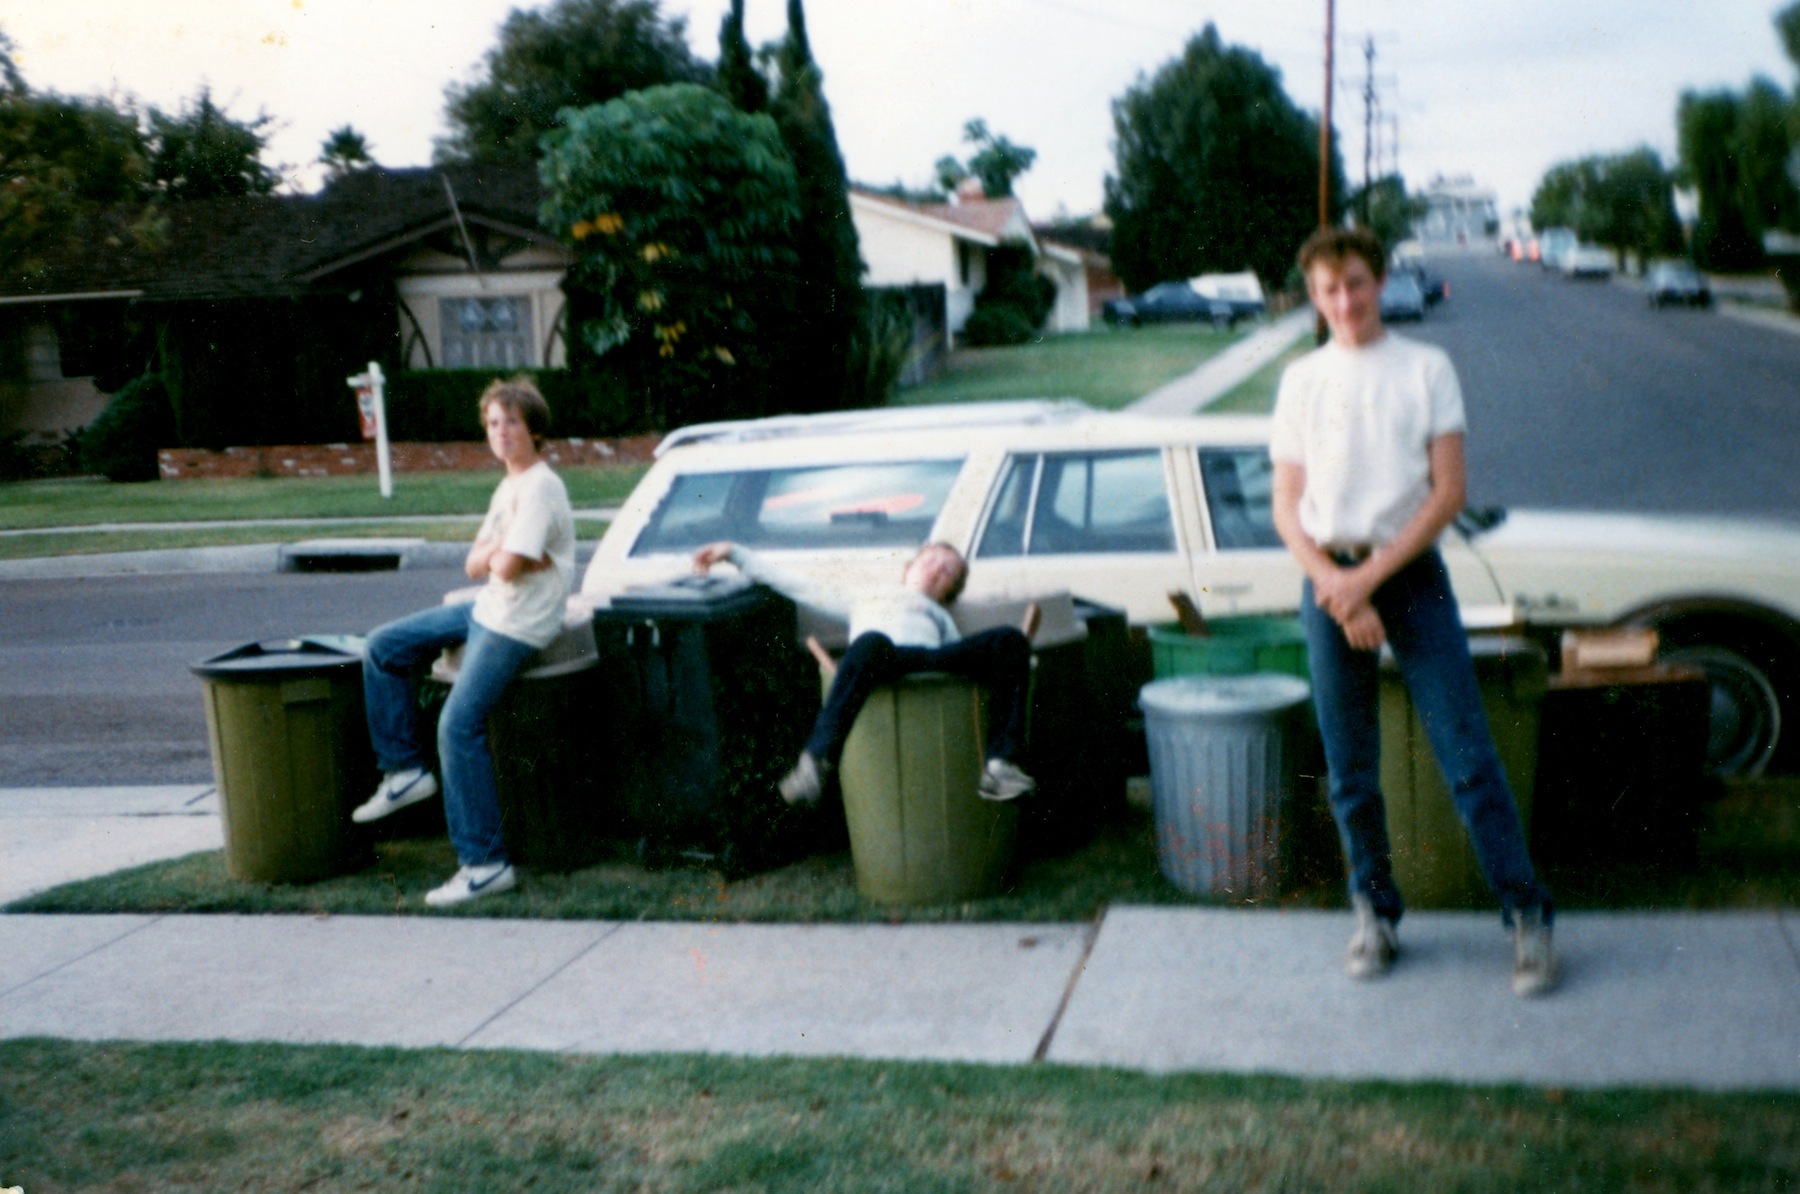
Dad liked to snap blurry pictures of us posing in front of Trash Cans. I am actually a little thankful for the fact this shot was out of focus.
Photographing Kids is not difficult
I’ve heard people say that taking photographs of kids is one of the hardest types of photography to master. I’d have to disagree, in fact I think that photographing kids is just about the easiest thing you could do with your camera.
You don’t have to use lights. You don’t have to make them pose. You don’t have to explain what looks good and you definitely don’t have to worry that they are self conscious. You just pick up the camera and shoot. It’s simple.
Chasing Cuteness
I actually have a term for photographing kids. I call it “Chasing Cuteness” and I think it’s exactly what kids photography is all about. My general rule of thumb with photographing kids is to put them in the right place where the light is good, give them a prop or a situation to deal with and then fire away.
I run around. I get on the ground. And I shoot. I shoot a lot of pictures. Getting a good photograph of kids is about chasing the cute things they do and hopefully capturing those cute things on camera. In short, you have to really match your own energy level with the energy level of kids which is extraordinarily high.

I come from a huge family – 12 brothers and sisters and it just gets bigger. I think at last count I have over 20 nieces and nephews so I get an endless amount of practice in taking pictures of kids. I wanted to give my list of the top 10 techniques that I have learned through trial and error on how to get the best shots of kids. These are techniques and approach that I use every time I pick up the camera.
1. Get out of the Studio
Here is the good news. You don’t need to have a fancy studio setup to take awesome pictures of kids, in fact you are better off if you get out of the studio and get into their natural element. You only need 1 studio shot a year of your kids and I consider that their school photos. Get outside. Go in their room. Go anywhere to take kid shots – just not in a studio.
2. Get on the Ground
If you read any tips on photographing kids this is the most common thing you will see. And that is because it is true. If you’re not cutting your eye level view down to under 2 or 3 feet than your not capturing the kids in the way that they see the world. When I shoot kids – I am sitting, and often times, laying on the ground even lower than them.

She’s under the bed hiding. I could only get this shot by laying down under the bed too.
3) Create a Situation, watch what unfolds
Kids are unpredictable in a predictable sort of way. Sure they can do anything at any moment but if you put a bowl of chocolate ice cream in front of them without a spoon what do you think will happen? My prediction is that you will end up with some hilarious shots of your kid with Ice Cream all over their face.

This is my favorite of all techniques. I try to come up with creative situations that will later tell a story about what is important to that kid. If they love to watch Mom put on makeup then I give them a mirror and some makeup brushes and create a situation where I am almost always guaranteed a great shot.

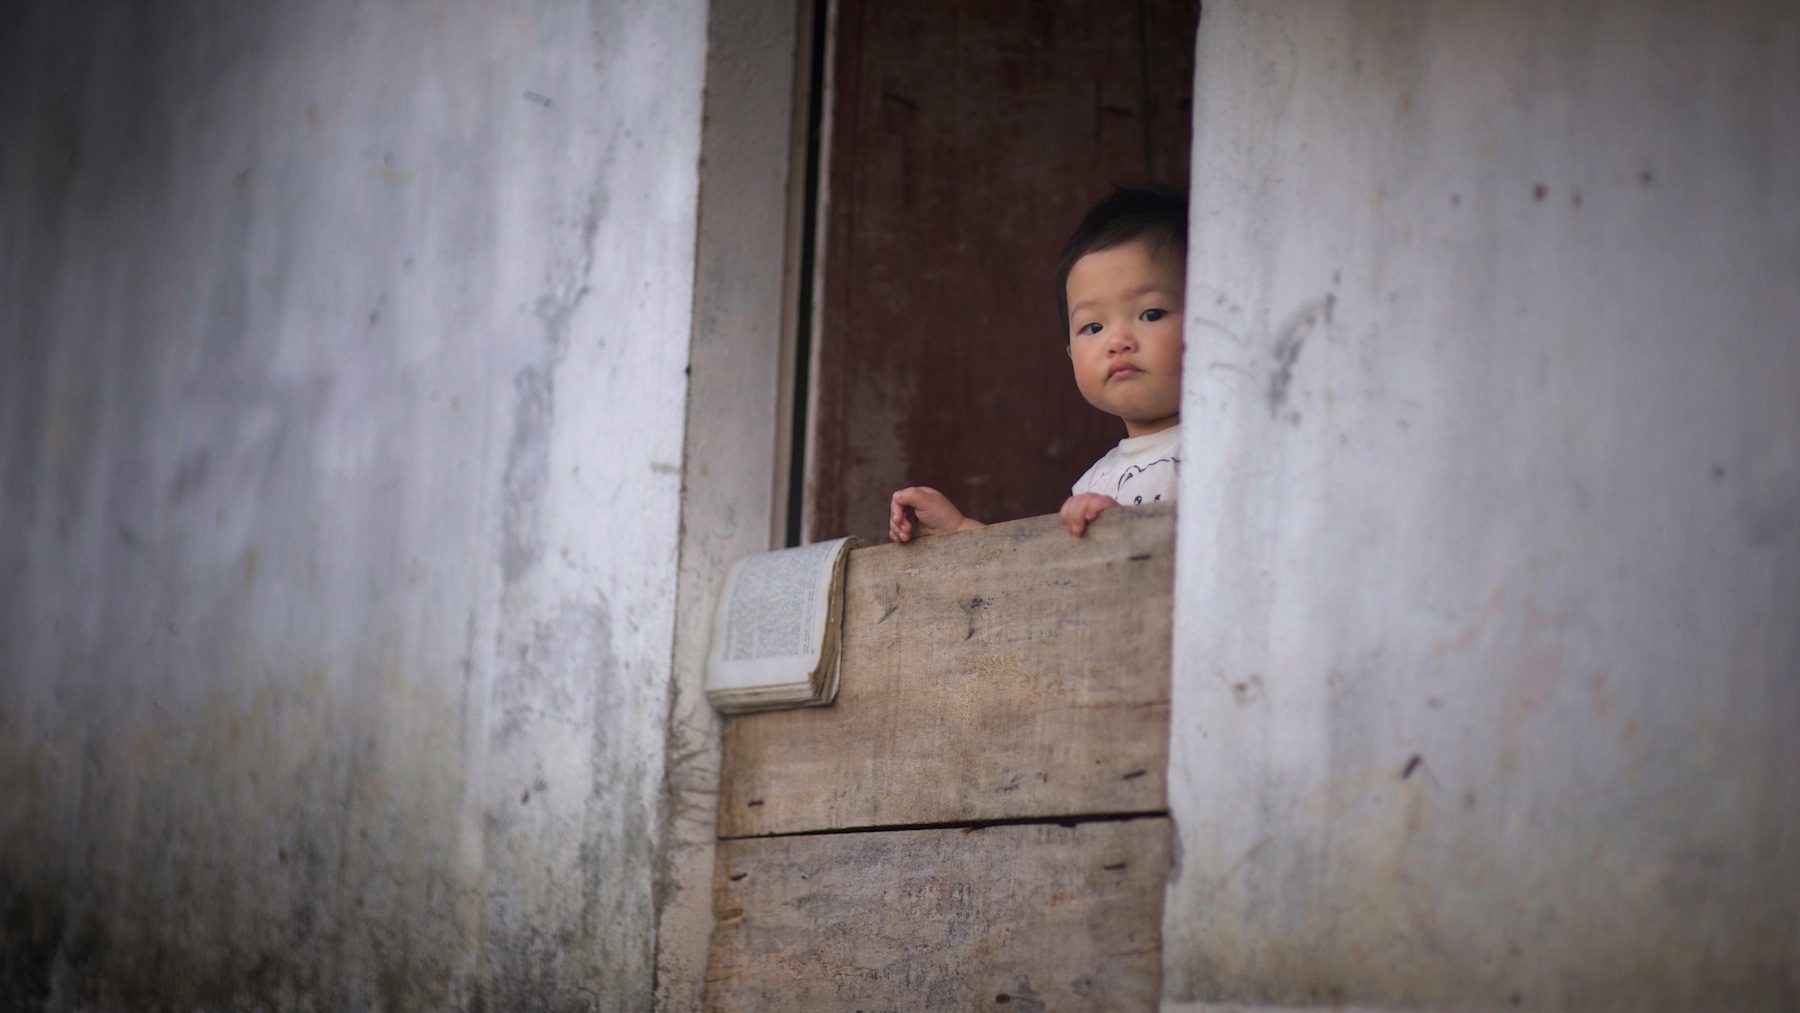
We gave this little boy in Vietnam a kitten to play with and ended up with some great shots.
4) Use a Fisheye Lens
If you’re going to take a lot of pictures of kids – invest in a fisheye lens. Not only can you capture a wide scene of whats going on but you can capture the mood of what its like to be a kid where everything is slightly larger than life. I like to use a technique called the Jarvie Window which I wrote about here. It’s a great technique to use at Kids Parties and can be a lot of fun. The Jarvie Window Technique

Using a Fisheye lens lets you capture the energy of kids and is also wide enough to capture all of the chaos.
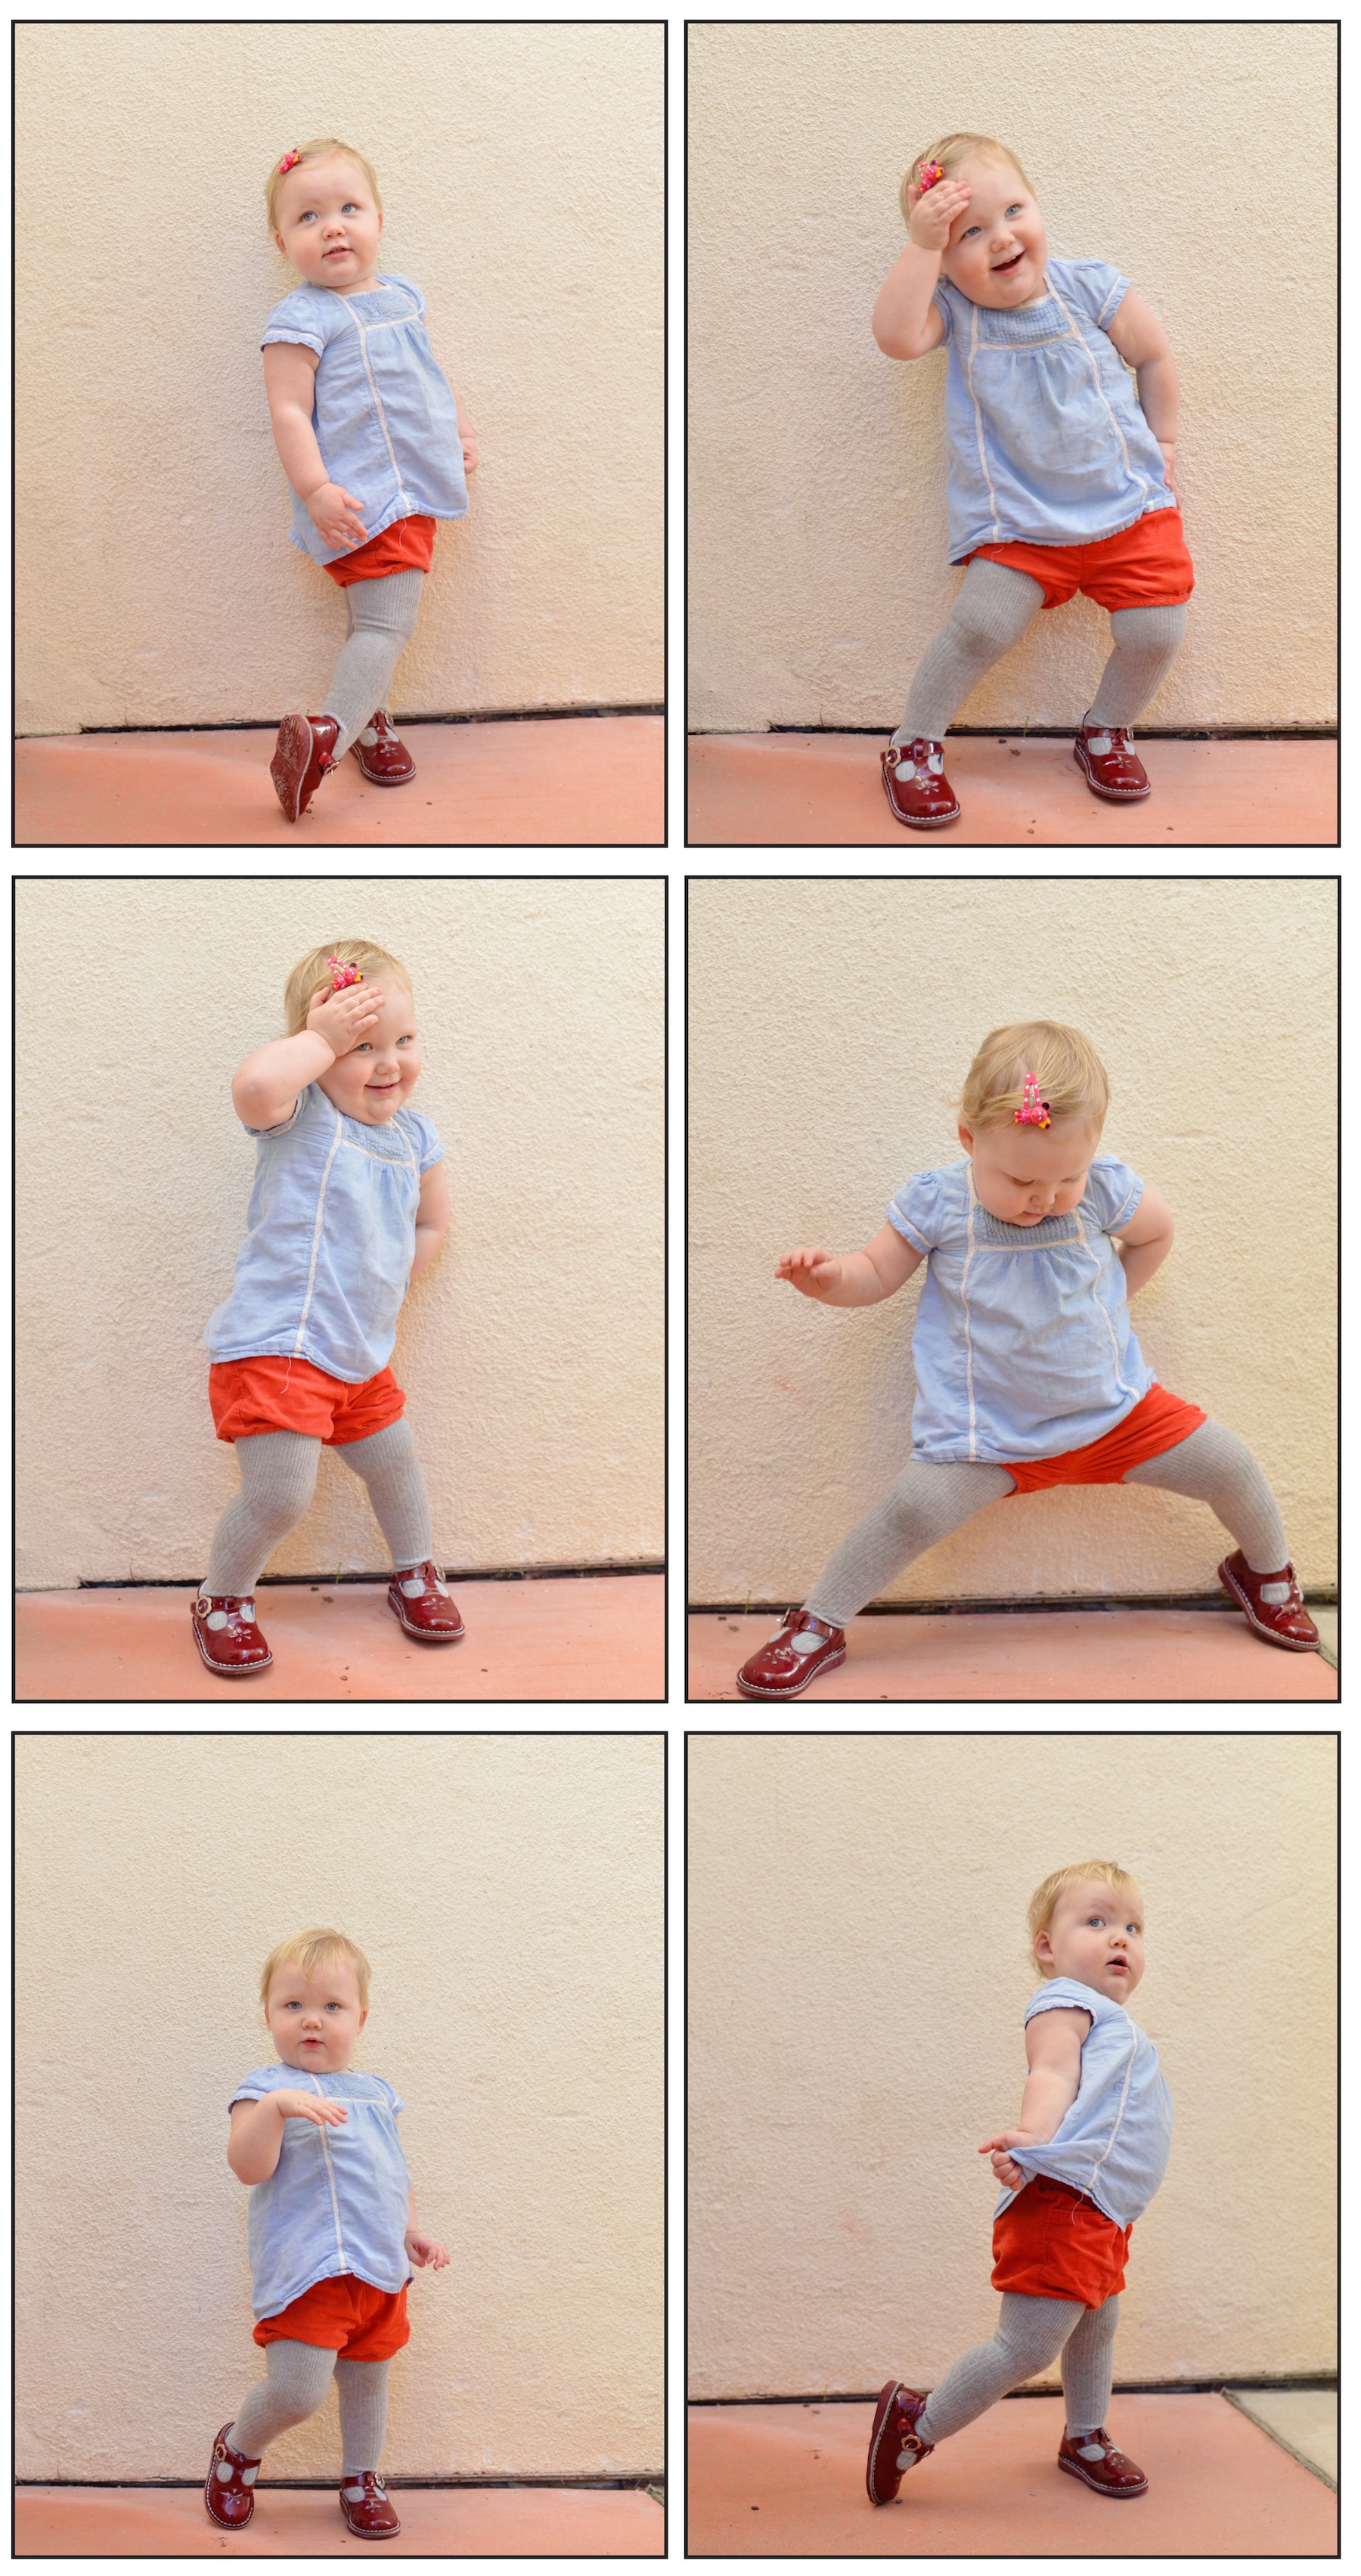
5) Machine gun shoot.
A lot of people don’t like it but with kids you have to do it or you will miss the best moments. Put your camera on high speed mode and shoot. The average adult will blink 25 times a minute. The average kid will change their facial expressions dramatically almost as often so you have to machine gun shoot to get the cutest shots. Sure you end up throwing out a lot of the shots but there are those golden gems that are priceless that you could not get without employing this technique.

All these pictures were taken within 30 seconds. She goes through all the human emotions in that short period of time.
6) Let them see your pictures. Let them take a couple of pictures.
Kids love to see their pictures. If you stalling out in taking cool pictures of kids. Show them your viewfinder and what you have come up with and I guarantee they are going to come up with a bunch of new ideas for you. Of course you can give them the camera and take some cute pictures of them trying to take pictures. That works too.

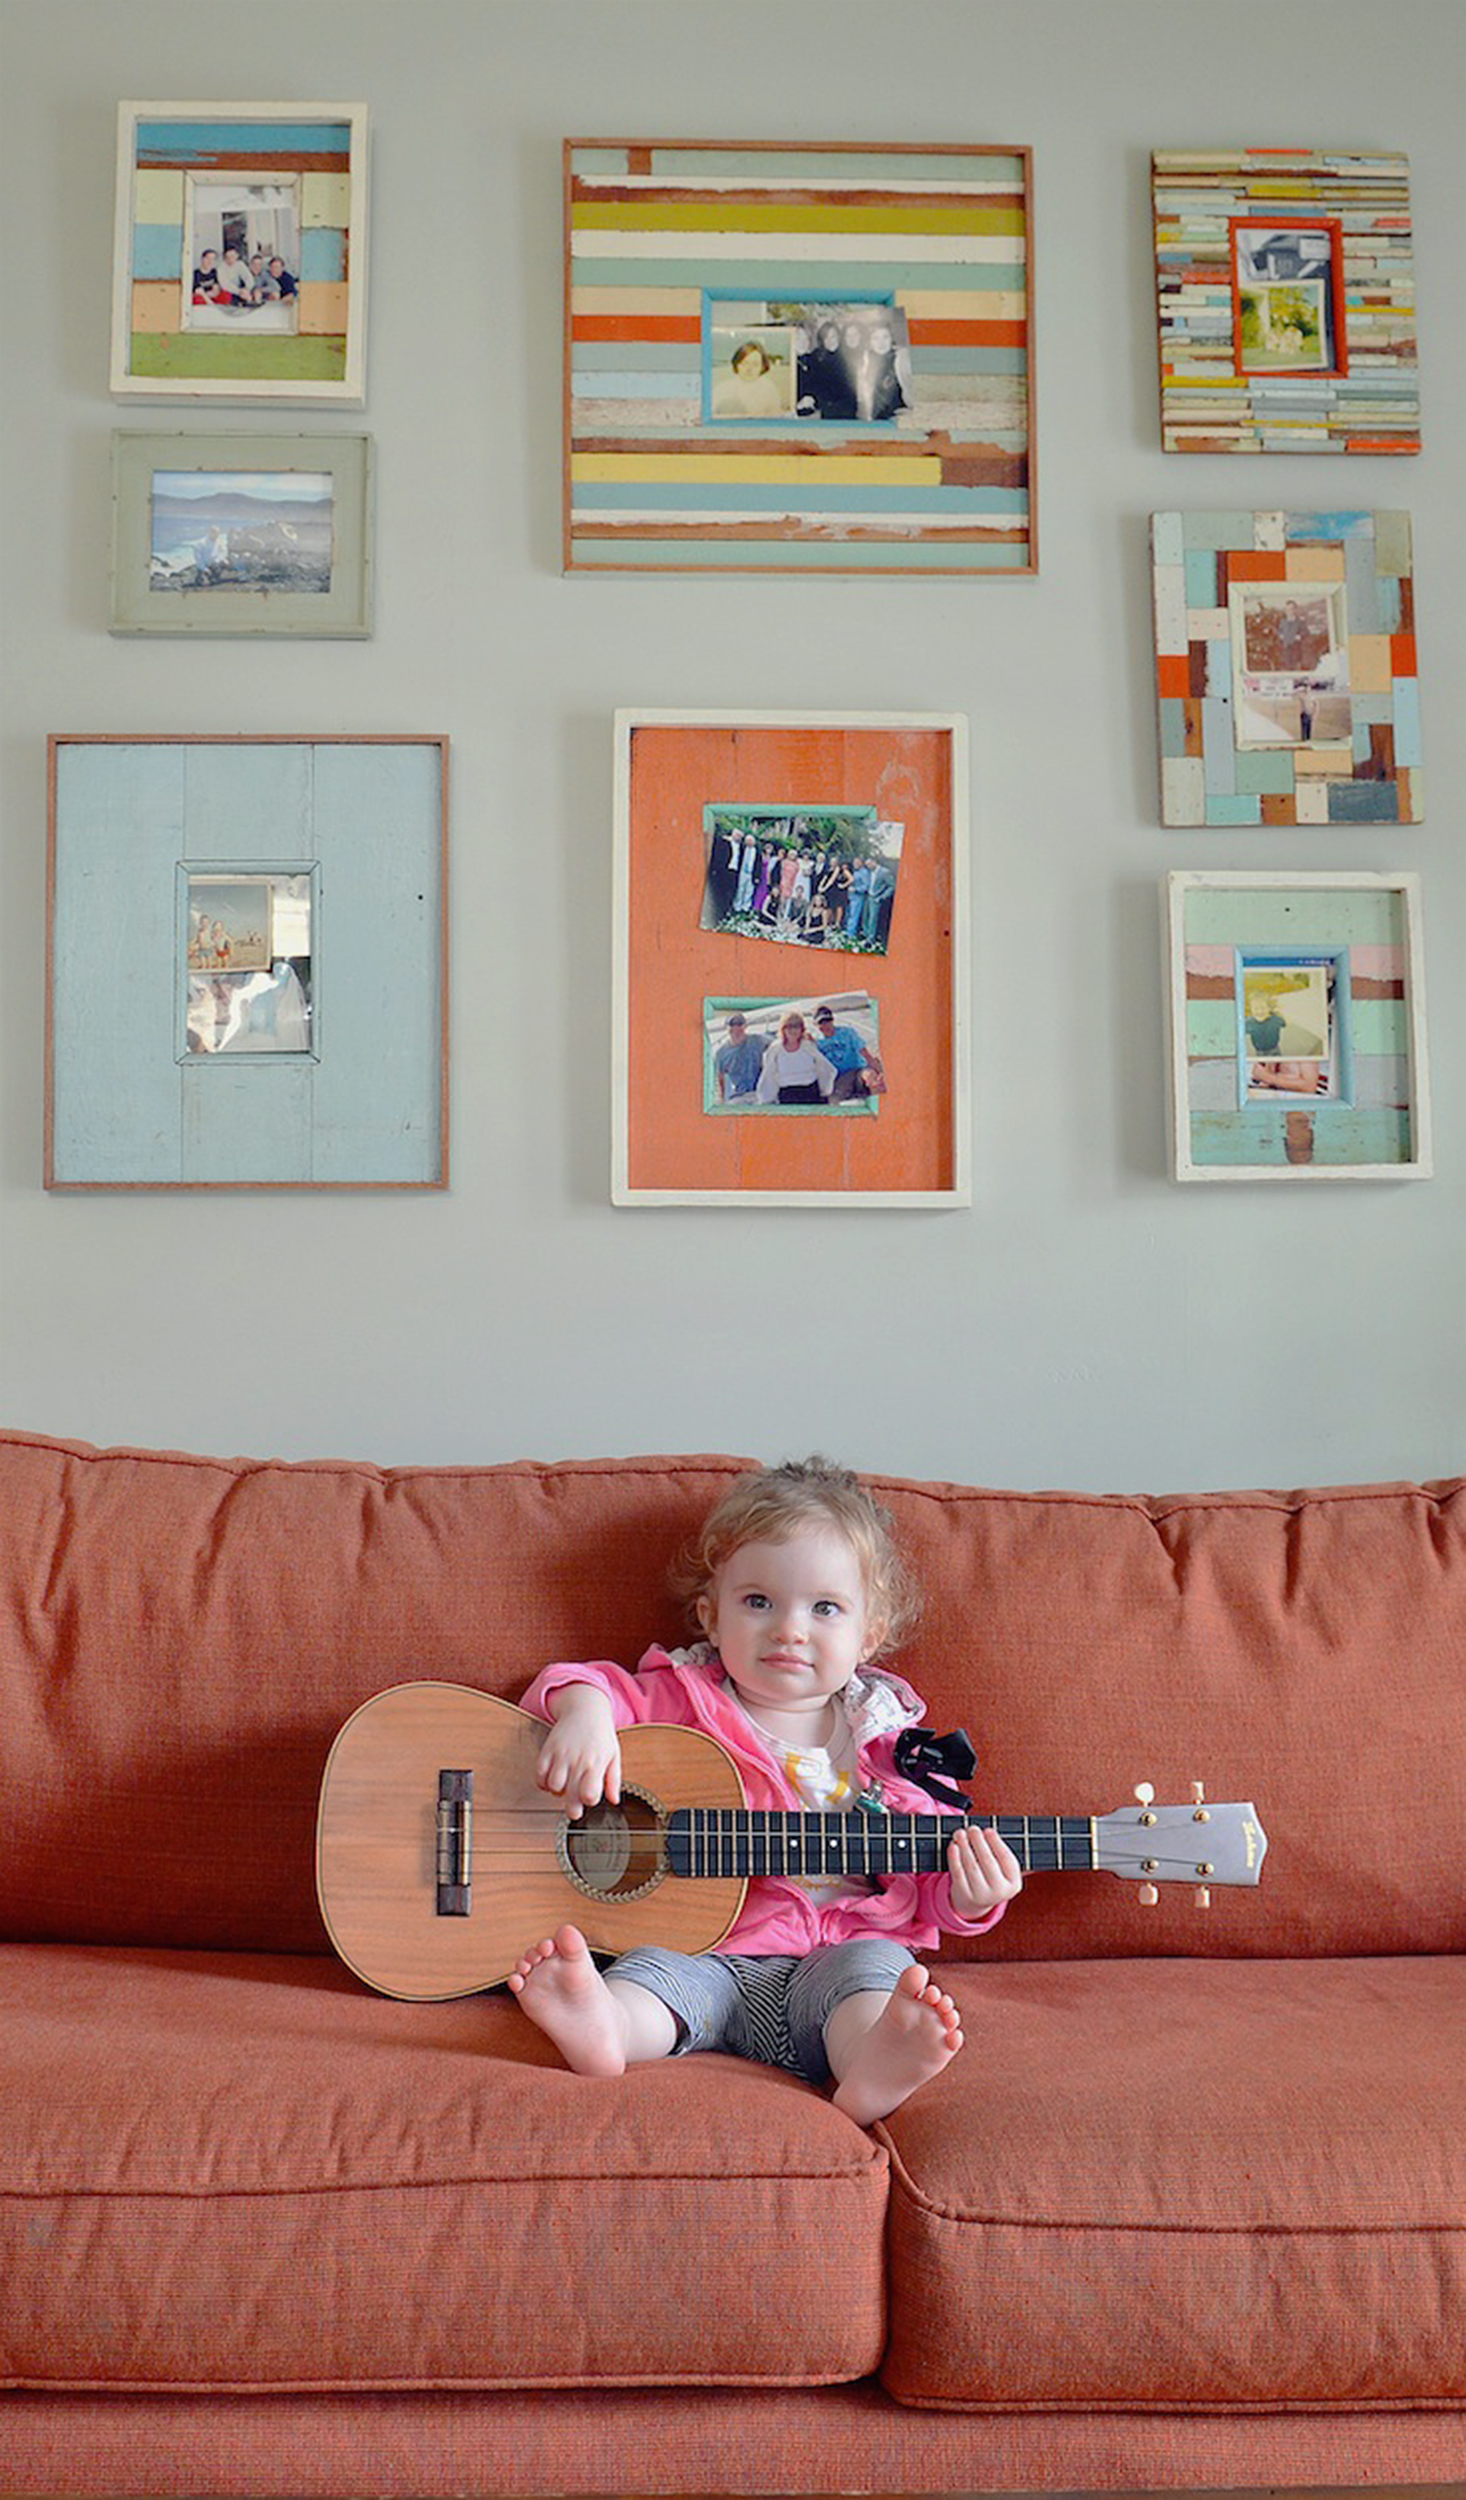
7) Put them in big stuff.
Kids pretending to be adults is a sure fire way for cuteness. I like to put big shoes on kids (like their parents shoes) and take pictures. You can also give them your parents guitar, or put them on their parents drum set. Whatever you can do to put the kids in a situation where they are acting like their parents in a cute way works pretty well.

8) Don’t say no
Half of why photographing kids is so cool is because their imaginations and their creativity is way beyond our adult minds. I usually come into a situation where I am photographing kids with my own notion of what I want to capture and it is never what I actually do. My rule of thumb is to pretty much never say No to a kid about their ideas. Most of them are good. No, in fact most of them are great. Just let them run with their ideas and you will probably be much happier with the result.

Let a kid be awesome without saying no to whatever silly thing they come up with in their mind.
9) Get a helper behind you
Kids have short attention spans and sometimes you need someone to help you keep them in one place long enough for you to shoot something spectacular. One technique that I like to use is to have a helper behind me who can coax the kids into doing cute things. The benefit of having a helper behind you while shooting is that you can get the kids to appear to be looking straight into the camera for some great shots.
We were able to get her to make some incredibly cute poses by showing her what to do. I could not have done this alone.
10) Don’t stop the camera when they cry
When I am taking pictures of kids and they start crying, my first instinct is to stop shooting. I guess in my mind I have been programmed to believe that all pictures should be happy. A while ago, I started ignoring those instincts and just kept the camera going. I find that these shots are often just as good as any others. It’s part of growing up and its part of who kids are so I just try to capture it as it happens.
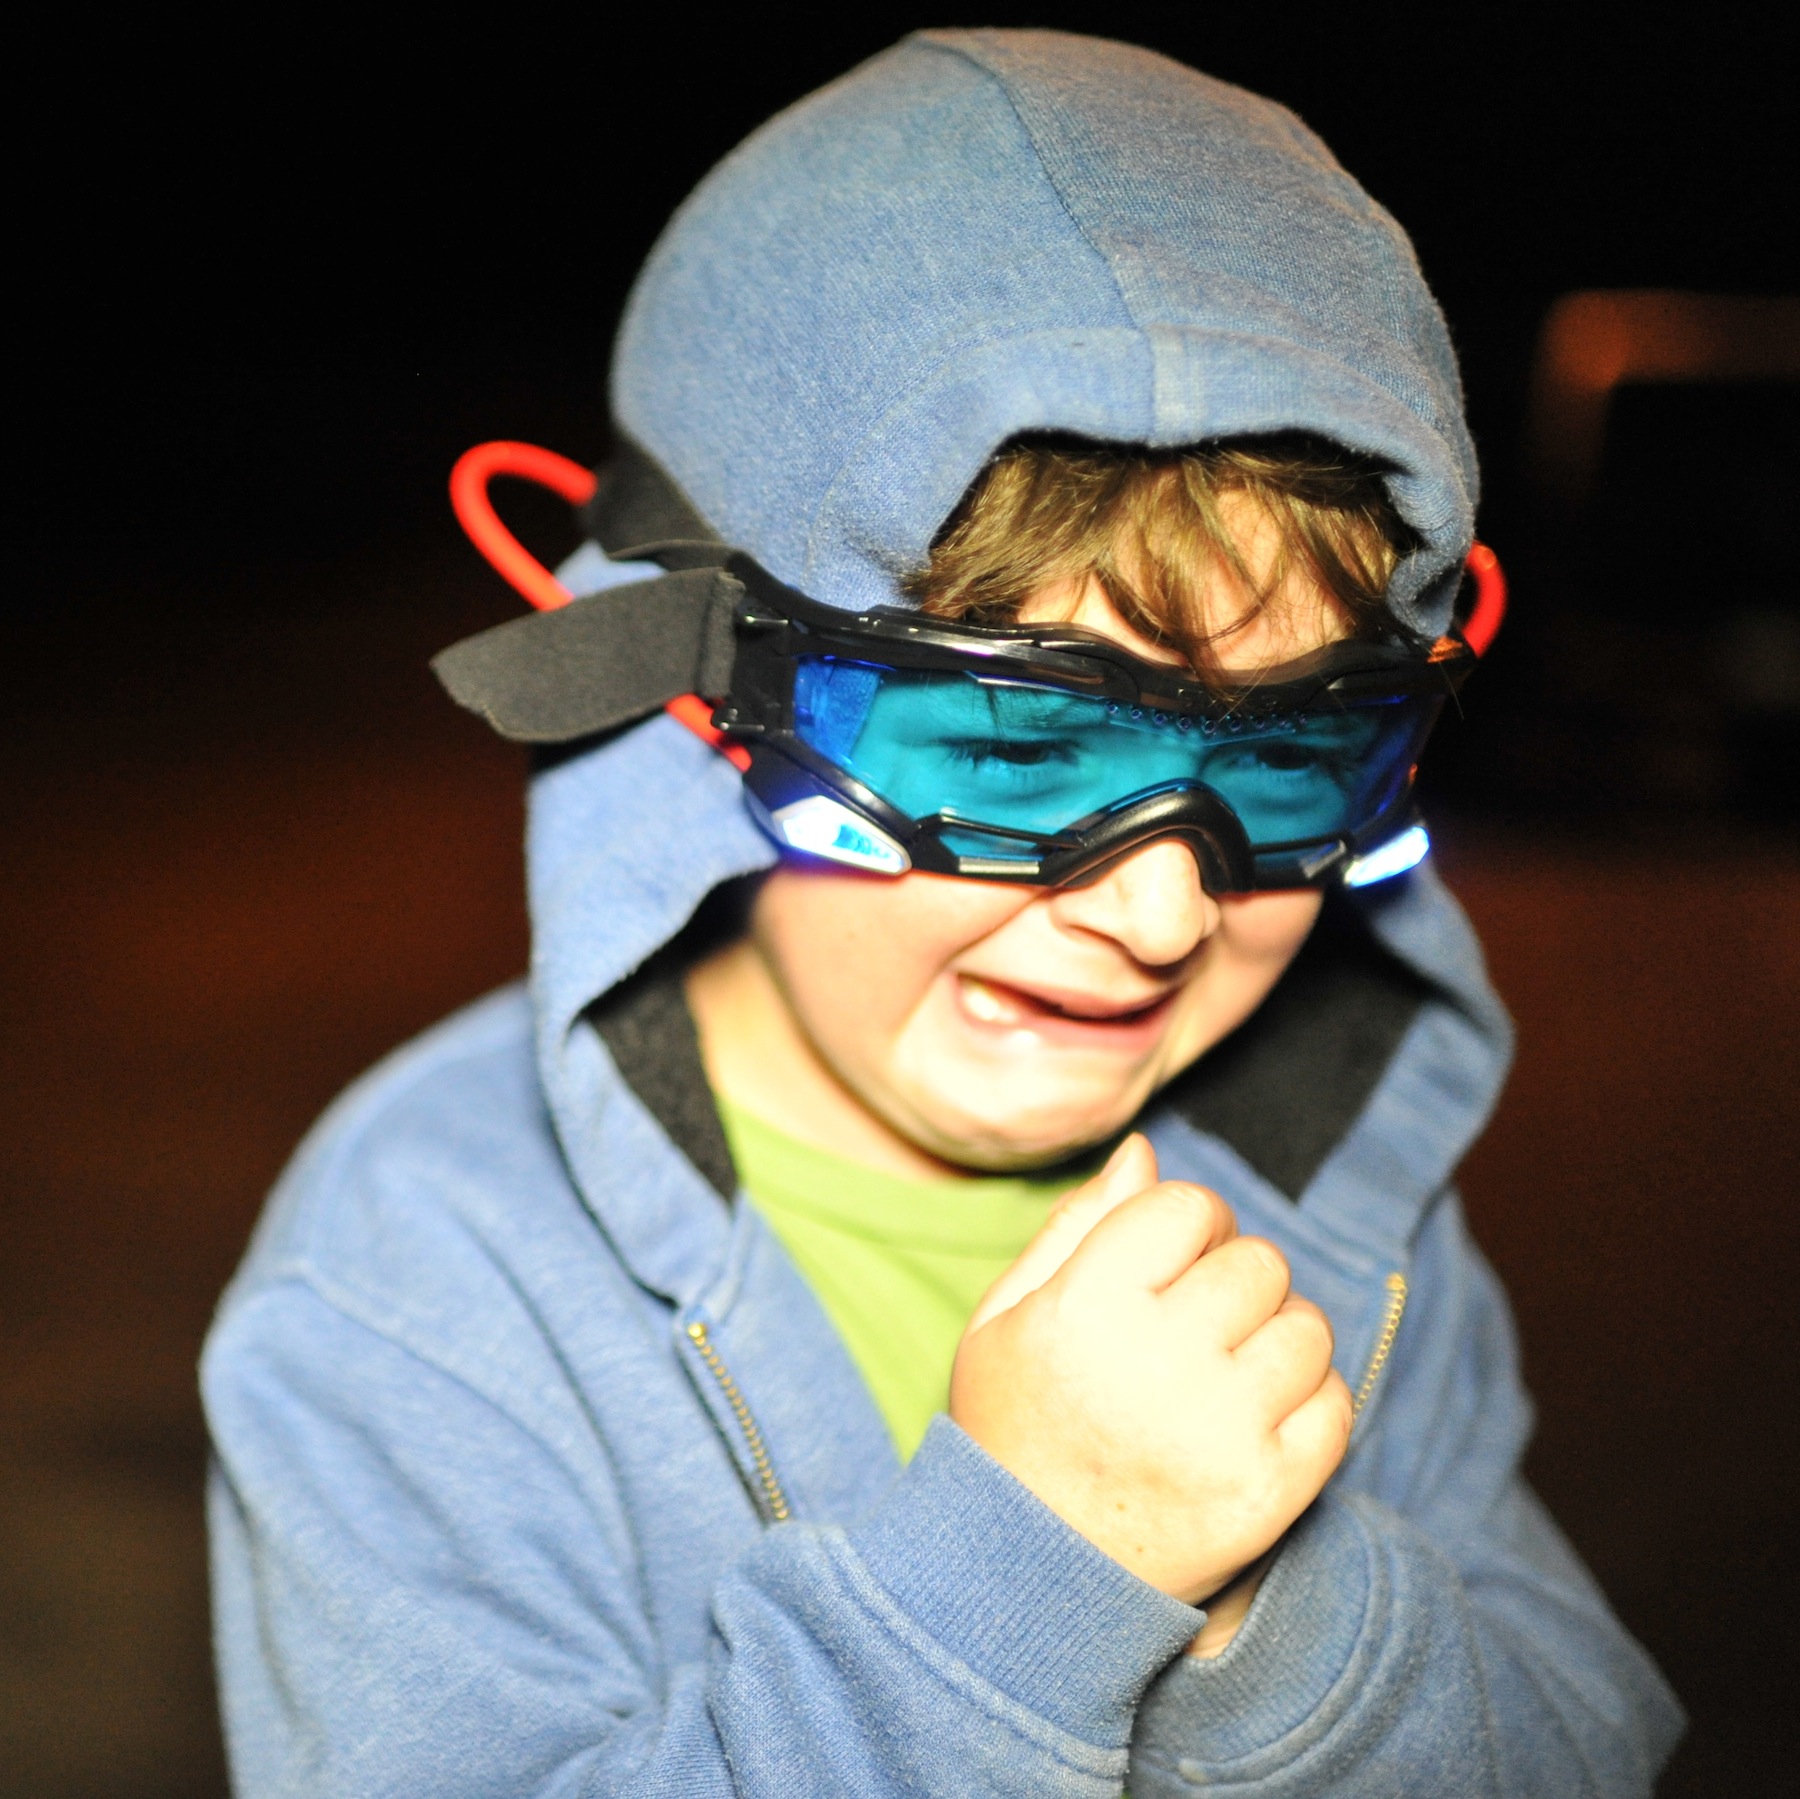
He was crying because he was afraid of a fish. Now he has a good picture and story to tell when he is older.
Anyone can take great Kid Photos with patience and energy
The great thing about photographing kids is that just about anyone with enough energy and patience can capture some pretty good kid photos. You don’t need an extraordinary camera. You don’t need to have expensive lighting. You don’t even need to understand all those complicated buttons on your camera. Just make sure you have good lighting, an interesting situation and chase the cuteness down.
If you want to check out some of my other kid photography you can see them in my gallery here – Frank McKenna – Kids.
Living Off the Grid in Very Strange Slab City

“You better be buying something”, she said to me as she took a long zip from the Tall Miller High Life she was holding. She was managing what appeared to be a permanent yard sale and from the looks of it some of the stuff she was trying to sell looked like it had probably been there a long, long time. She looked pretty sunburned there under her trucker hat but to tell you the truth everyone here did. I smiled in agreement.
I poked around a bit at the stuff on the table and decided on something better. “I’ll tell you what”, I said, “I’ll give you a few bucks to let me take a picture of you and your boyfriend.” I figured a picture of some local folks from Slab City was the best souvenir I could ever bring back from this place. They were pretty happy with that.
They were even happier when I told them they could bring their Miller High Life’s and smokes for the picture. Something tells me they never leave home without each – Millers and smokes.
I was on the outskirts of a small town with a sign that read, “Slab City – The Last Real Free Place on Earth”. I had stumbled on it quite accidentally while driving to reach somewhere else. Living in the last free place on earth certainly sounds attractive but I was not sure from the looks of it if this was a place I would ever settle down in.
I mean this place is so far off the beaten path that police would probably never venture out here. There were no roads. No Traffic Lights. No running water. Nothing, just Trailer Homes, Yard Sales and something else interesting I would come to find out – Art and a small community of people that cared for each other.
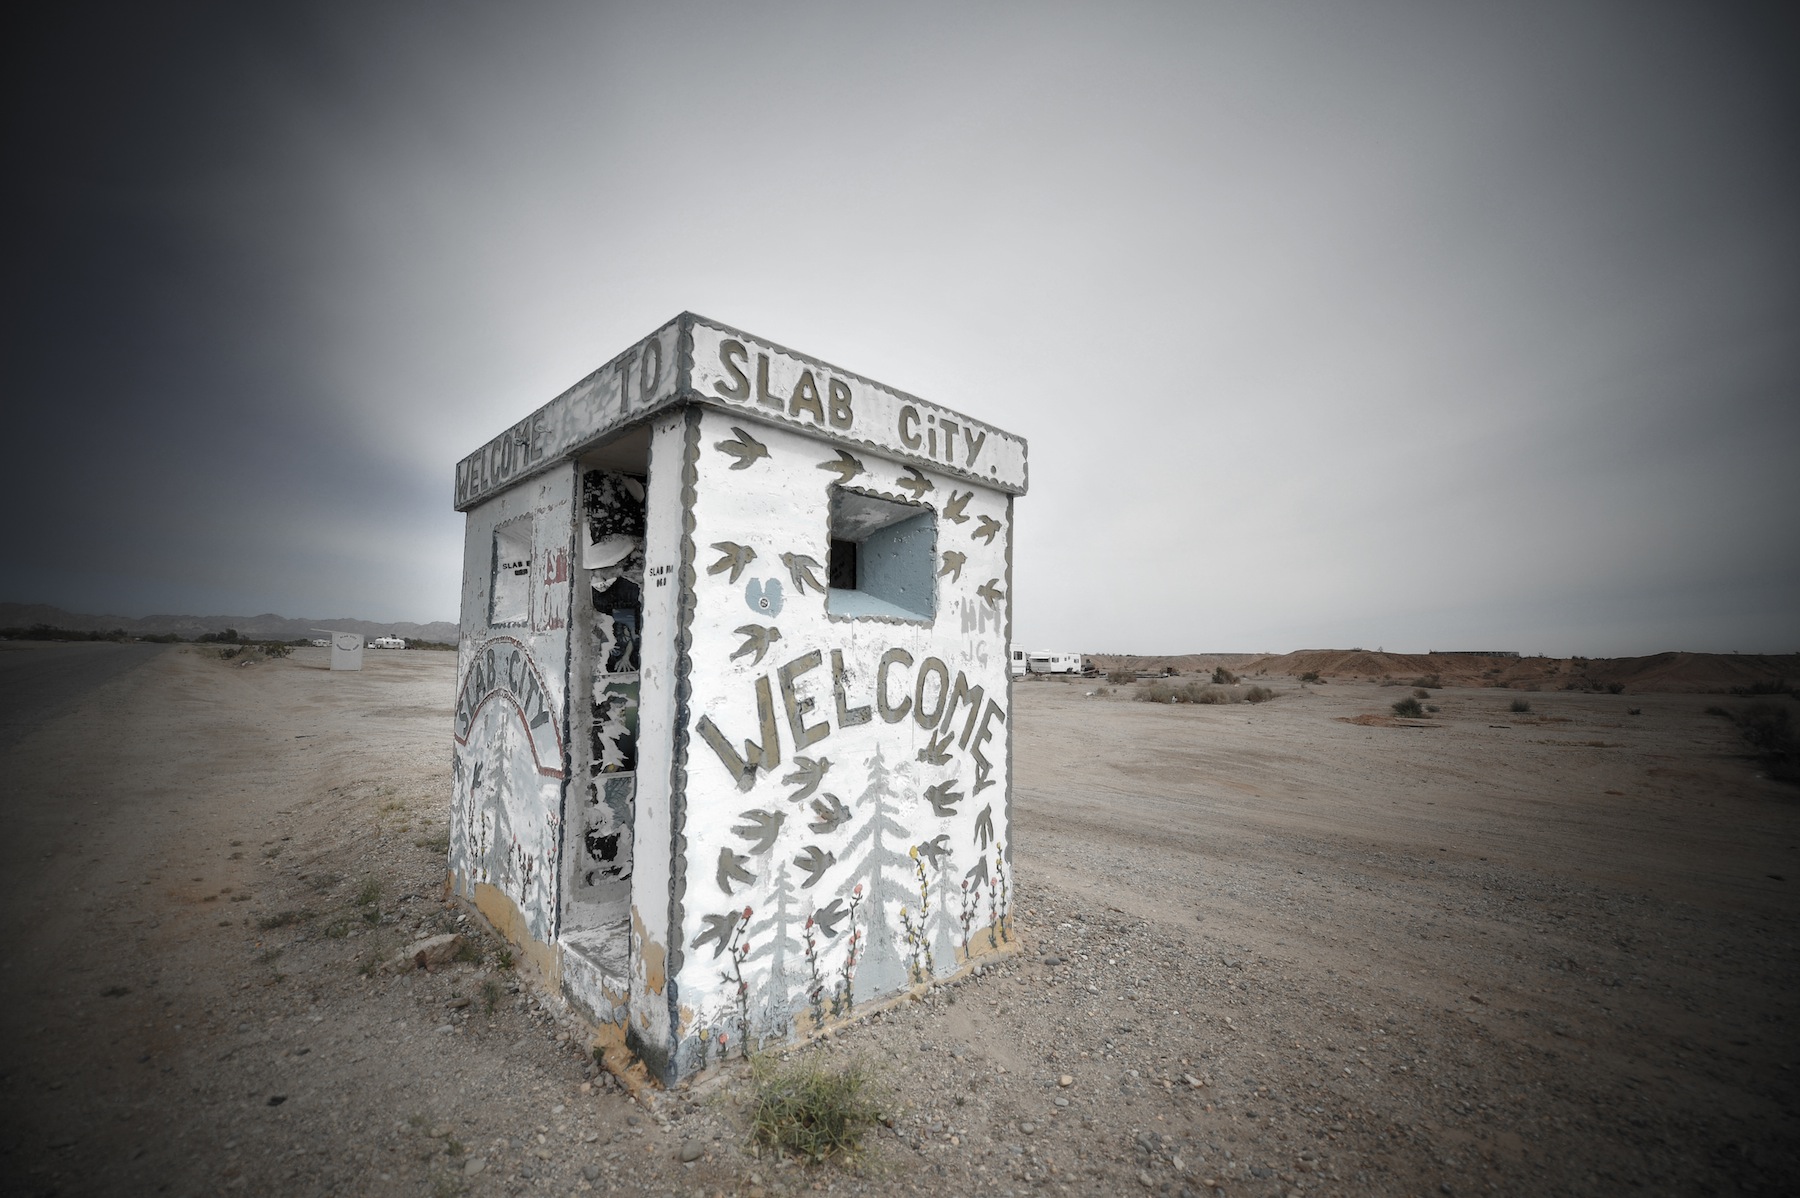
Grand entrance to Slab City greets travelers, tourist and Slabbers
World War II put the “Slab” in Slab City
In 1942, the Marines built a marine base in the middle of the Colorado Desert to train Marines to fight the Germans and Japanese. The 640 acre compound was called Camp Dunlap Marine Training Facility and it was 120 feet below sea level. Soldiers trained at this camp until the end of the war.
When the camp was later dismantled in 1956, the only thing they left were the huge concrete slabs that they had used for the foundation of the buildings and tents.
The concrete slabs started to attract Trailers and RV owners who loved the free parking and the ability to camp in a location with pretty mild weather during the winter. Later when the Salton Sea grew in popularity, Slab City as it became known was the premier location for snowbirds from all over the country.
Slab City Community Bulletin Board in the town center
Slab City not only attracted snowbirds however. Soon Slab City was attracting fugitives, derelicts, gypsies and people that just wanted to live off the grid. There is no electricity, no running water, no gas, no restaurants, no stores in Slab City – just people living in trailers, tents, RV’s and any where else that they can find.
The Slabber’s Life
If you live in Slab City, you’re a Slabber. Slab City is the Wild, Wild West – the last truly free place on earth. Slab City was featured in a movie called “Into the Wild” and has since attracted more people.
It’s part hippy commune, party art community and part drop out society. They tend to take care of each other here in spite of the fact that slab city is one of the poorest cities in the poorest counties of California.
While Slab City is free, its not without it’s problems or disputes. Builder Bill (one of the most famous residents here) and the guy that takes care of Salvation Mountain believes that there is a growing divide in the town between the younger generation and the older generation, a conflict that is hurting the town’s carefree but caring culture. Slab City is just like any other city in many ways.
An Encounter with Cuervo and two mules
One particularly interesting Slabber is Cuervo. While driving along a dusty road into Slab City there he was. He had two mules. He was wearing a cowboy hat but certainly didn’t look like your typical cowboy.
I had to do a double take while I was driving because seeing two people riding mules down a desert road just look so unusual. It was just one of many things that made me do a double take during my day in Slab City. Cuervo was on his way into Niland – another derelict town 3 miles away.
I am not sure why they call him Cuervo but something tells me he might have liked Tequila at one point.
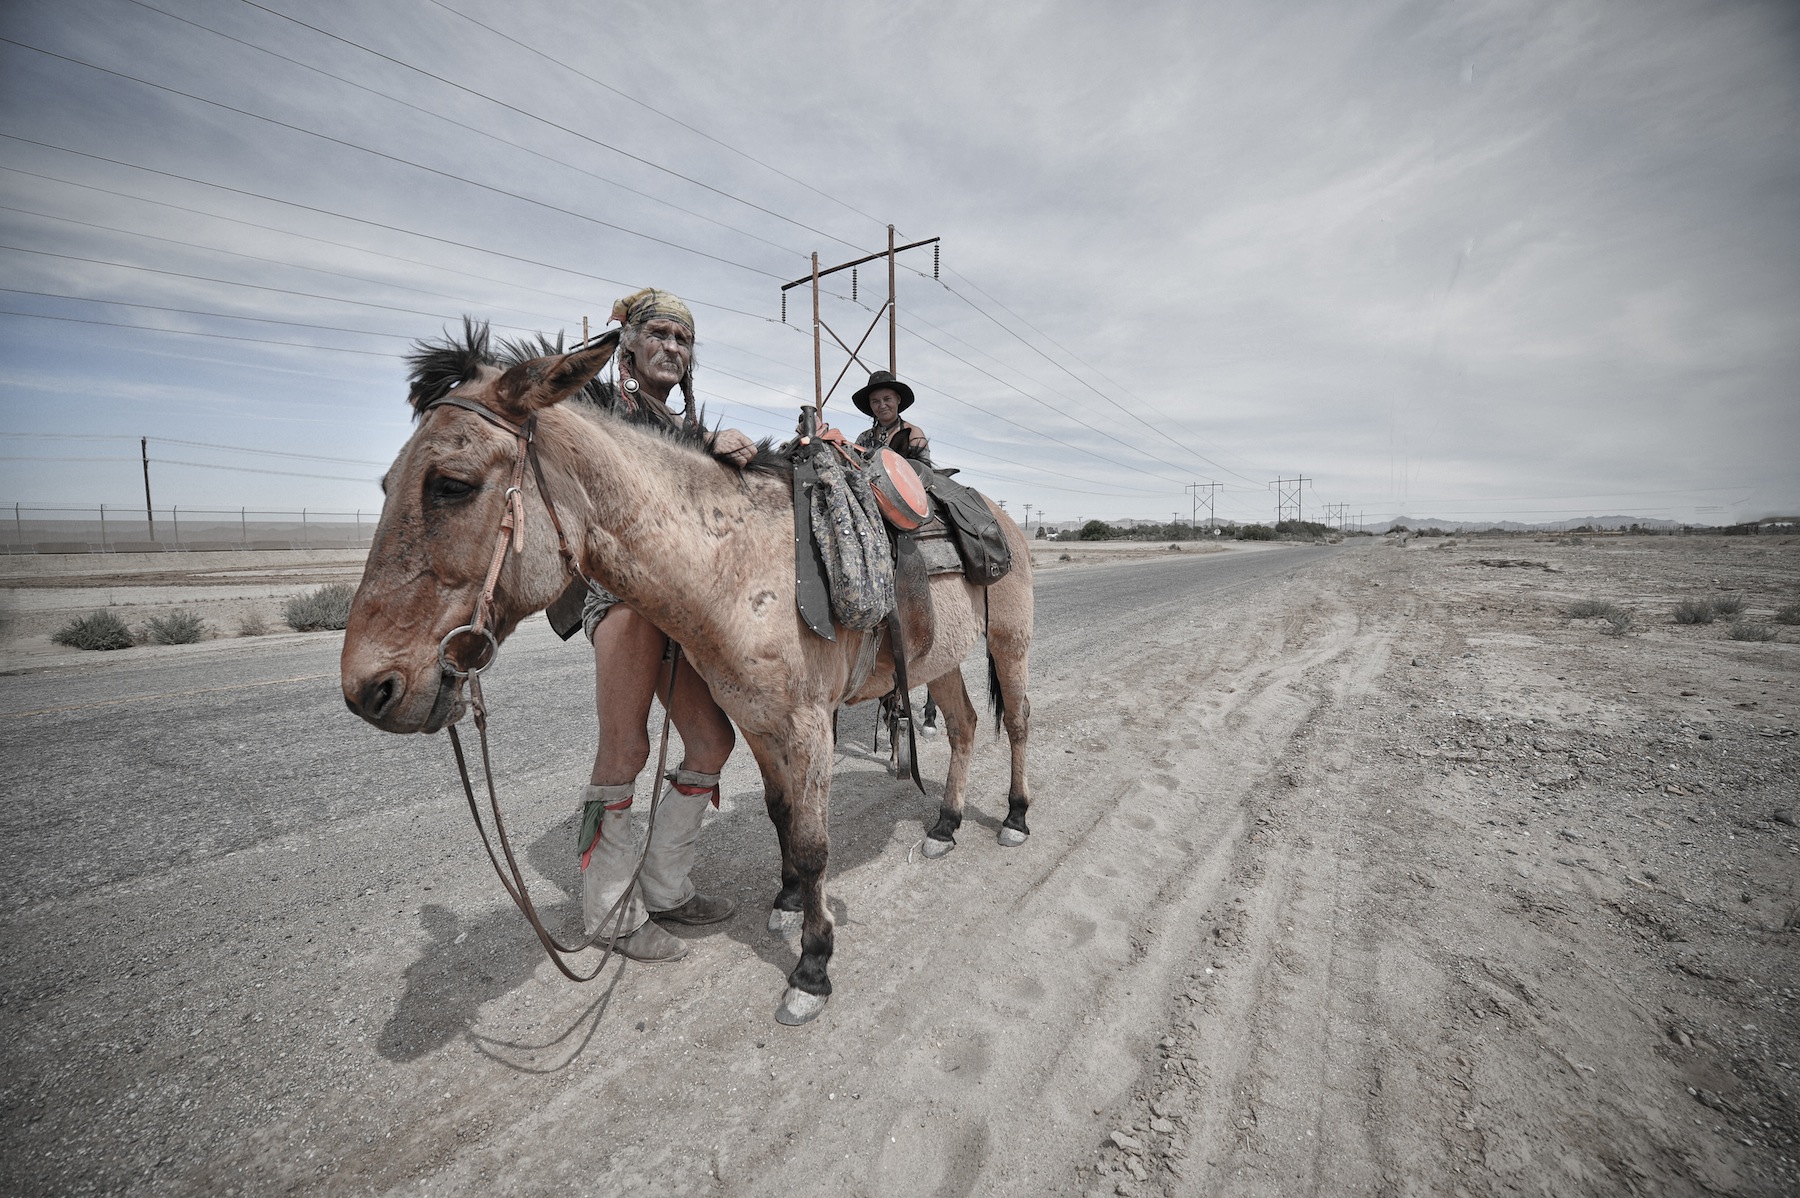

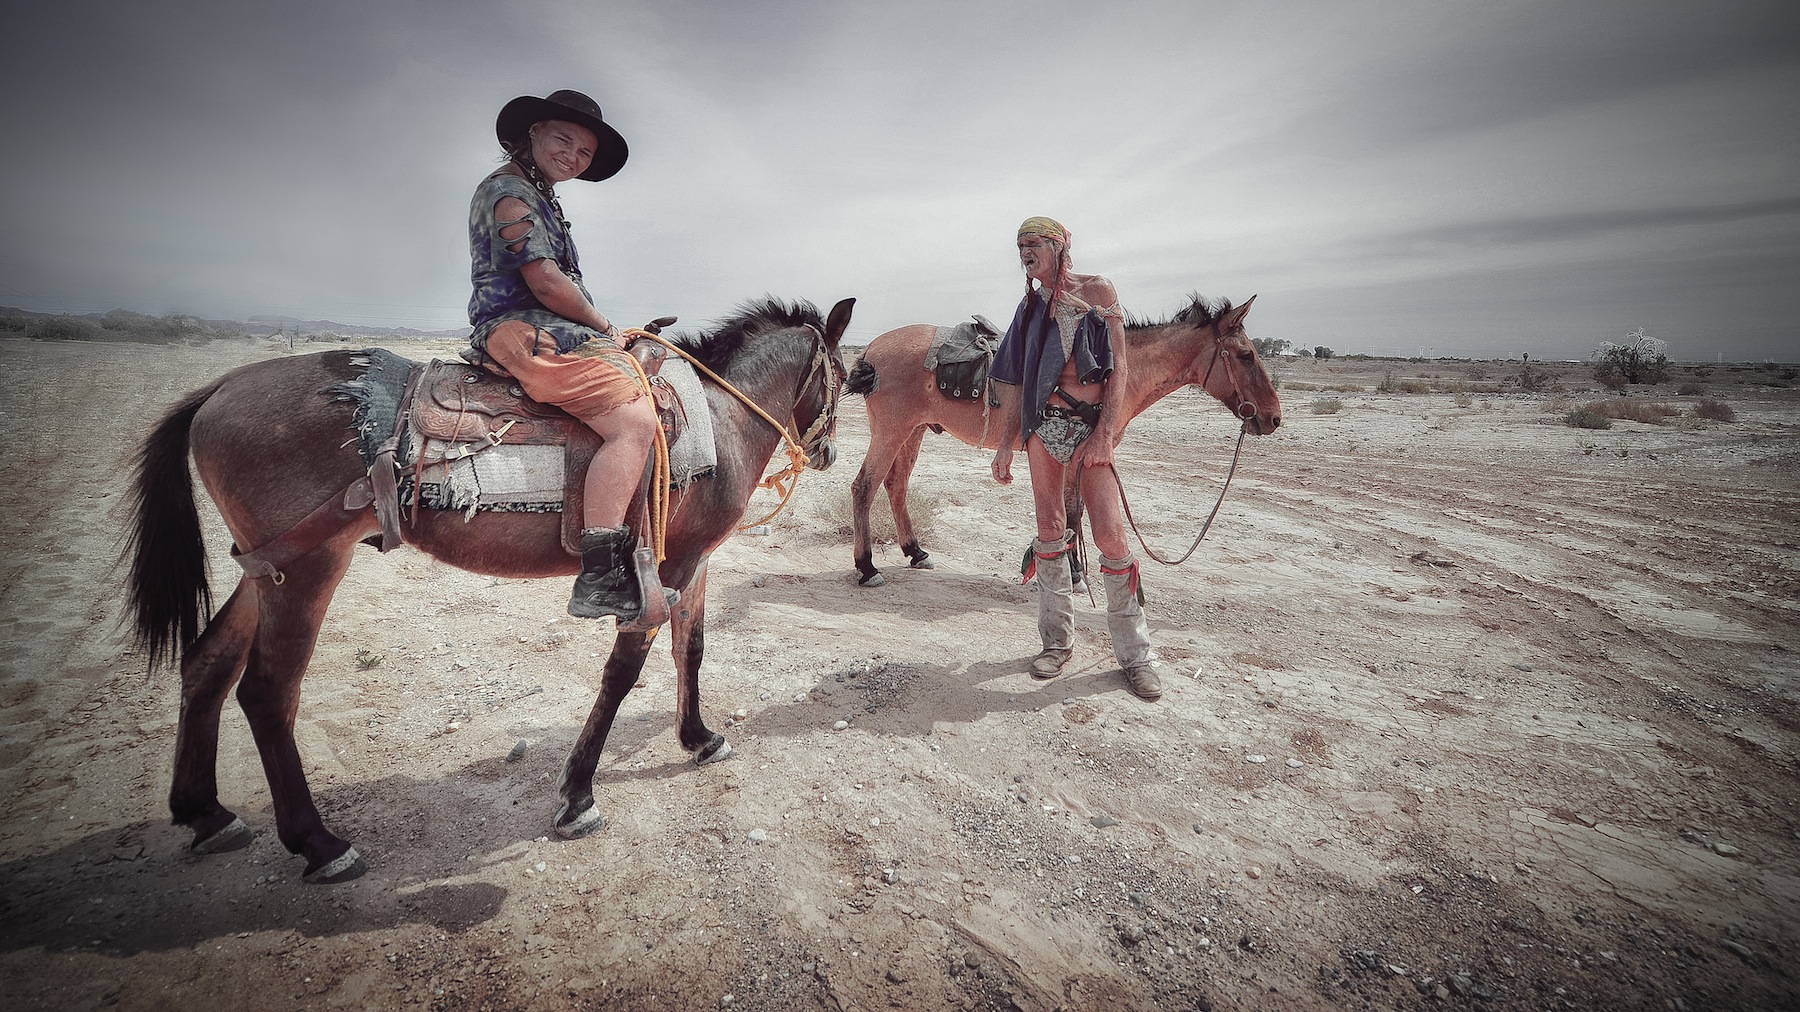
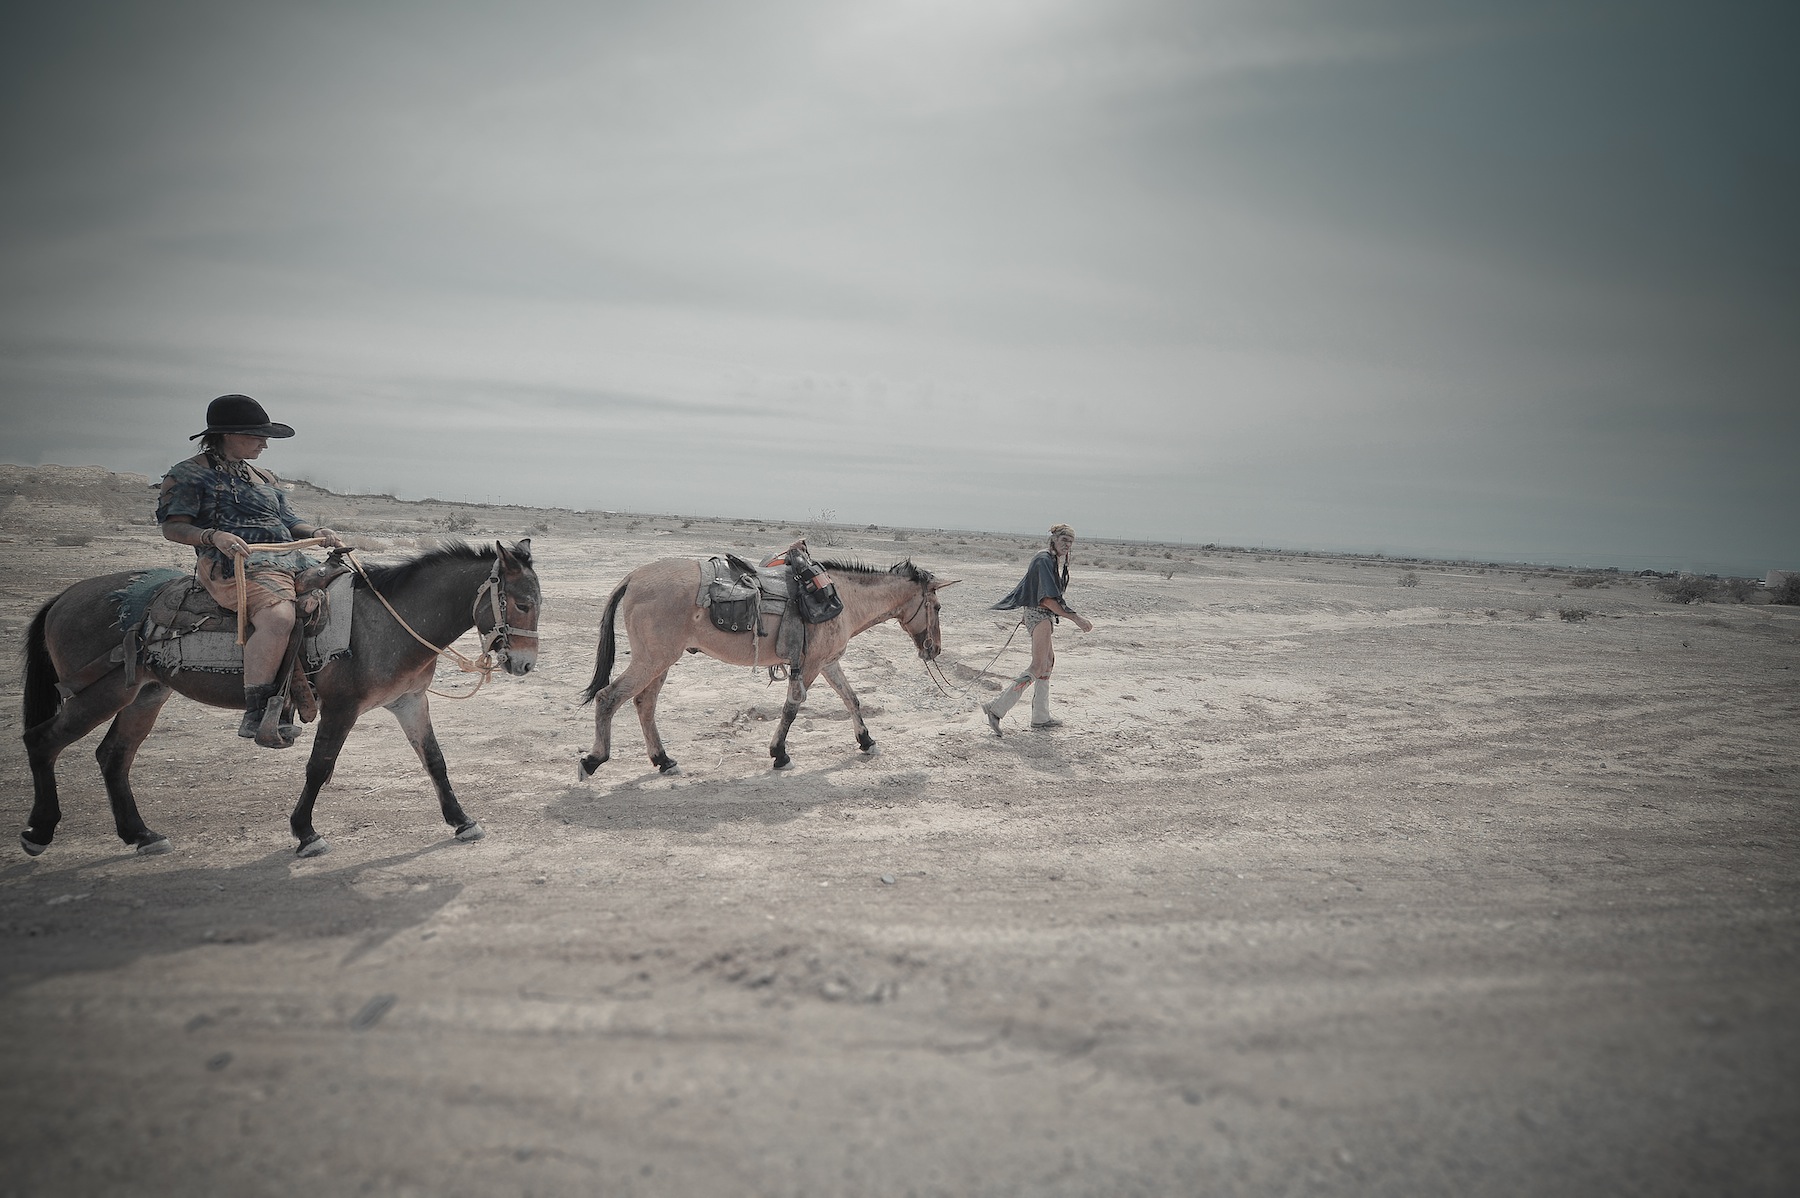
Cuervo and his lady companion stop for a breather along the road to Niland.
After taking a few pictures, I said goodbye to Cuervo. I watched them ride off on their mules into Niland. I saw them a couple of more times during the day – as it turns out they were camped out at Salvation Mountain where I was spending some time.
Discovering the art and passion of Slab City
I have to admit. When I was on my way out to visit Slab City I thought I was really going out to see motor homes and some strange guy that made a mountain of paint. And I did see that, but I also so much more.
I wrote about my experience at Salvation Mountain and Leonard Knight which you can find here: Lord Take me to Salvation Mountain.
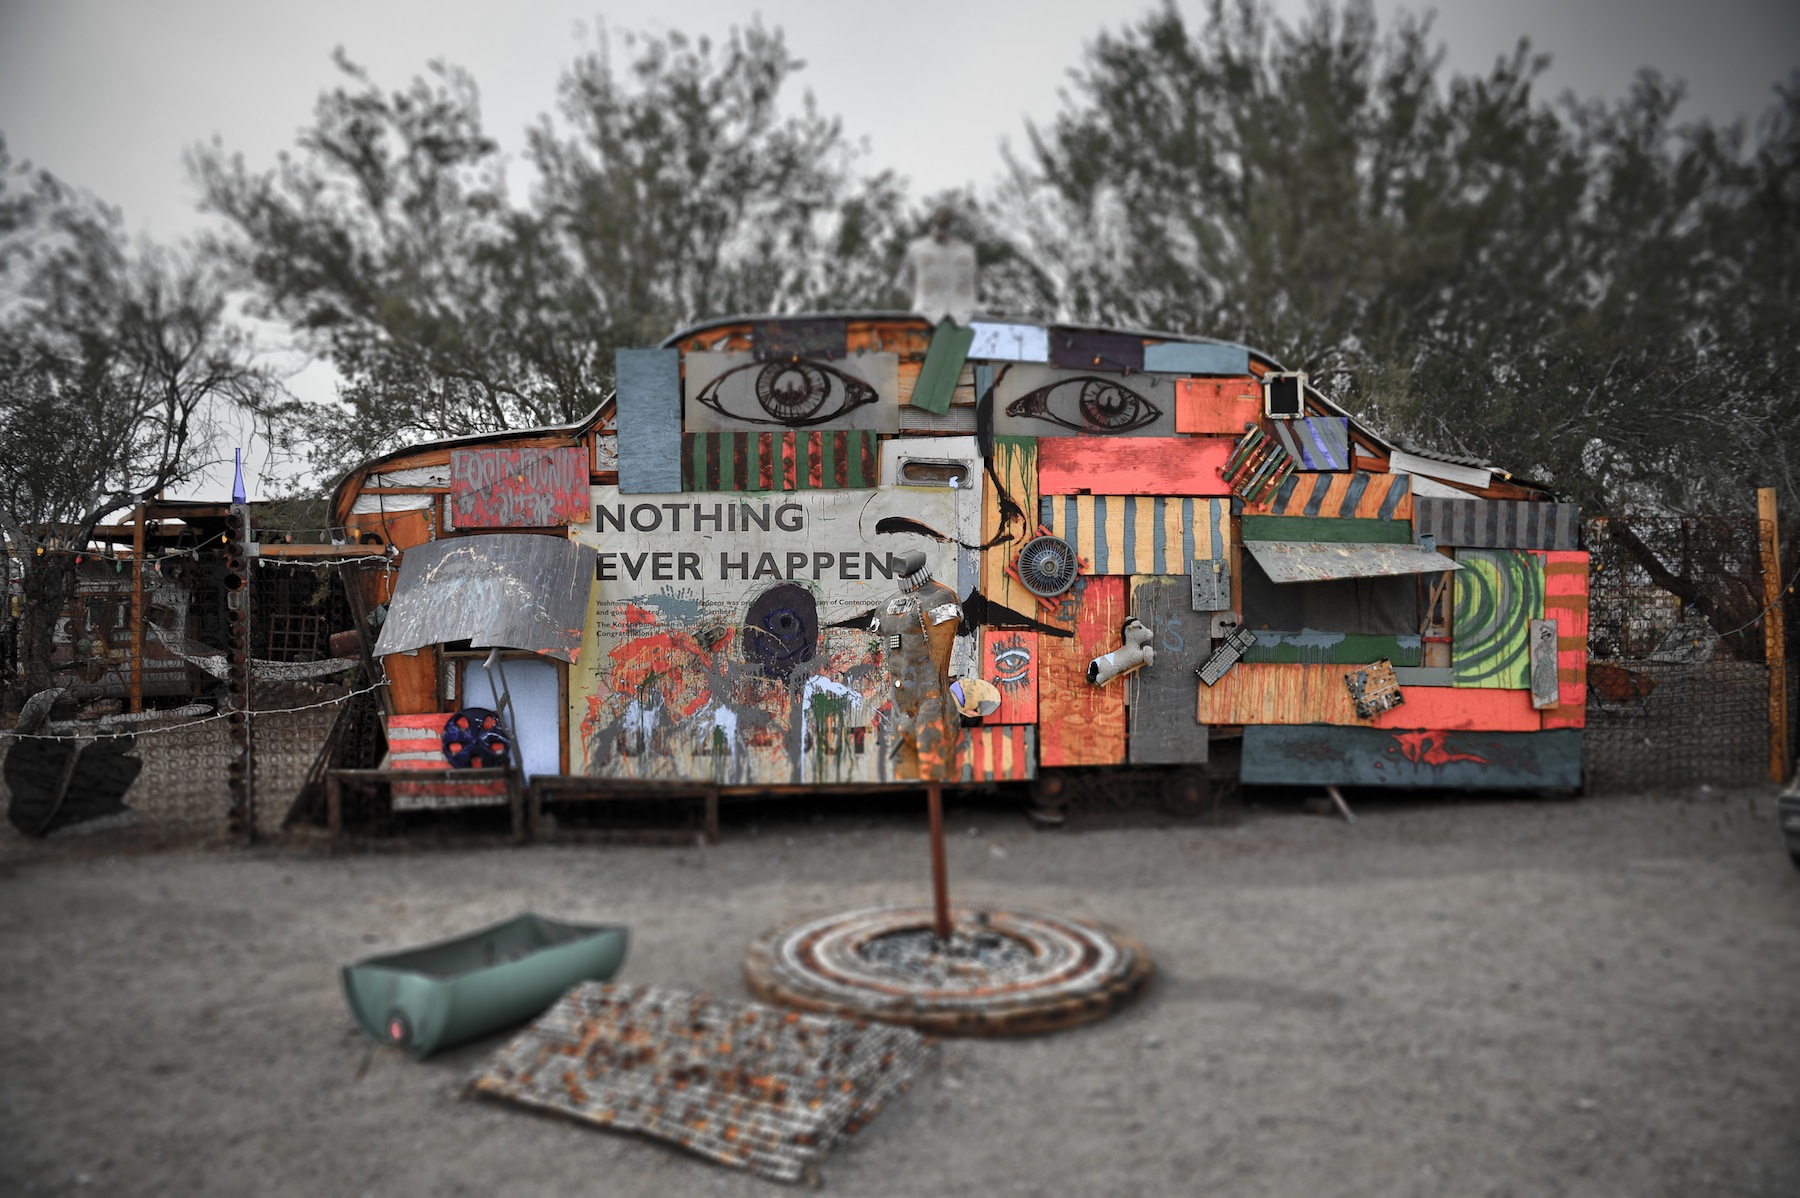
But there was a lesser known art camp in Slab City called East Jesus that a photographer prompted me to visit as well. You really get the feeling out in Slab City that your going to find something interesting every time you turn around.
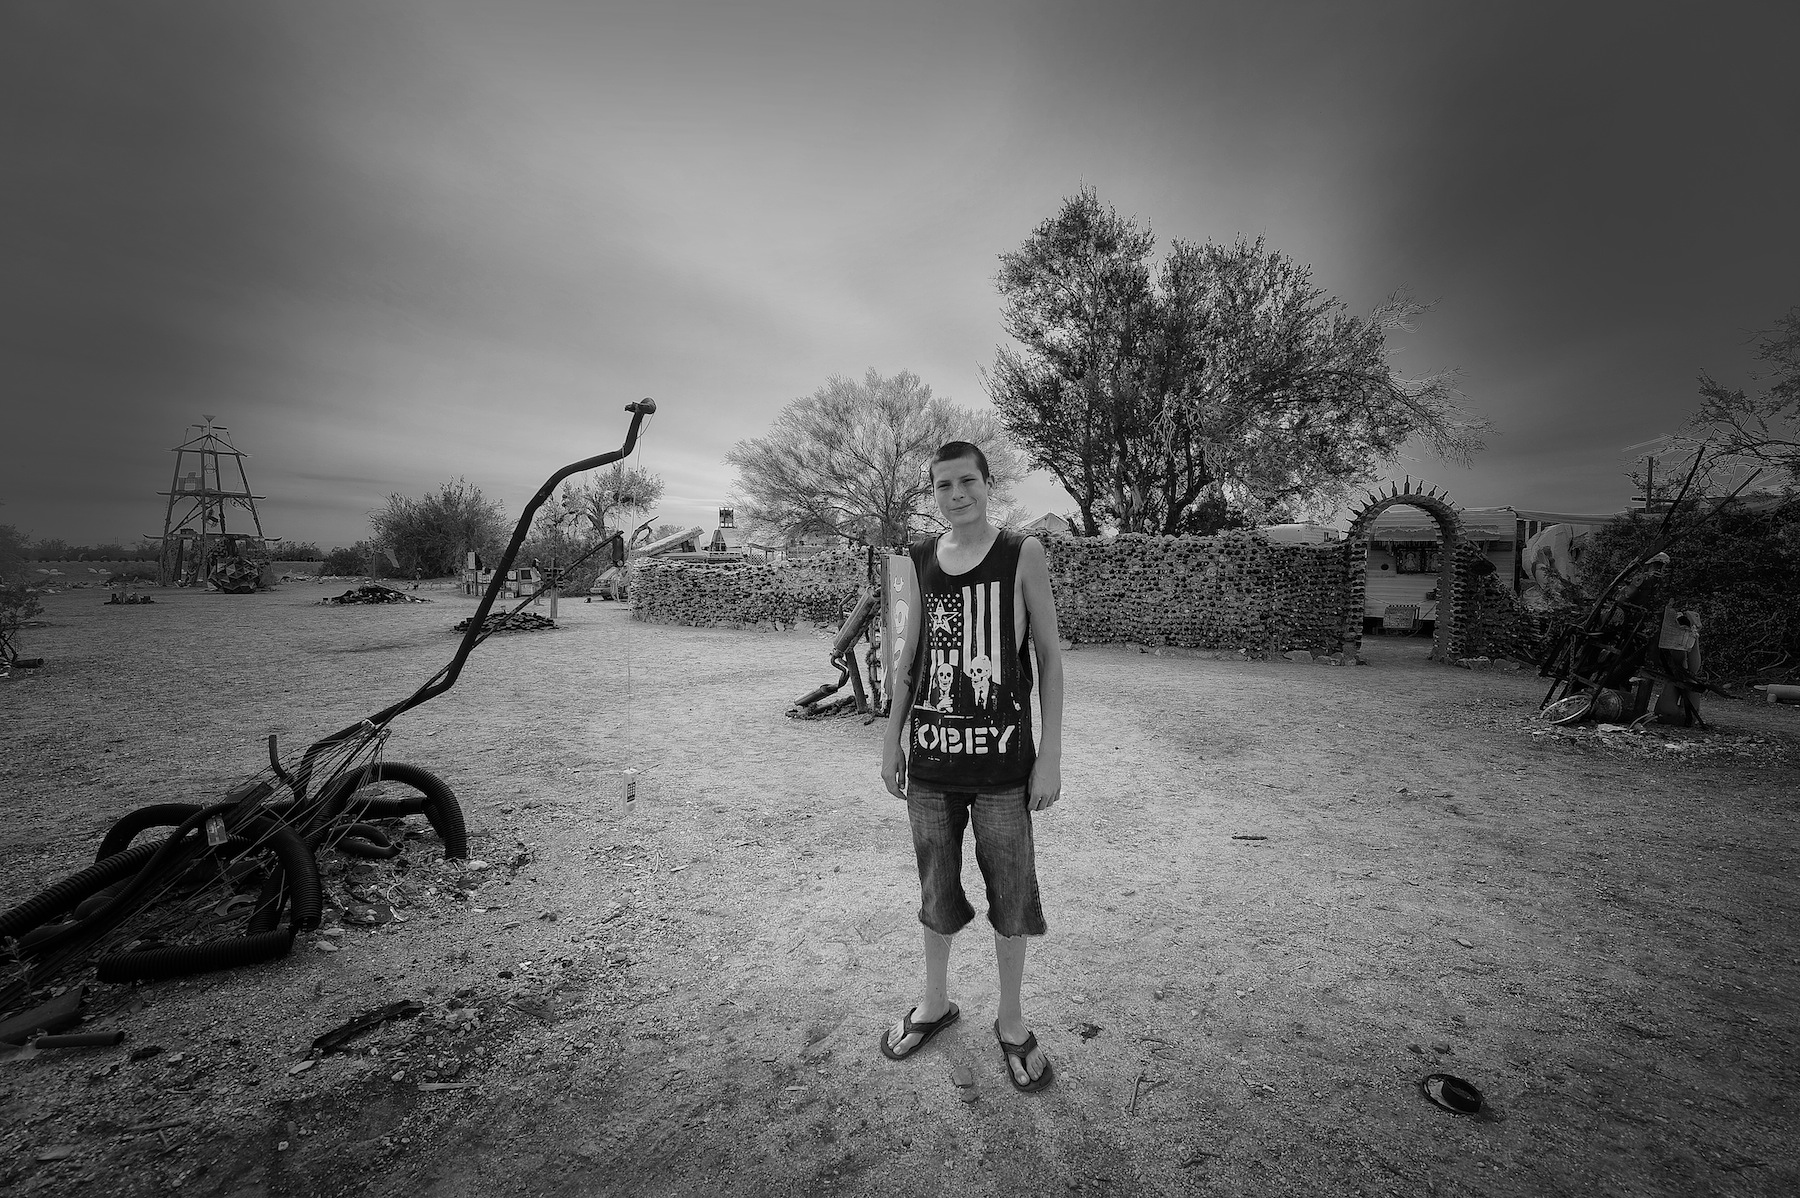
A tour guide at East Jesus can walk you through the camp and tell you the stories of the art
East Jesus is an experimental, habitable artwork project that has been around since 2006. There is not a single artist that creates the pieces rather the pieces are created by volunteers that stay at the camp for short or longer periods of time. They make it clear that they are not a dumb-ass hippie commune rather an art community where you have to do work. Actually there is a whole list of rules if your going to come to here and if you don’t you risk “staring down the barrel of a 12GA” as they put it.
If your going to visit or stay at East Jesus, I highly recommend you read the hilarious East Jesus Survival Guide which I found on their website.
Much of the art is not only interesting but habitable, meaning that you can camp out in it. For donations of $10 a night and agreement to follow all of the rules you can stay in a work of art. This place was getting quite interesting.
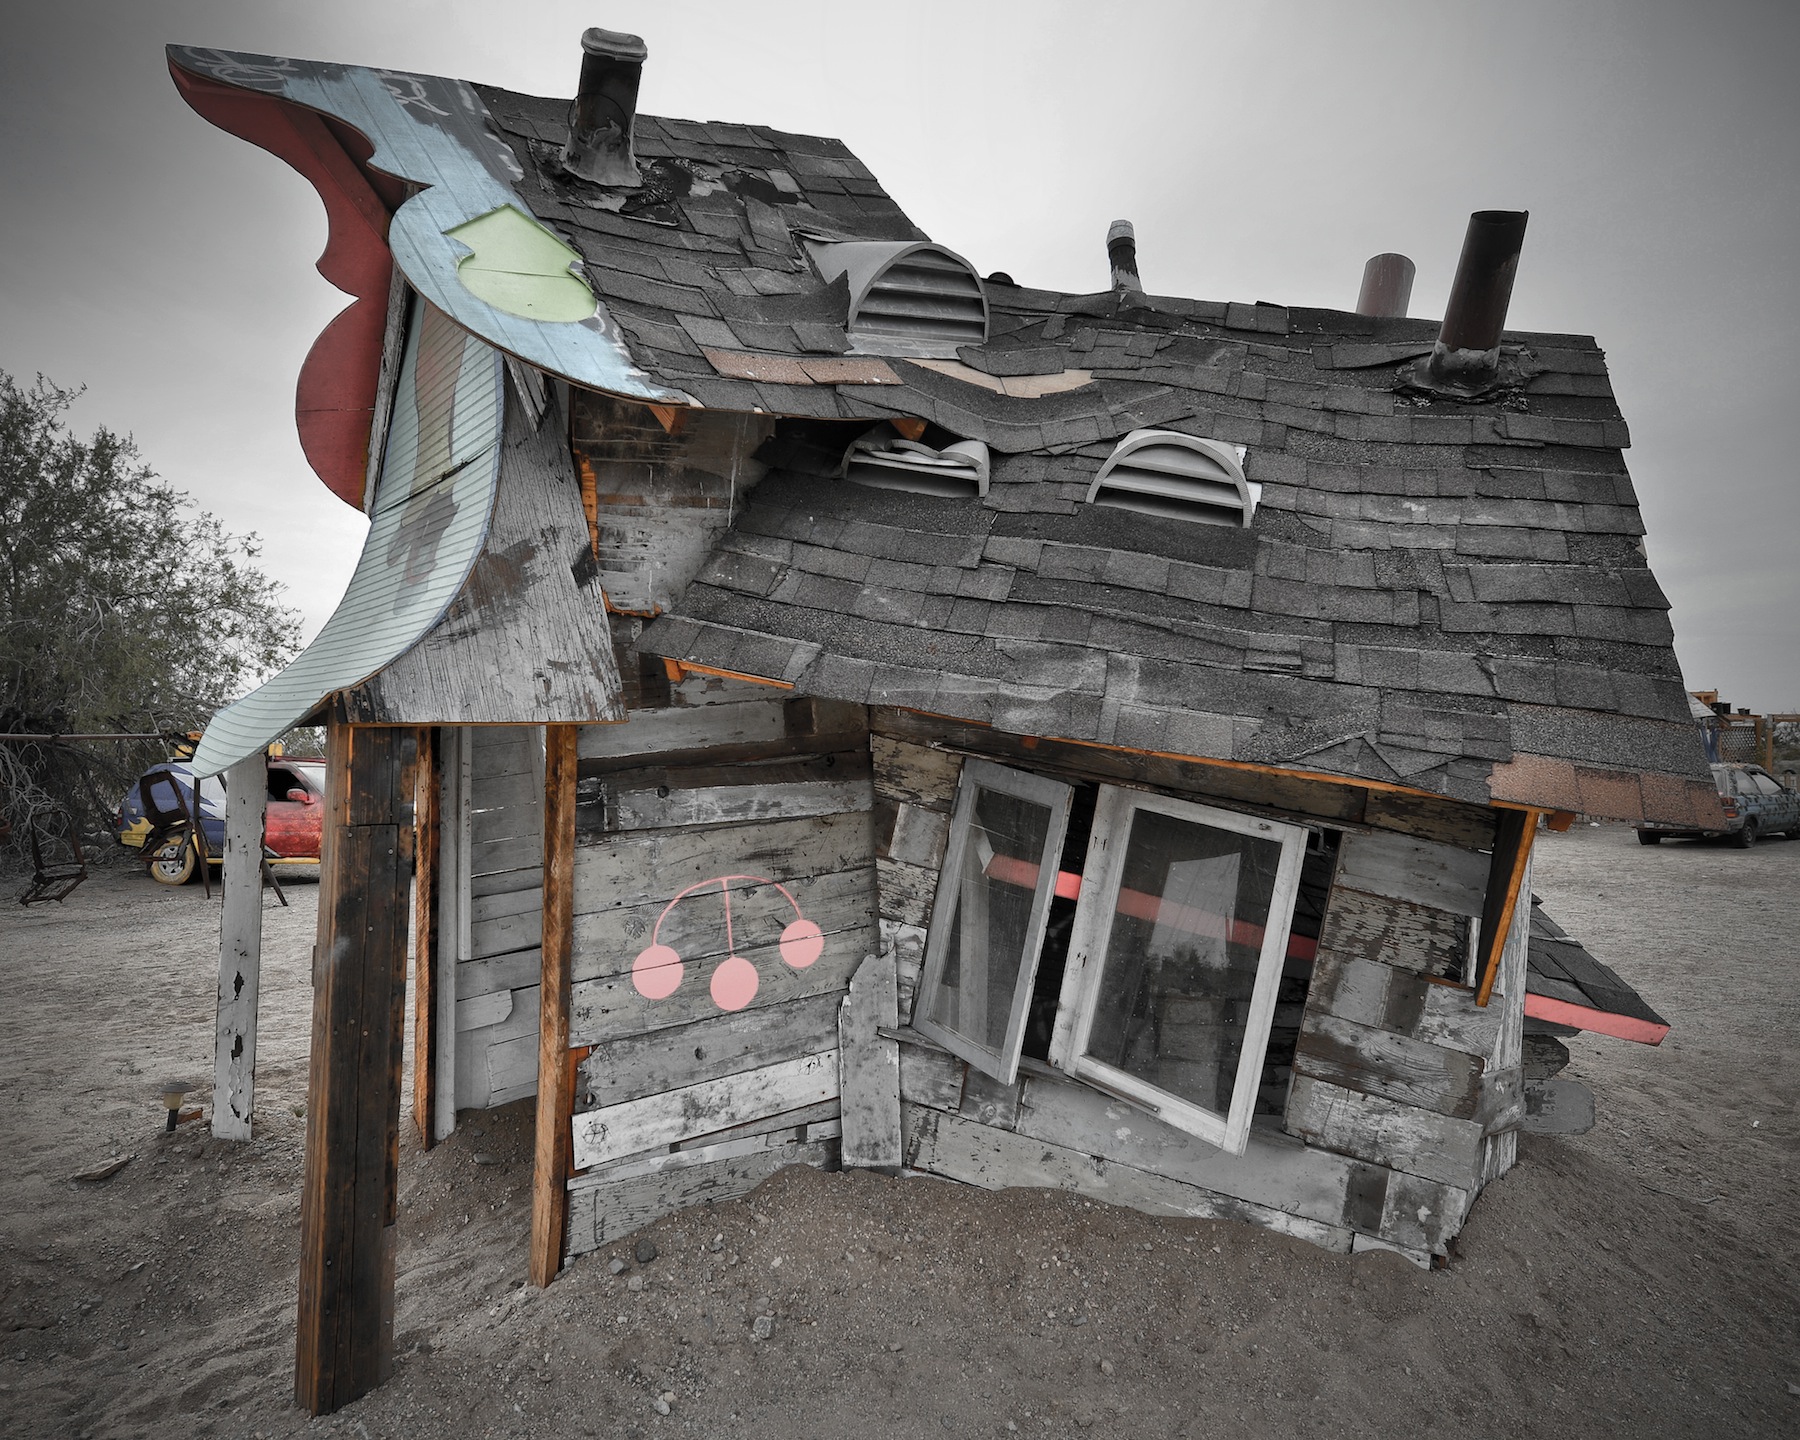
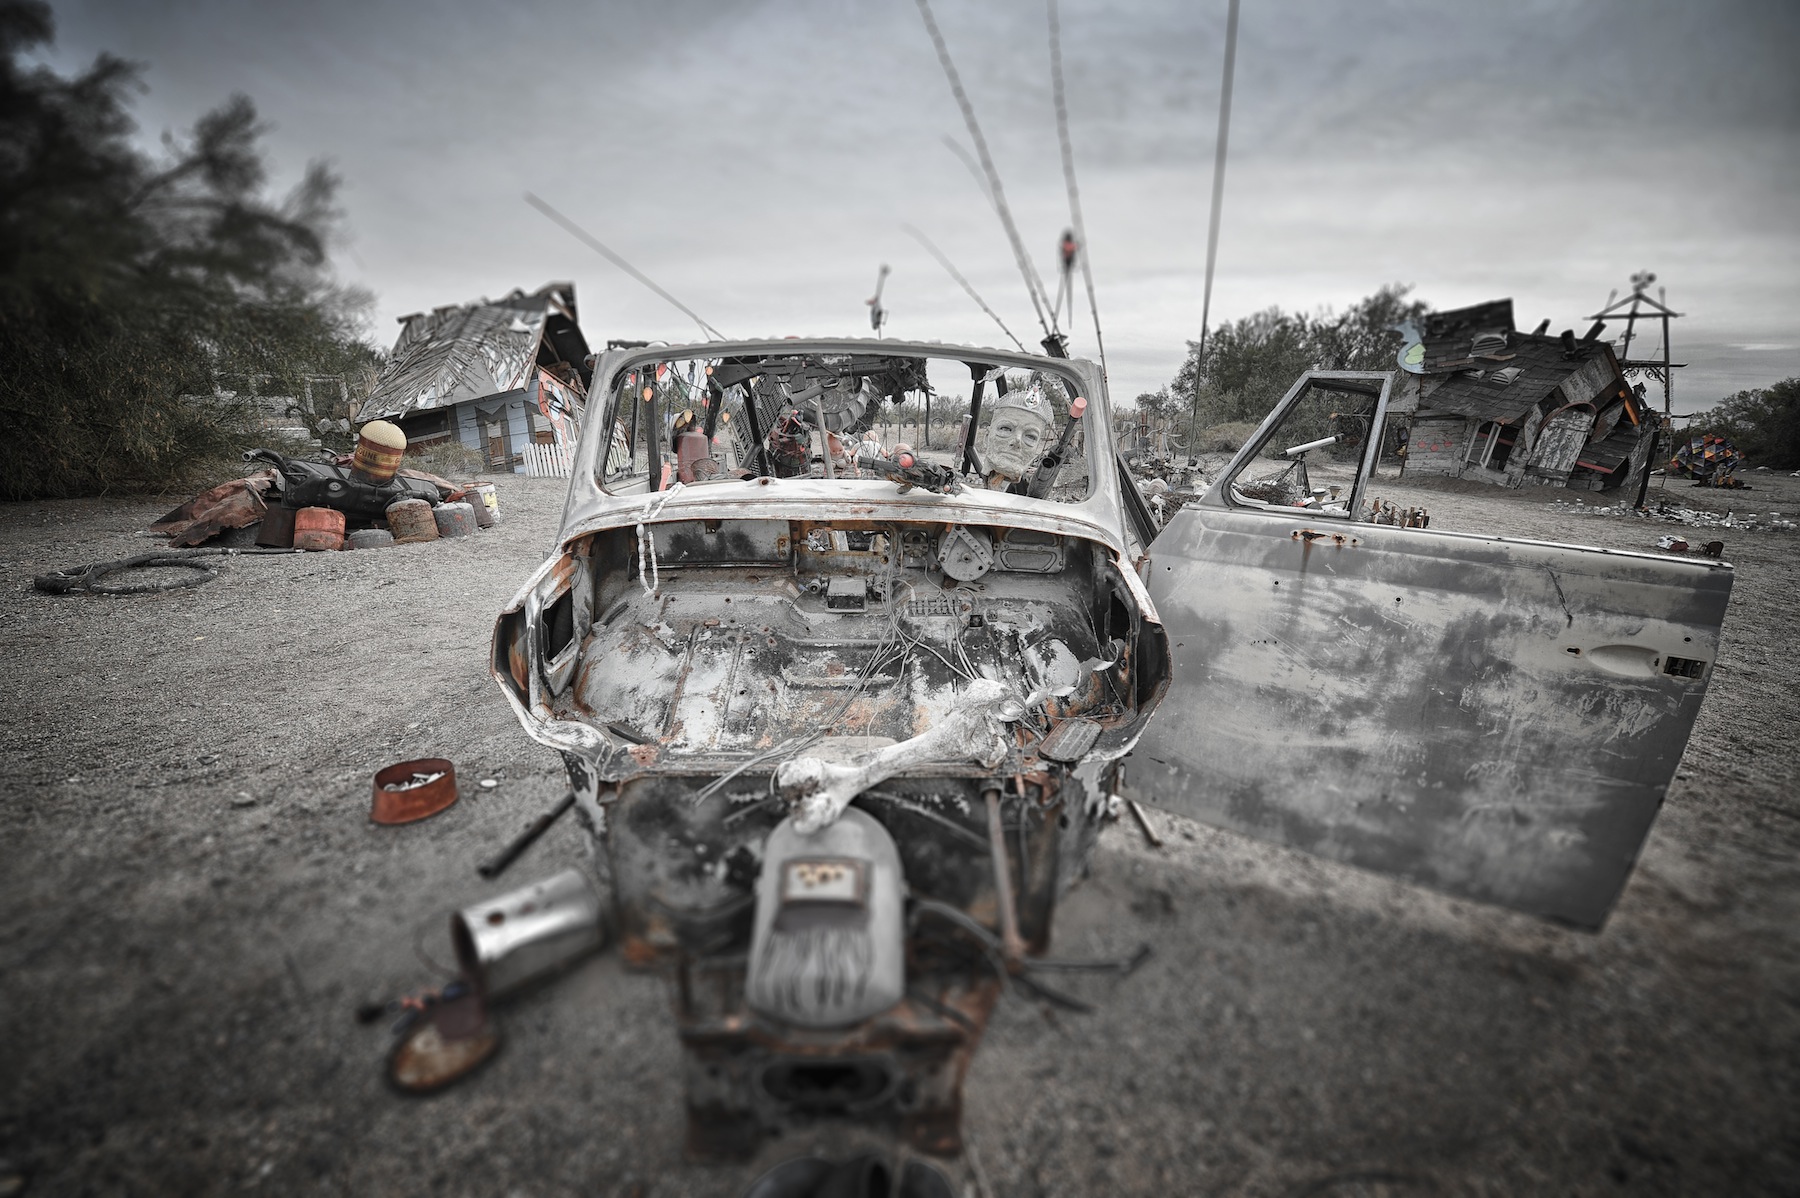
You can’t help but think of the Mad Max movies when you are wandering through East Jesus. The works of art here are just extraordinary and interesting.
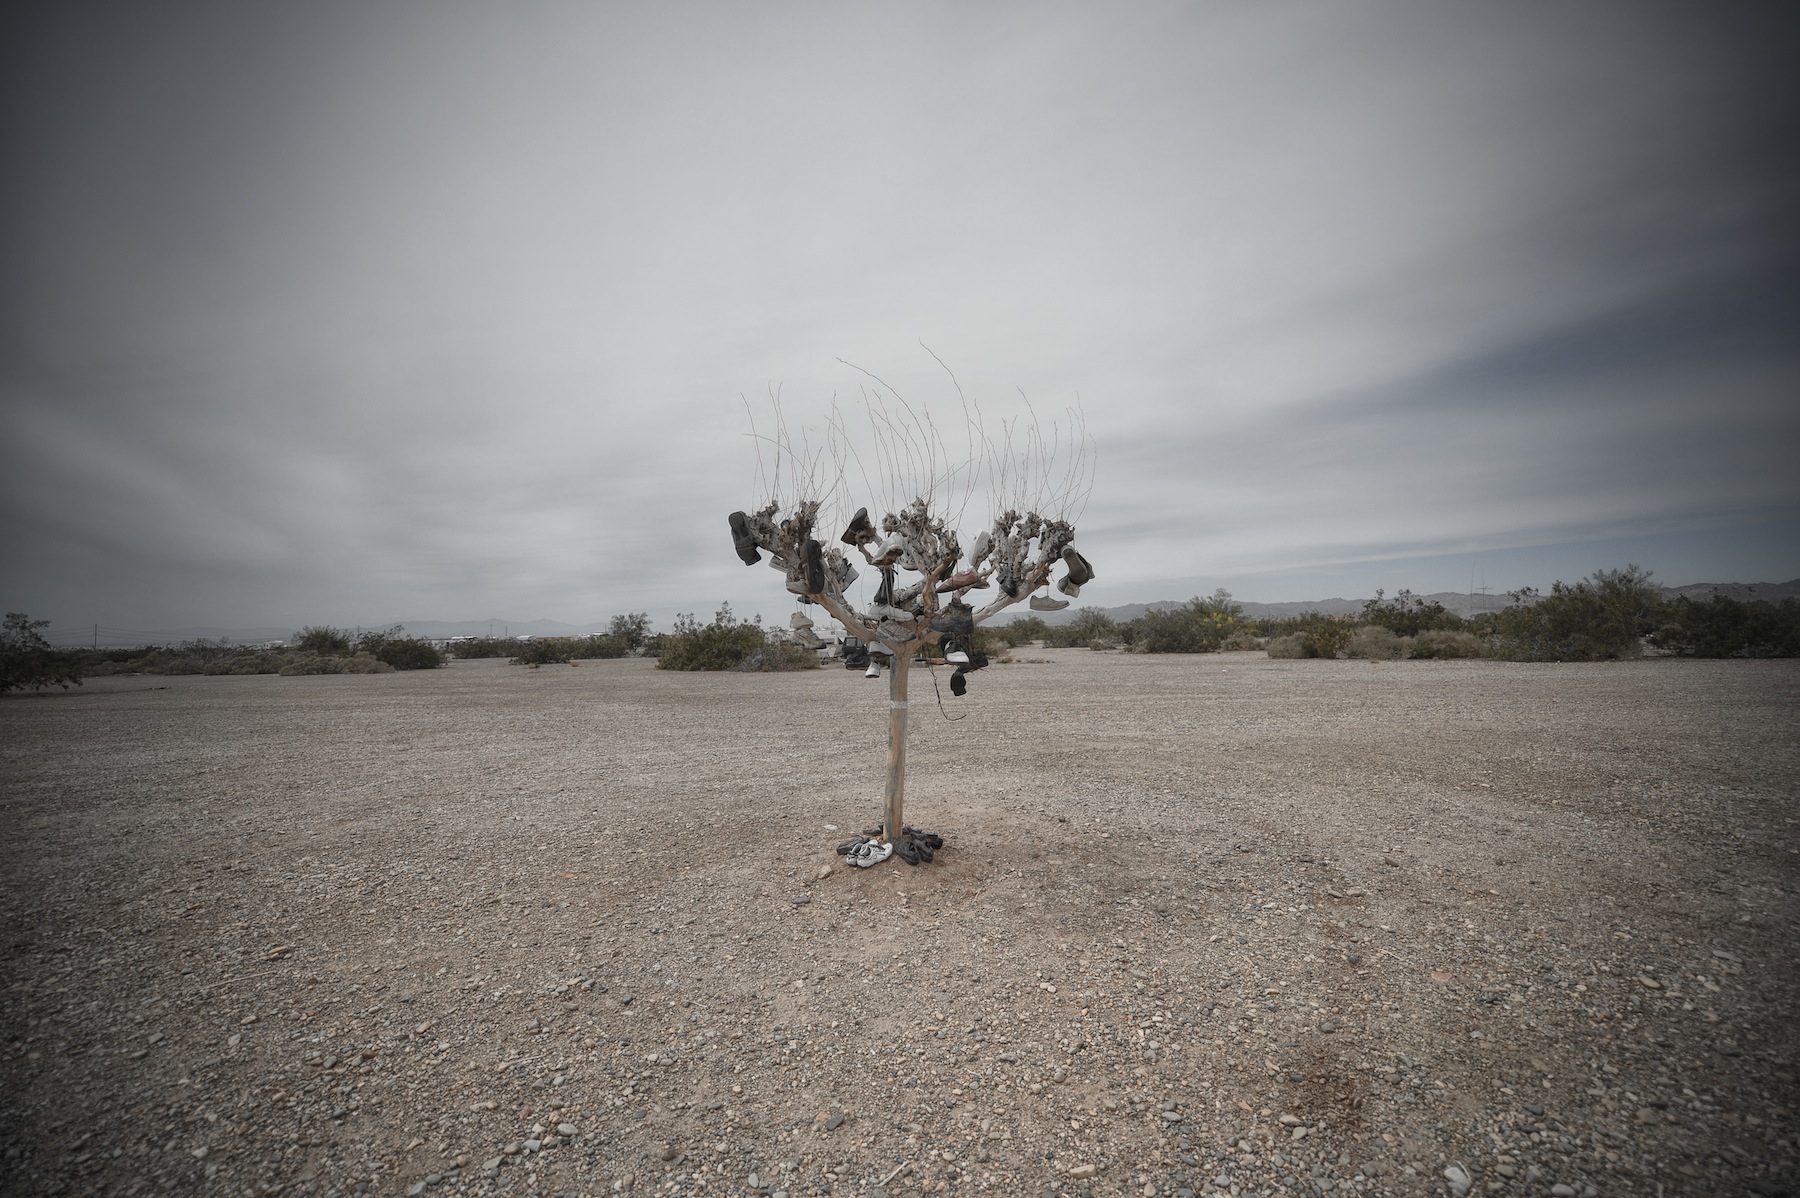
A shoe tree. How could you not have a shoe tree in this place. I love shoe trees and take pictures of them everywhere I can find them.
Ingenuity, Survival and Proms.
Slab City is under threat to be permanently closed down by the government. I am not sure why, maybe it has to do with the trash and how people just dump stuff out here.
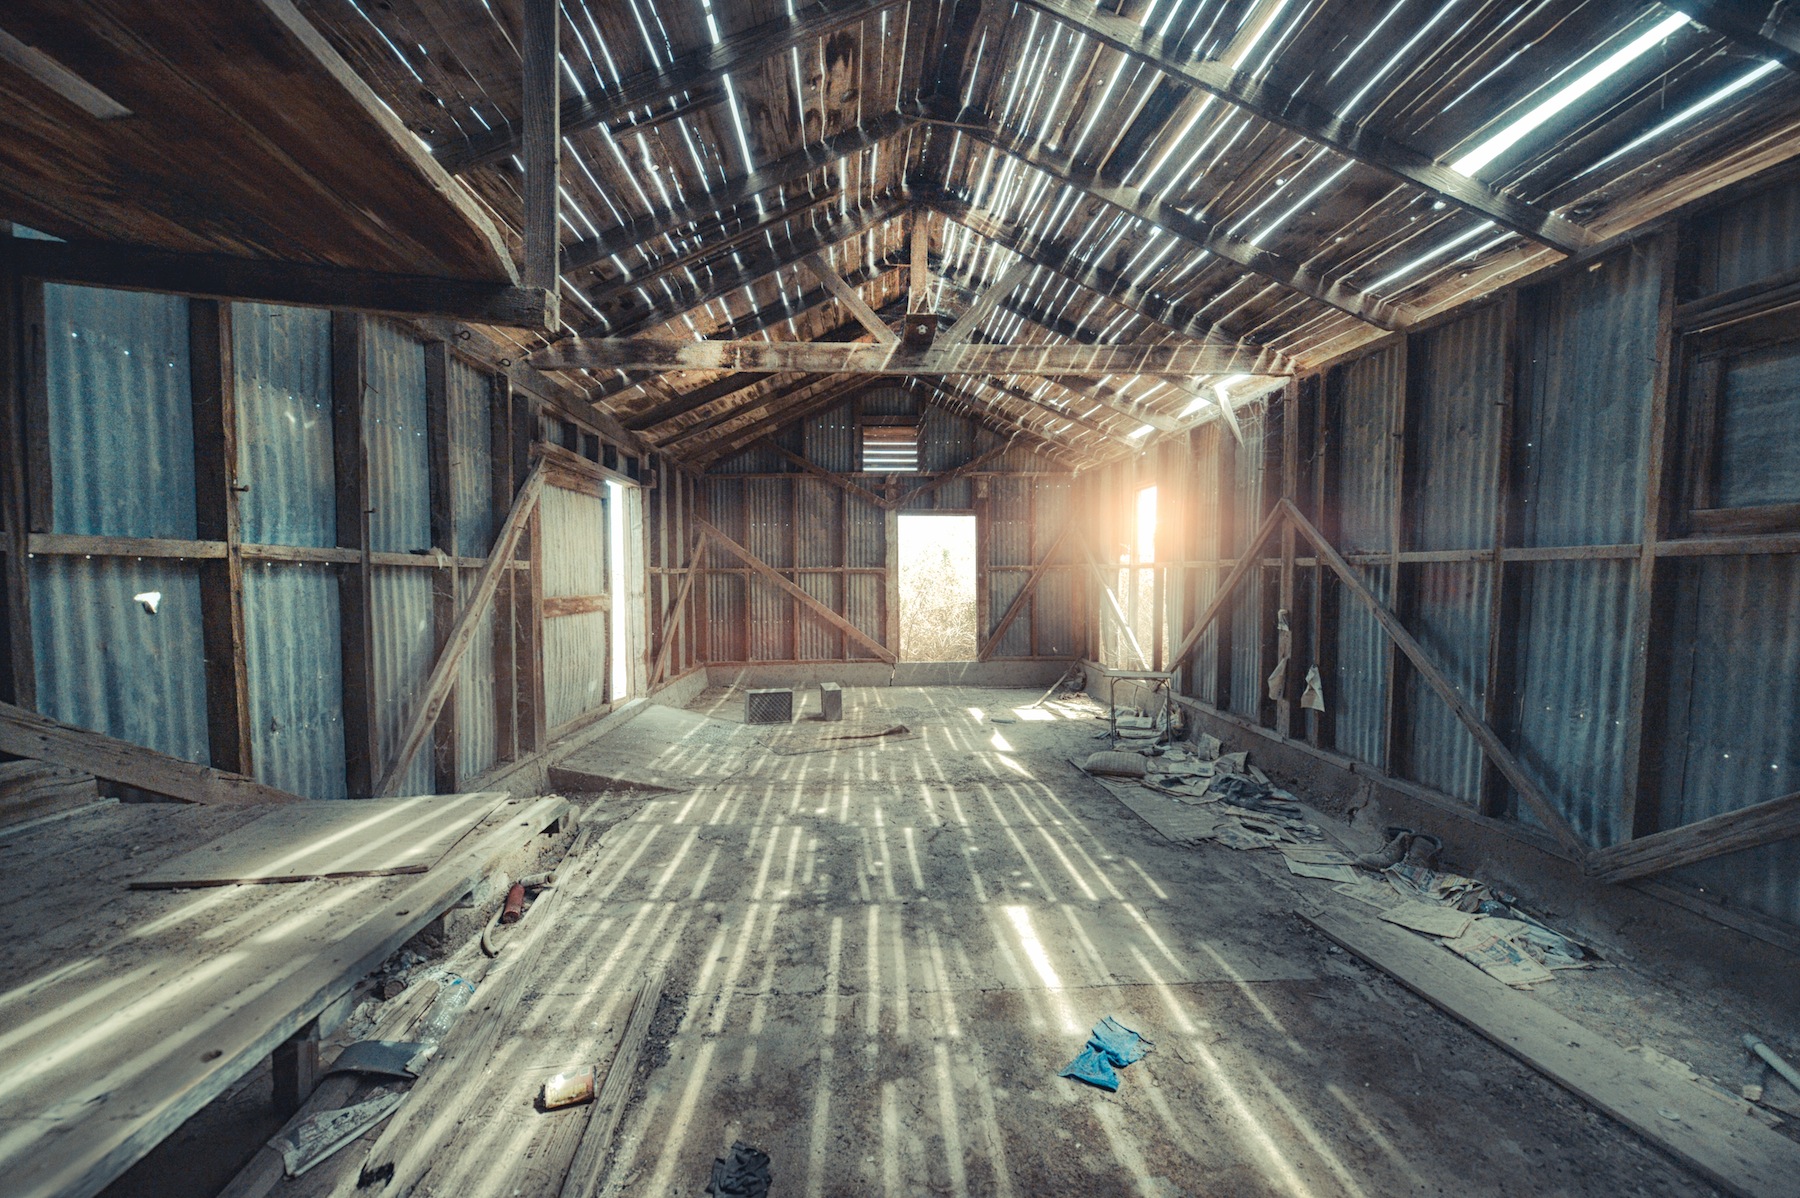
One of the many abandoned houses and businesses in the area.
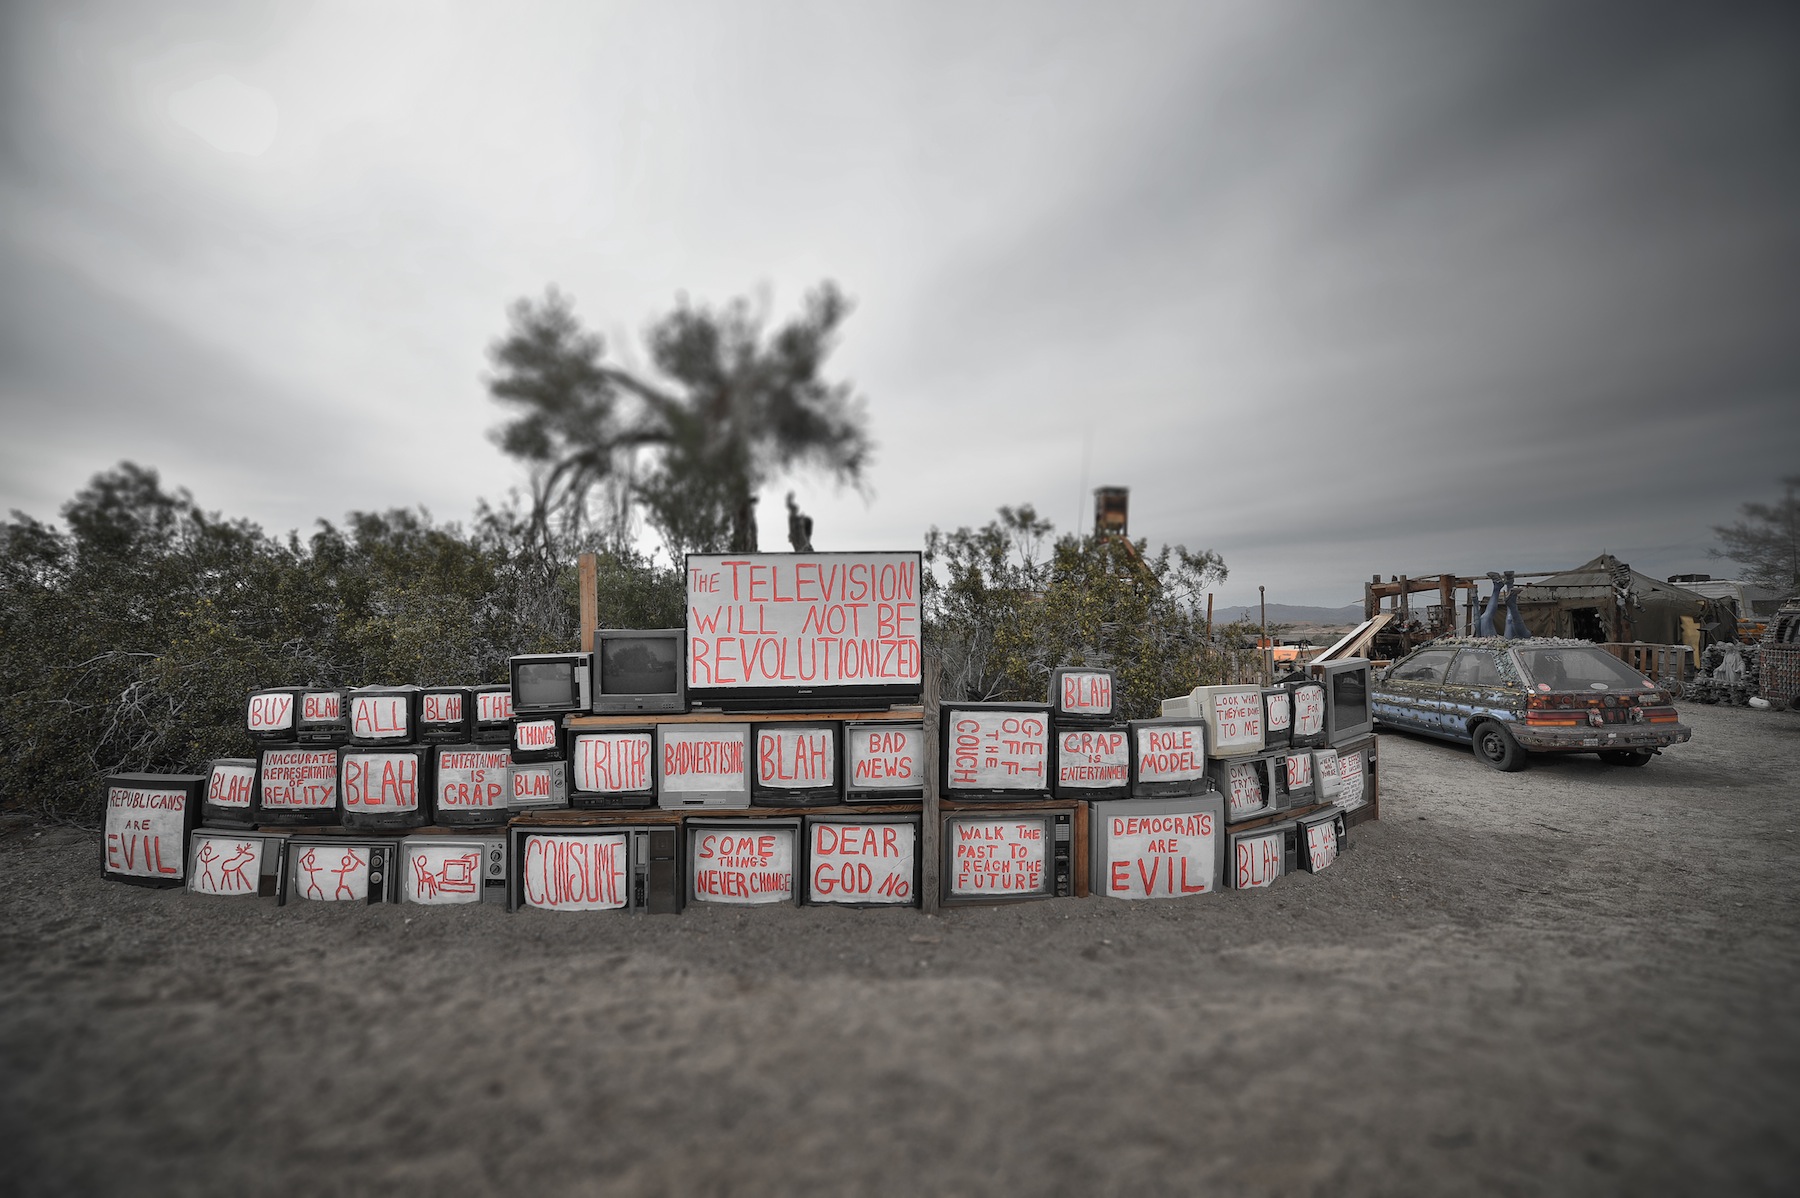
In any case, Slab City has been a story of ingenuity and survival. Everywhere you look the residents take things people have left behind and make art with it. From swimming pools to Marine Water tanks, everything here is used to create art.
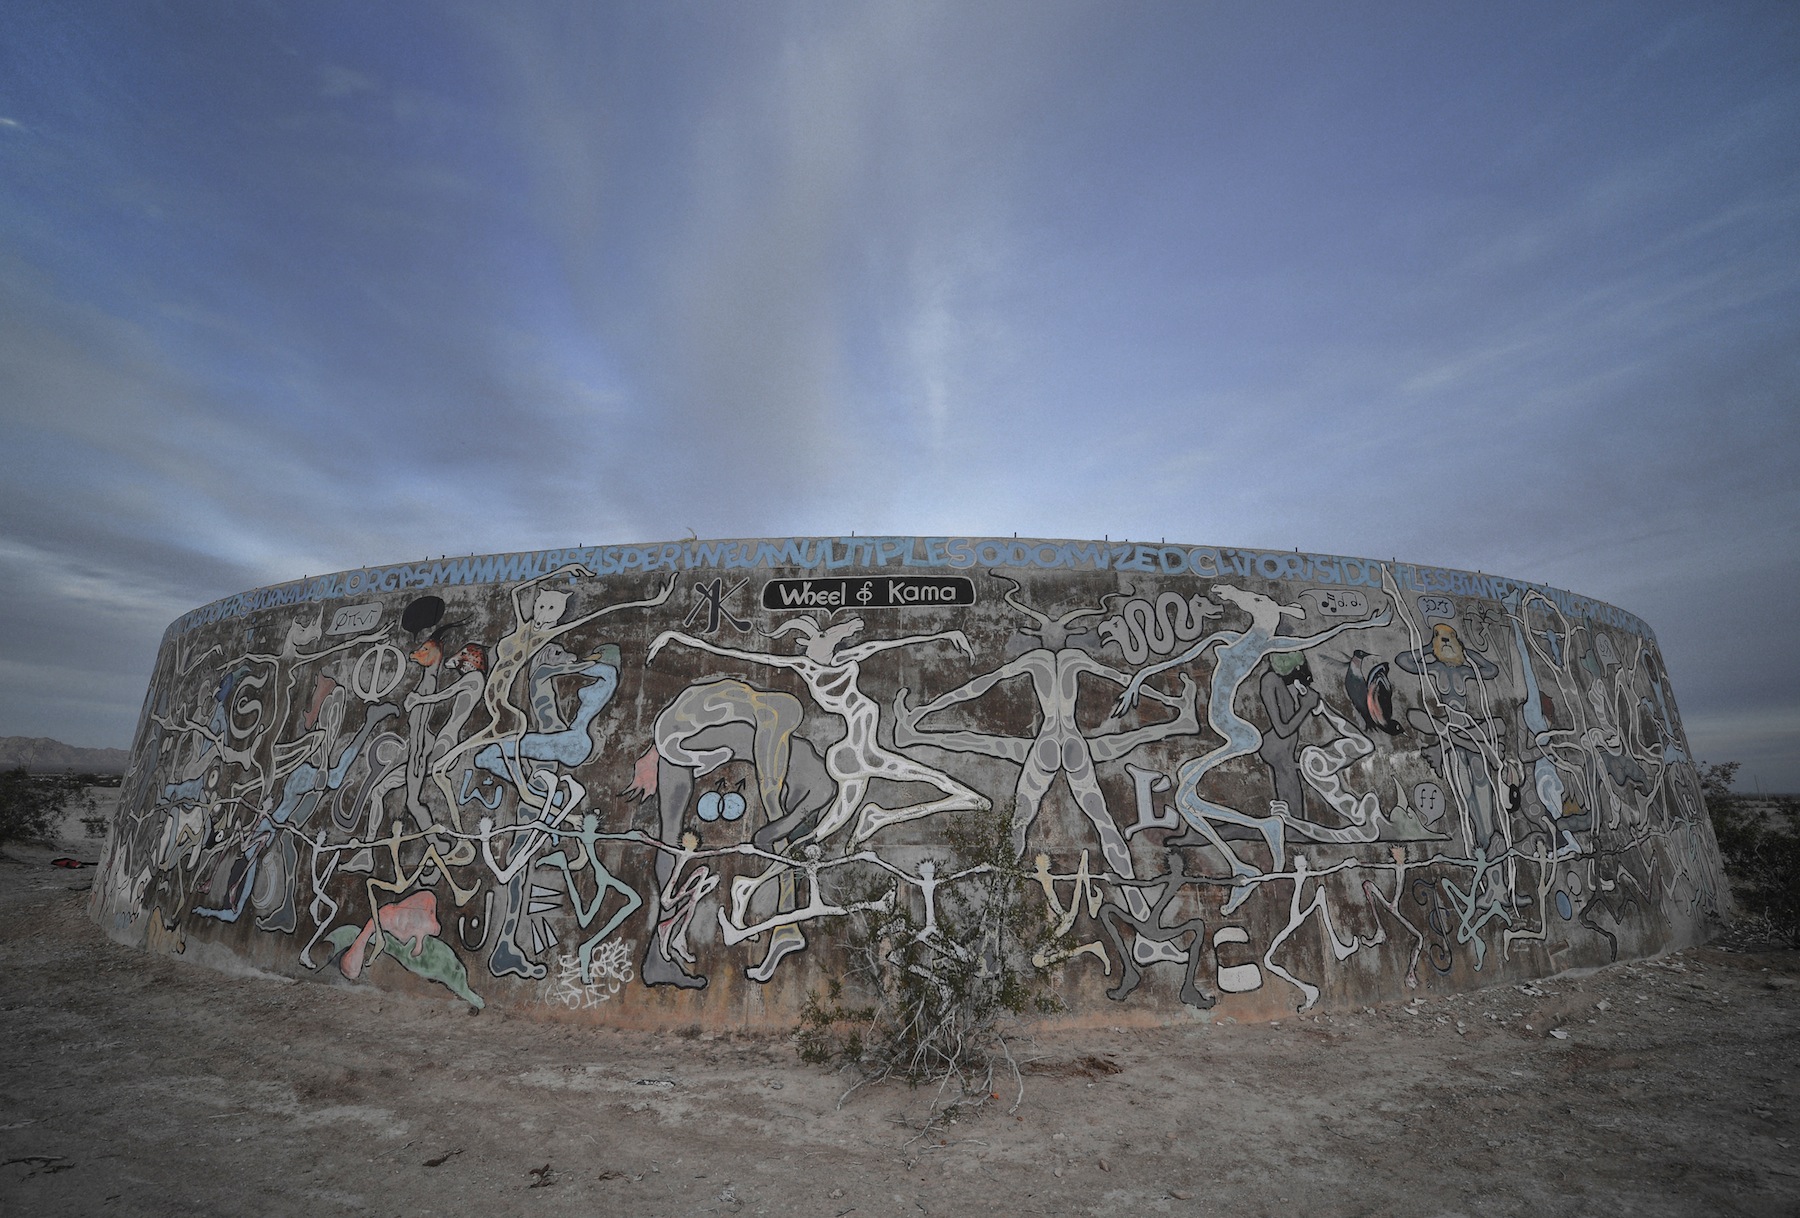
An abandoned Marine water tank has been retrofitted to become a Wheel of Kama
As, I was getting in my car to make the long drive back to San Diego, a guy stopped me and said, “why are you leaving?”. I had to get home I told him. He said, “YOU CANT LEAVE TODAY!, Tomorrow is Slab City Prom. The biggest day of the year. People get dressed up like a prom. You have to stay!”.
I got into my car smiling and shaking my head. I couldn’t believe it. Slab City even has their own prom. I’m definitely coming back again to see that someday.
How many orphans in Vietnam? There are 1.5 Million.

I read that there are 1.5 million orphans in Vietnam. That is very sad and what makes it particularly sad is that the Vietnamese Government and the US Government have made it particularly hard for people here to adopt these orphans.
We visited several orphanages in Vietnam. In Vietnam the orphanages are either run by the Church or by the Government. In either case each orphanage we visited relied heavily on donations of food, clothing, toys and other things for the orphans. Some of the orphanages in the cities such as Saigon were frequently visited and the kids seemed happy. But unfortunately most of the orphanages in the more remote locations of Vietnam were hardly visited at all the kids were in desperate need of visits, toys and food.
If you are planning a trip to Vietnam it is a good idea to visit the kids in the more rural parts of Vietnam because it is them that need your help the most. Here is a gallery of some of my pictures of the Orphans of Vietnam – Full Gallery of The Orphans of Vietnam.
Vinh Long Orphanage (Facebook Site)

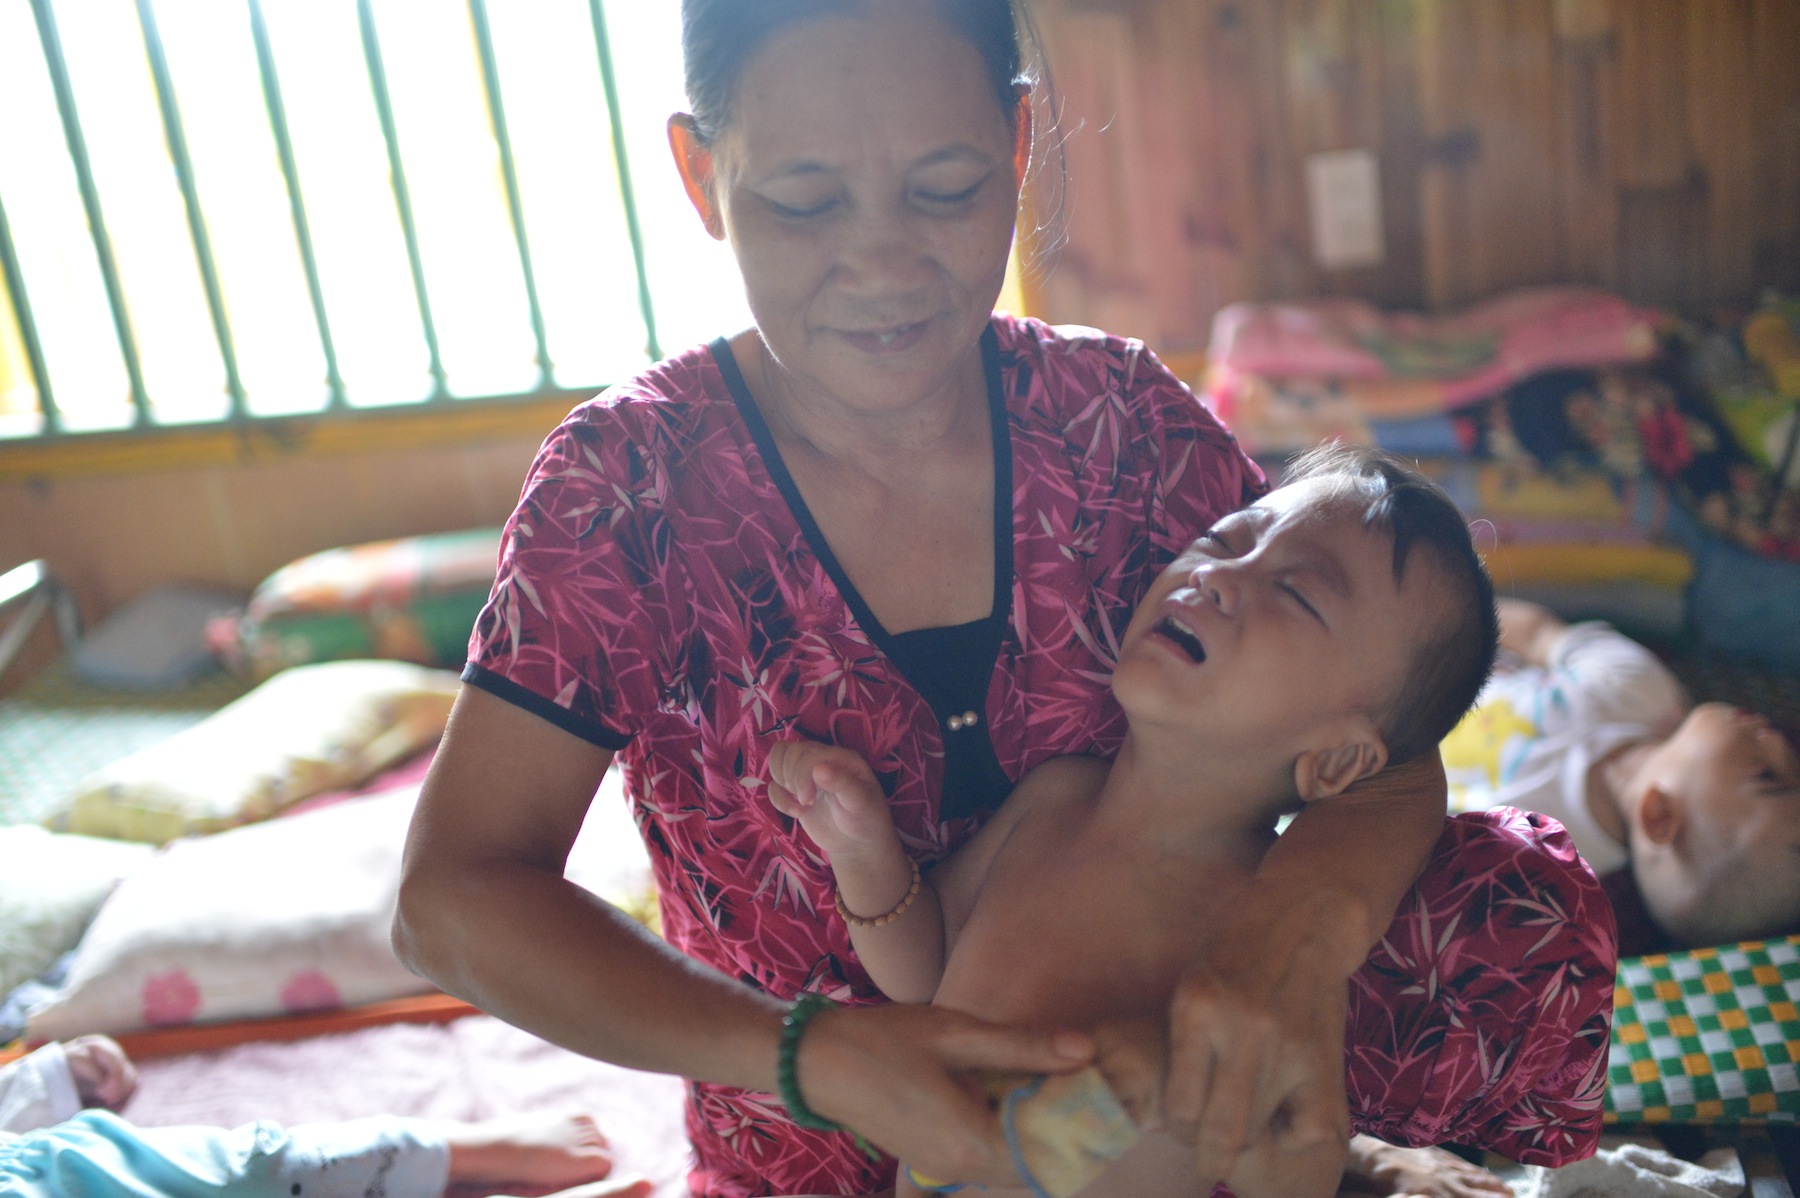
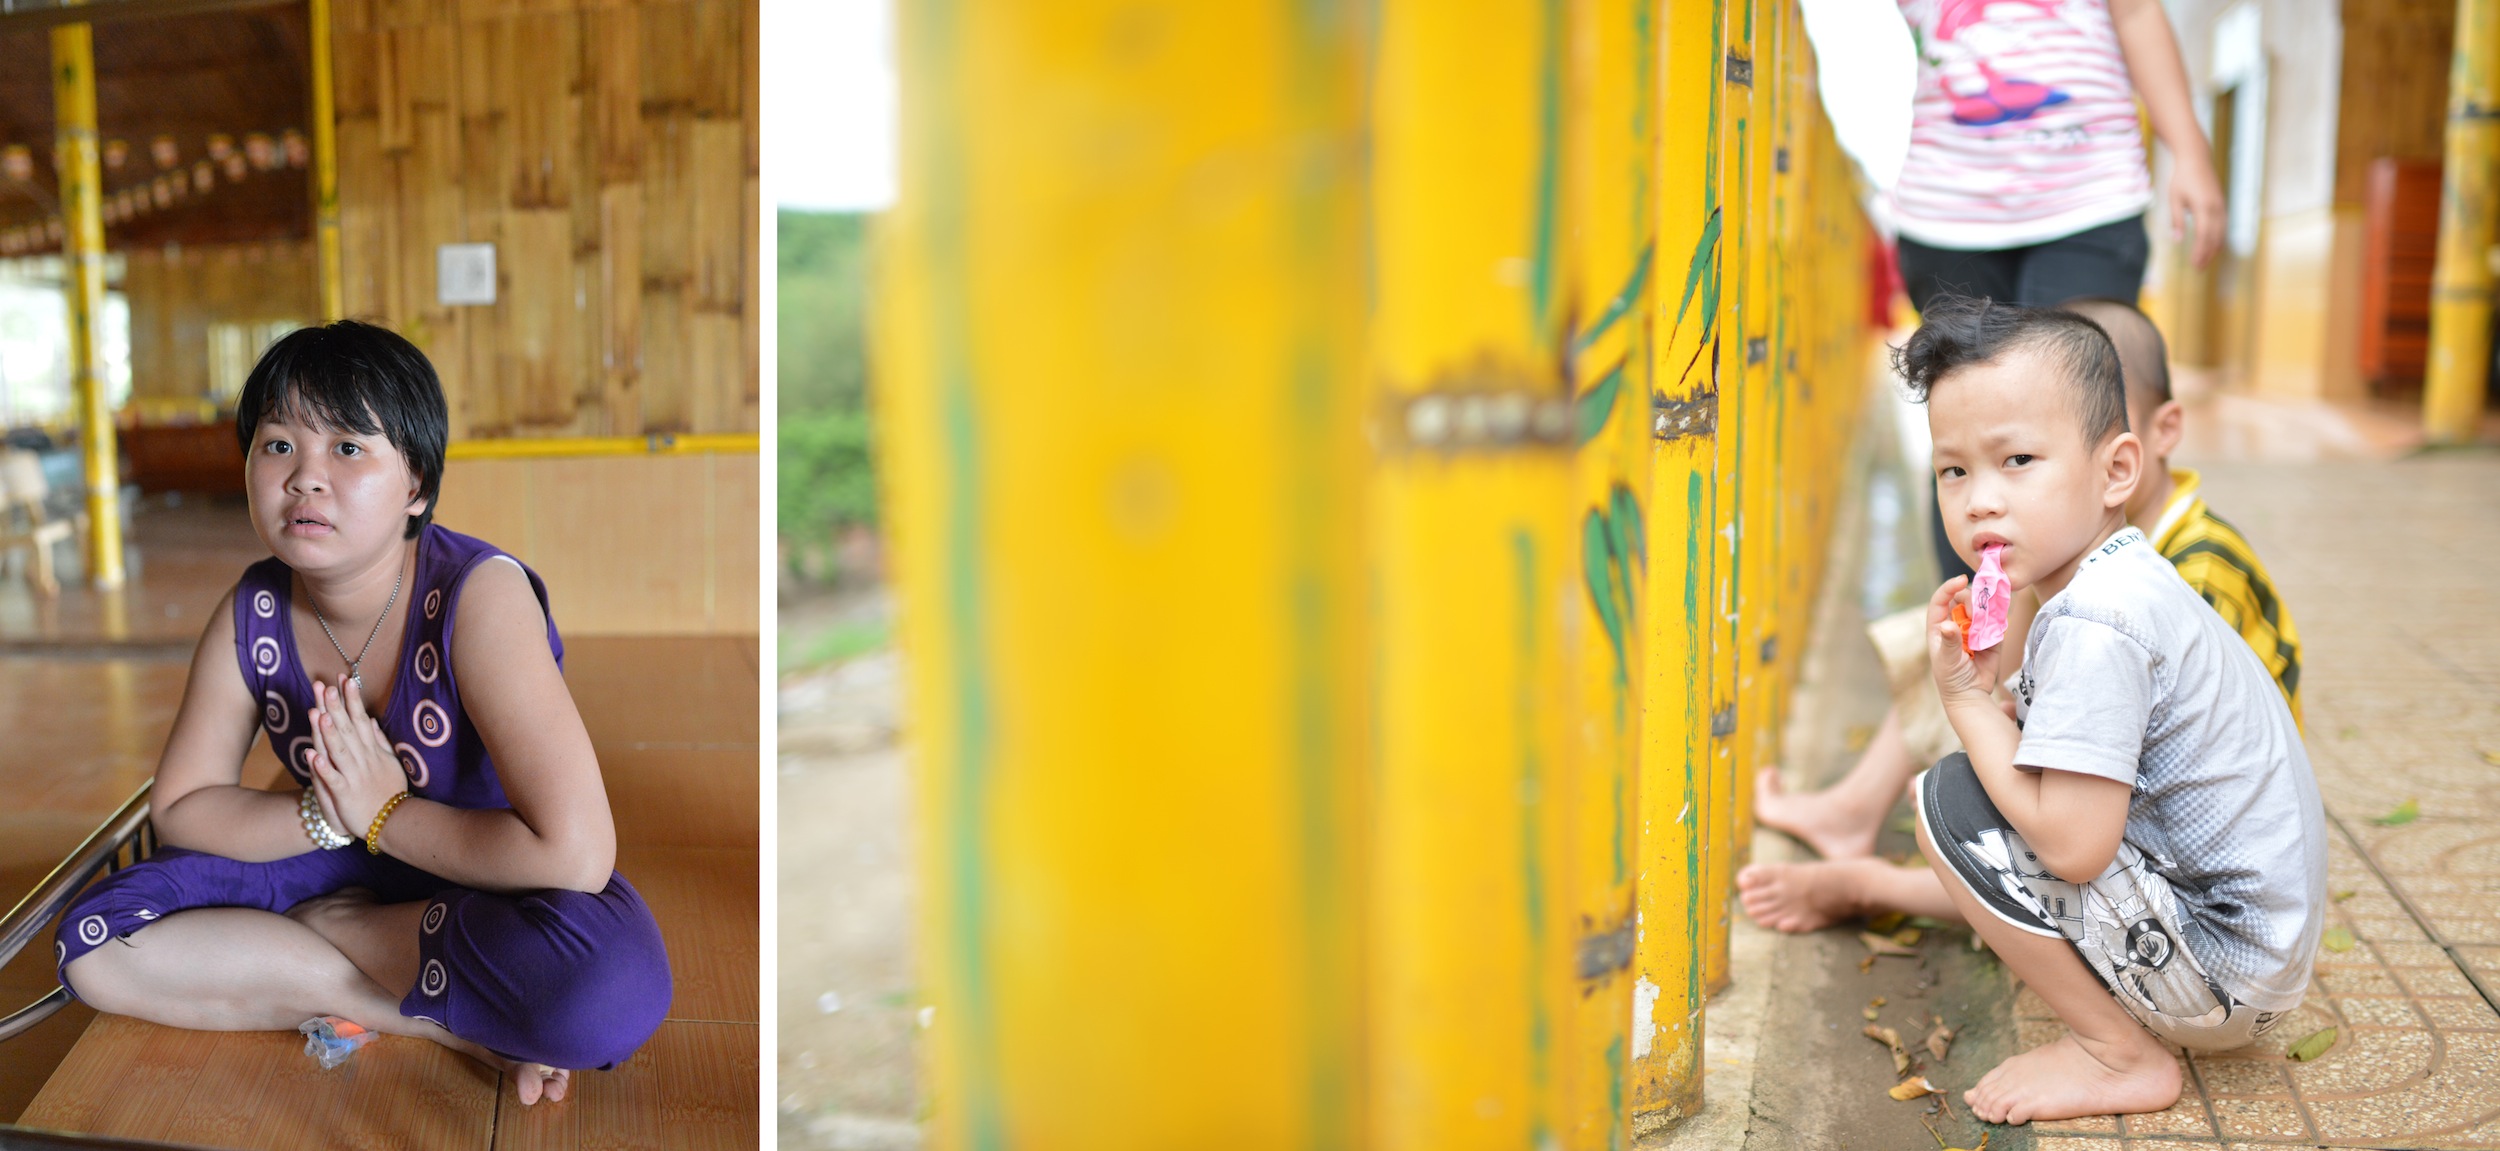
This orphanage was about 2 hours south of Saigon and the kids and babies were housed in an old prison. They were behind the cages but safe. When we entered the building, they screamed in delight. Imagine the feeling of that? It was wonderful and heartbreaking all at the same time.
The kids and babies were cute but they needed more help. They did not have enough people in the orphanage to take care of all the babies and kids. We were happy to donate food, clothing, toys and even threw the kids a Christmas party which they thoroughly enjoyed. If you can visit the website above. My girlfriend and I run the webpage and actively post new pictures of the orphans and how they are doing.


Lang Tre Orphanage
The second orphanage we visited was very remote. From Vinh Long it took us about 6 hours by car to get there. The orphanage was run by monks but the kids were very poor but happy in this orphanage. What made it sad was that the orphanage was also home to mentally disabled men and woman.


Saigon Orphanage
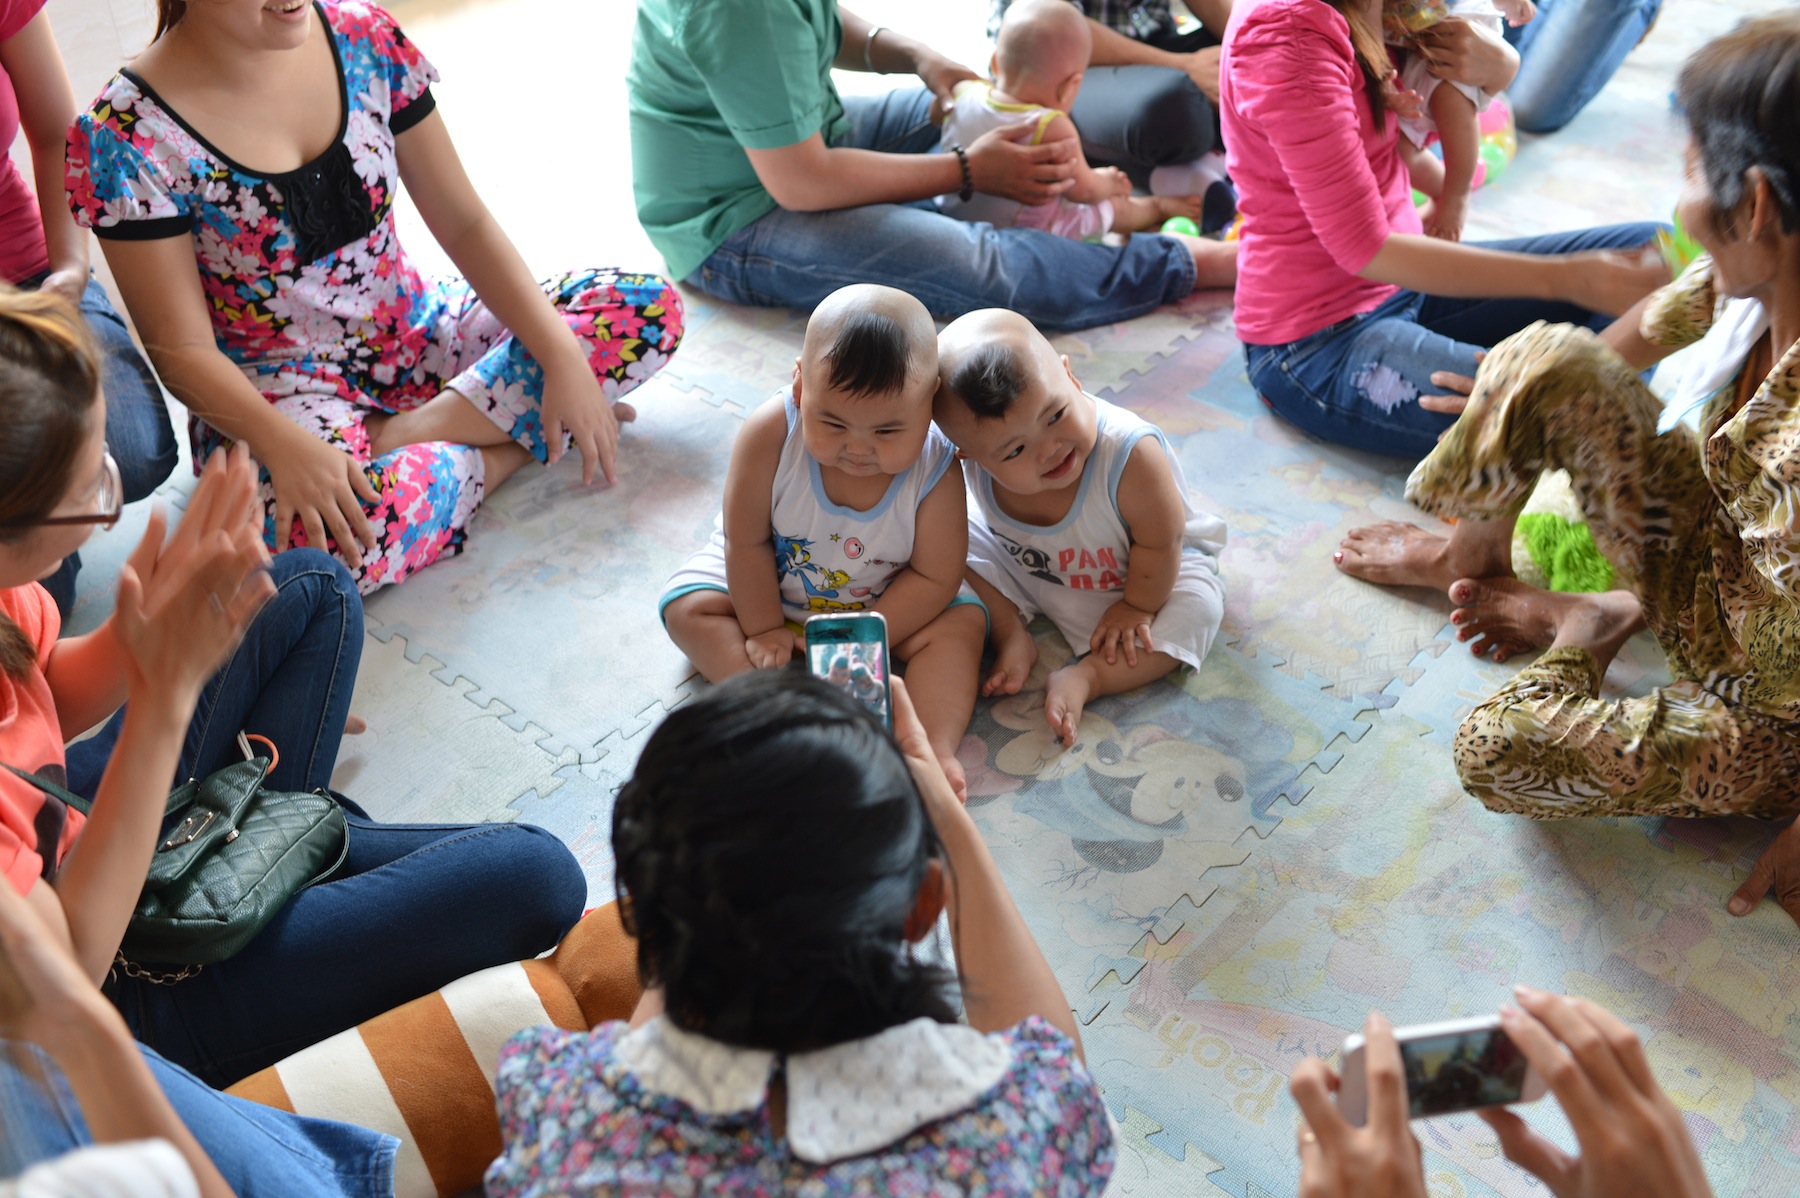
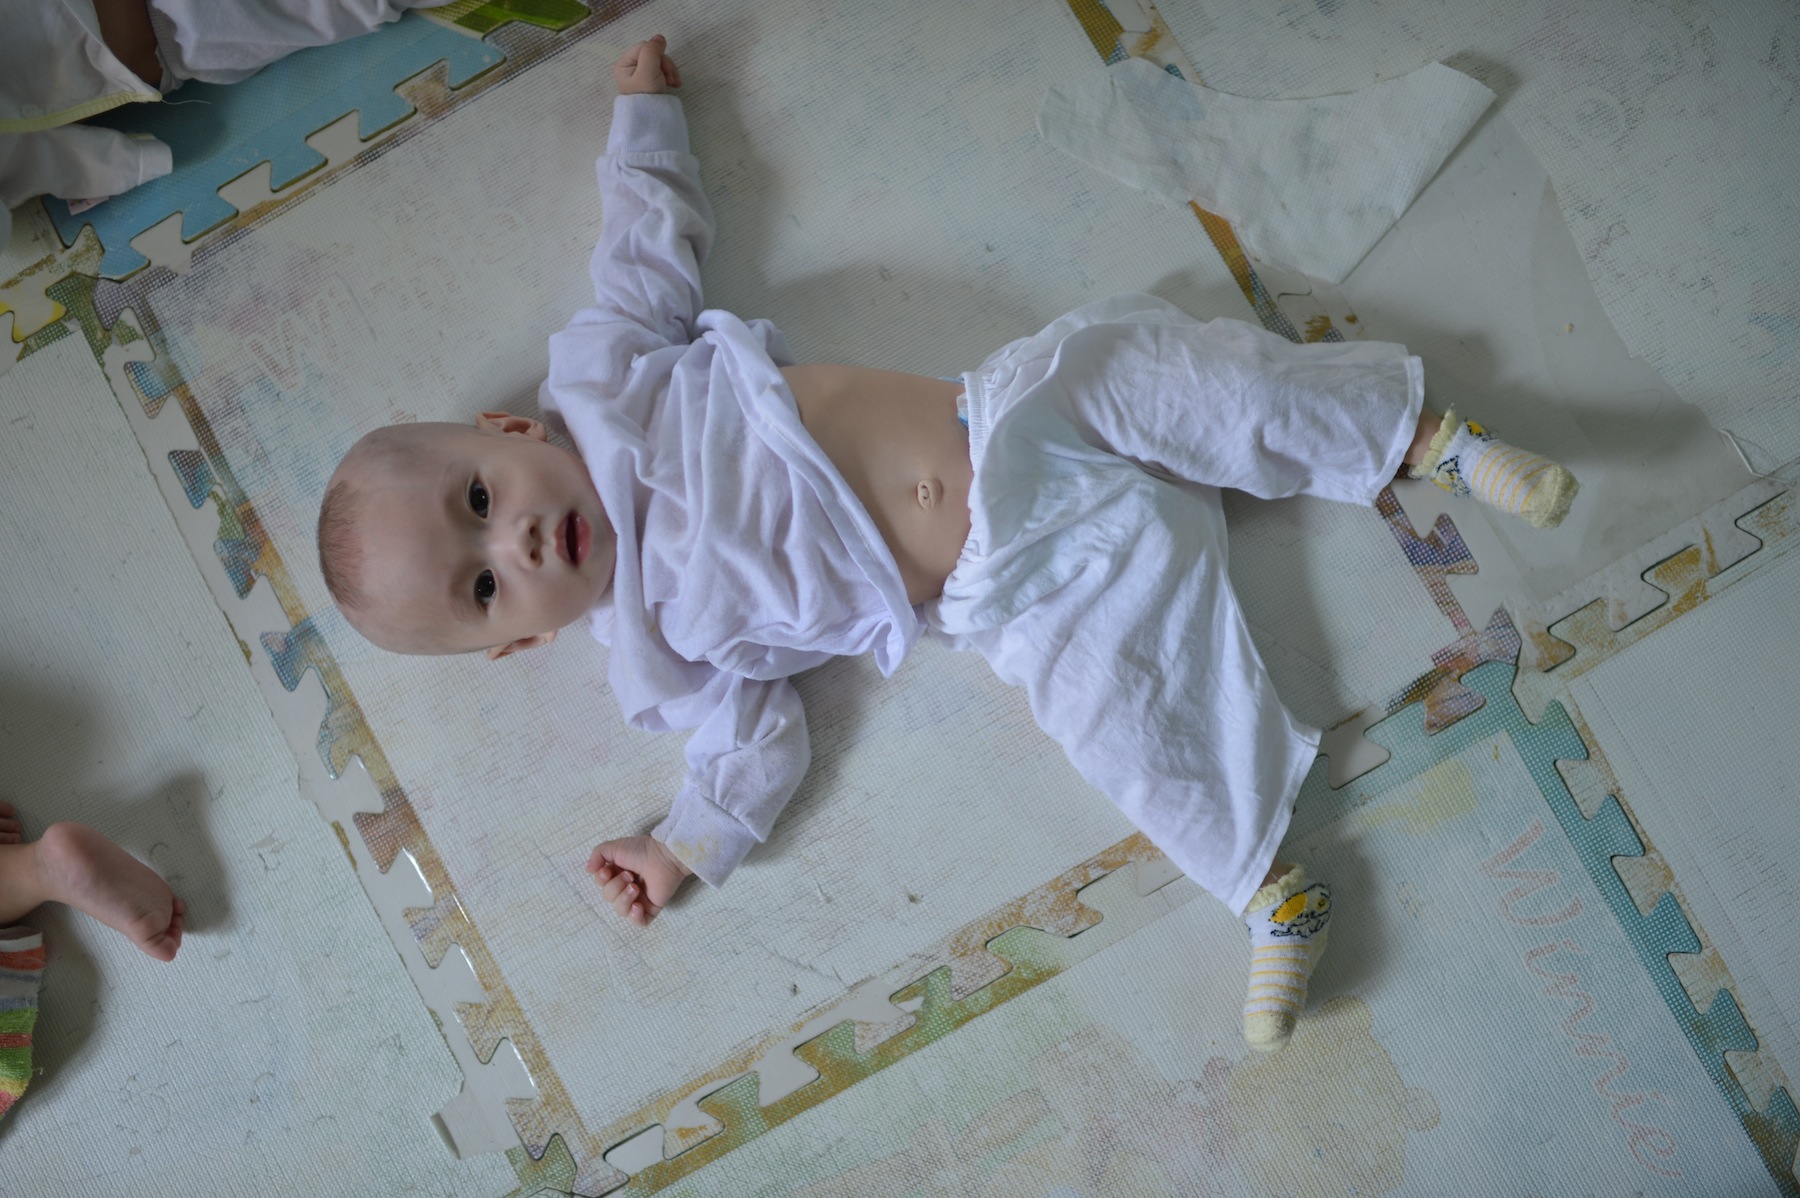
The third and final orphanage that we visited was the best kept of all of the orphanages. The kids were so well cared for and so cute. They had at least 30 people visiting them when we got to the room. Since I had a camera and write about the orphans in Vietnam they let me come into the special room where all of the babies were kept. There were babies in this orphanage that were just days old. And all of the babies slept on the floor.


If you would like more information about orphanages in Vietnam or how you can help you can send me an email to [email protected] and I will do my best to get you any information that you need.
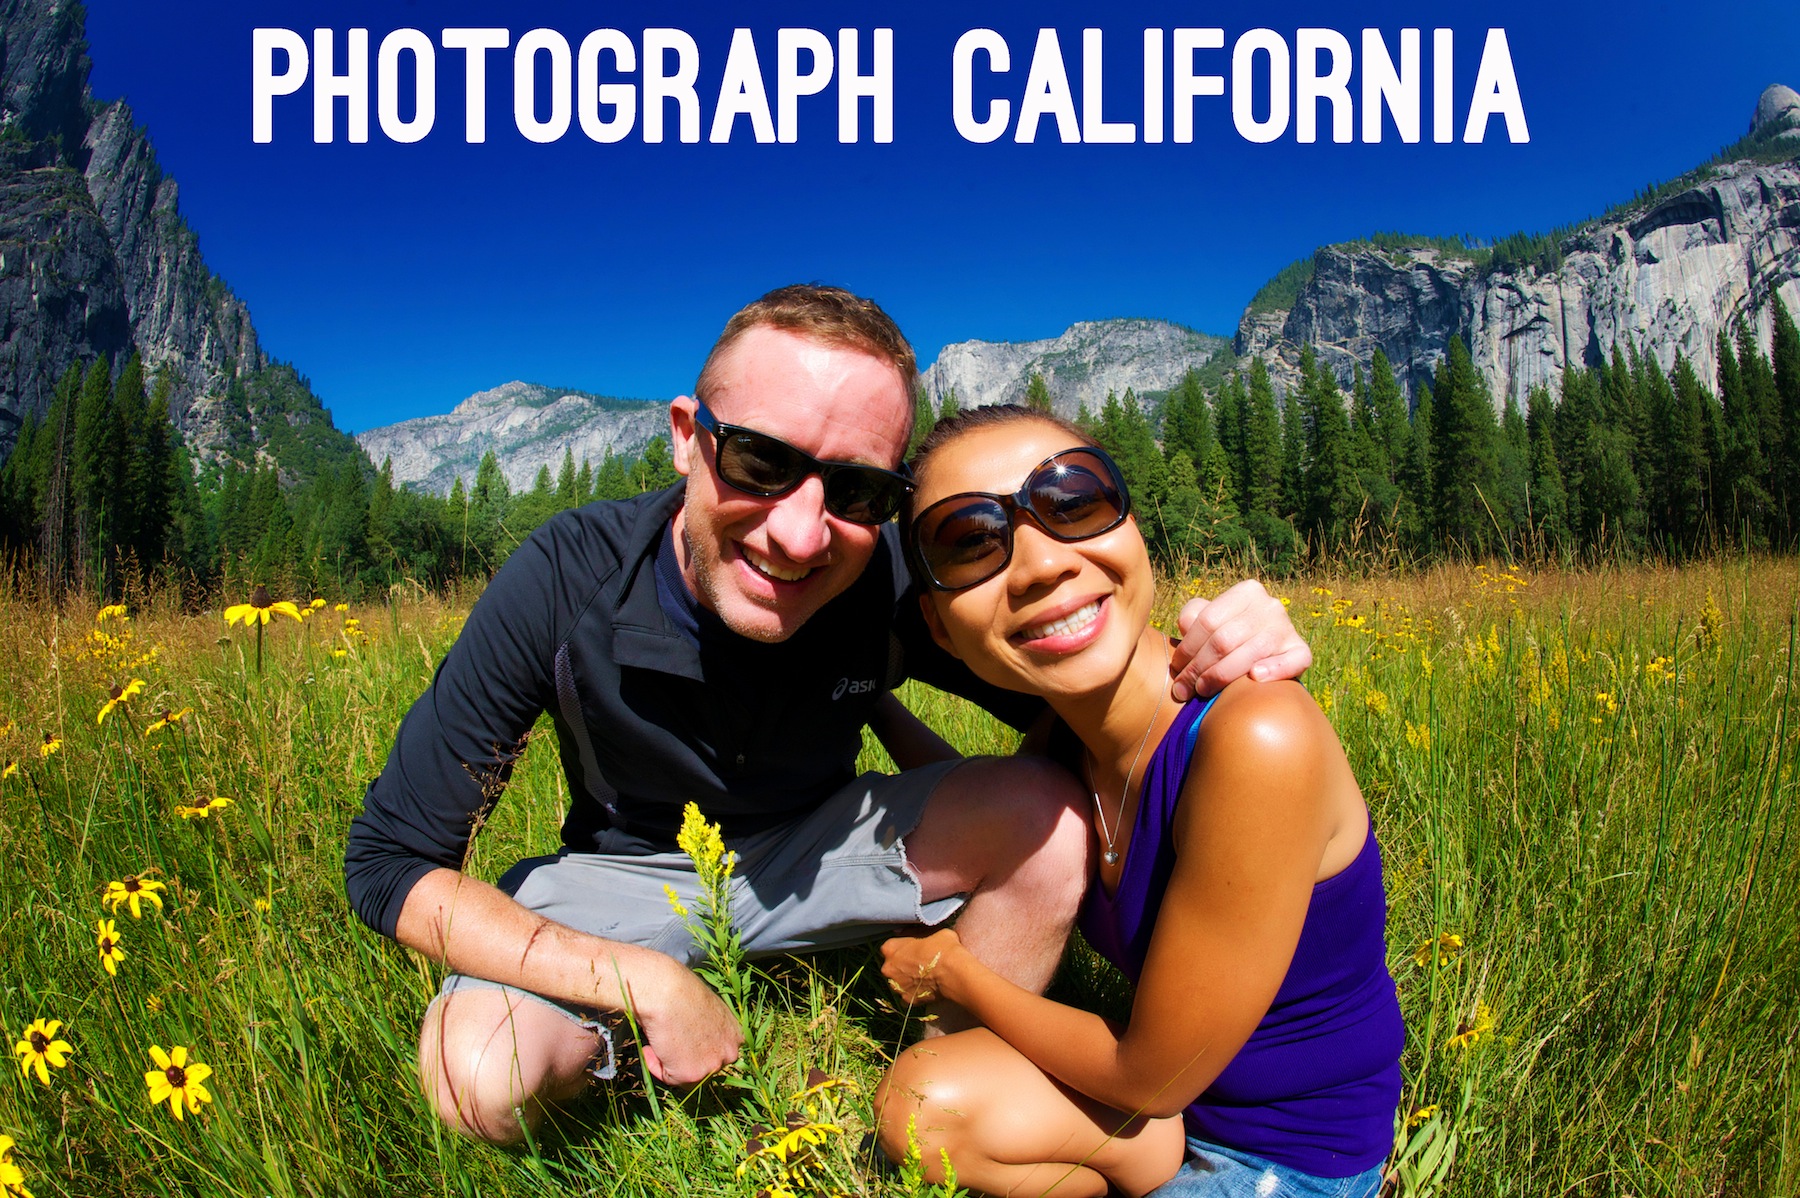
10 Most Beautiful Places to Photograph in California
California is one of the most amazing geographic locations in the world. Almost every climate, every lifestyle and every land topography can be found in the state which is the reason that it is one of the first places that people come to visit when they come to the United States. Many famous places can be found in California but more importantly for photography – some of the most beautiful places in the world. I put this blog together of photographs that I have taken all over the state so you can see what the locations look like and even where to take the best pictures.
Photography Tour California in 7 to 10 days or a month
I think to really capture the beauty of California you need at least 1 week in the state but quite honestly I feel that you would need 2 weeks to adequately capture most of the best places in a comfortable manner. My recommendation for touring the state if you are coming from out of the state or the country would be to fly to Los Angeles, rent a car and then hit up all of the locations that I outline in this blog and then fly out of San Francisco to minimize your cost. Actually flying in or out of San Diego is an option too but it it is harder to find direct flights internationally.
My recommended itinerary is about 1,700 miles of driving to some of the most beautiful places in the world. I have driven all of those roads and I have to tell you I have seen some amazing things in the process. You can eliminate 10 hours of the driving time of this itiniarary by not going to Redwood National Park but if you are headed up to Oregon anyway it will be well worth the trip.
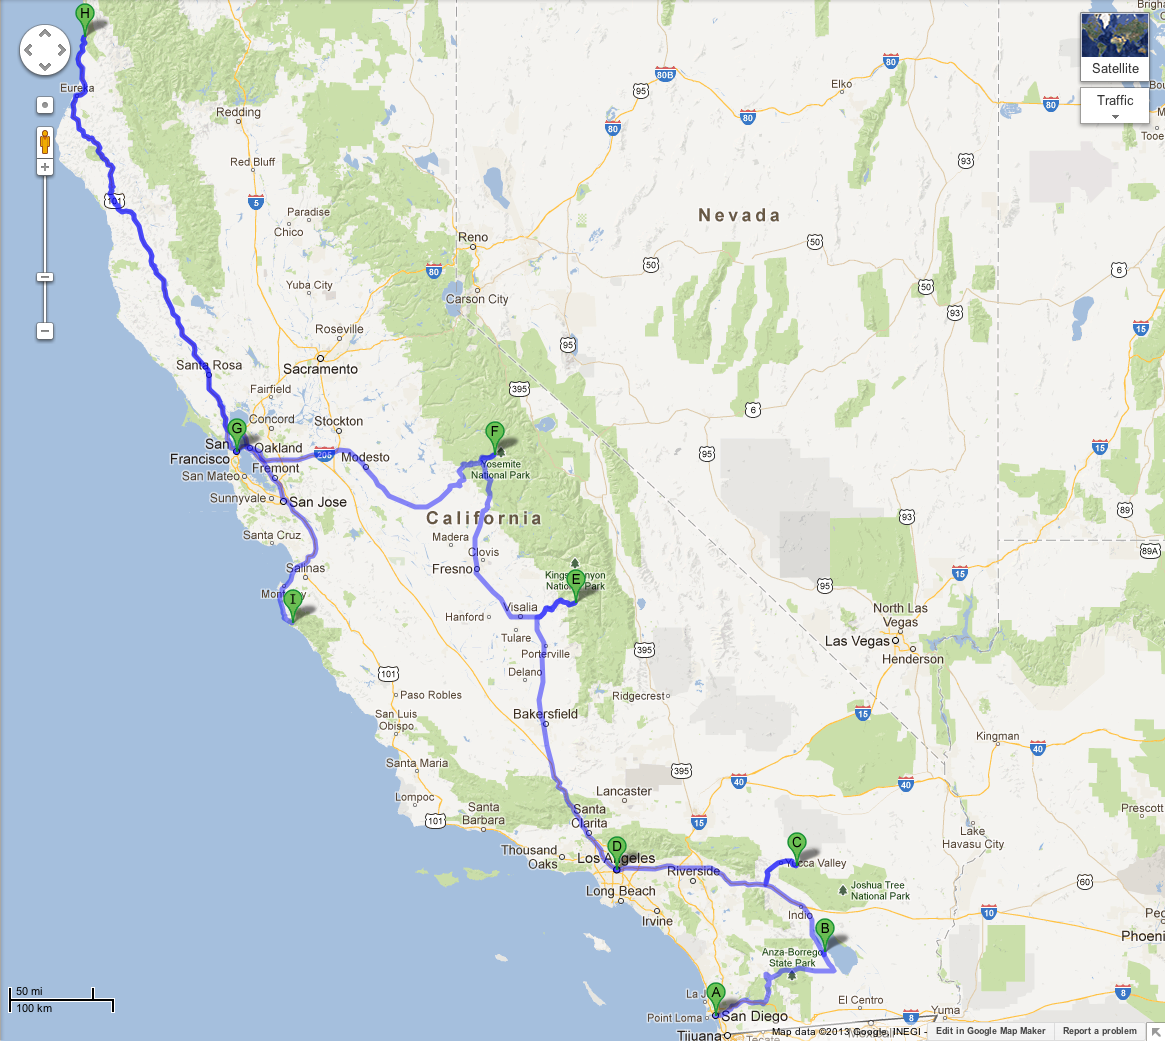
Tour from Southern California to Northern California
For purposes of this, I will show the most interesting places to go and photograph in California from Southern California to Northern California. There is no reason however that you could not develop your own itinerary to make it work for your schedule.
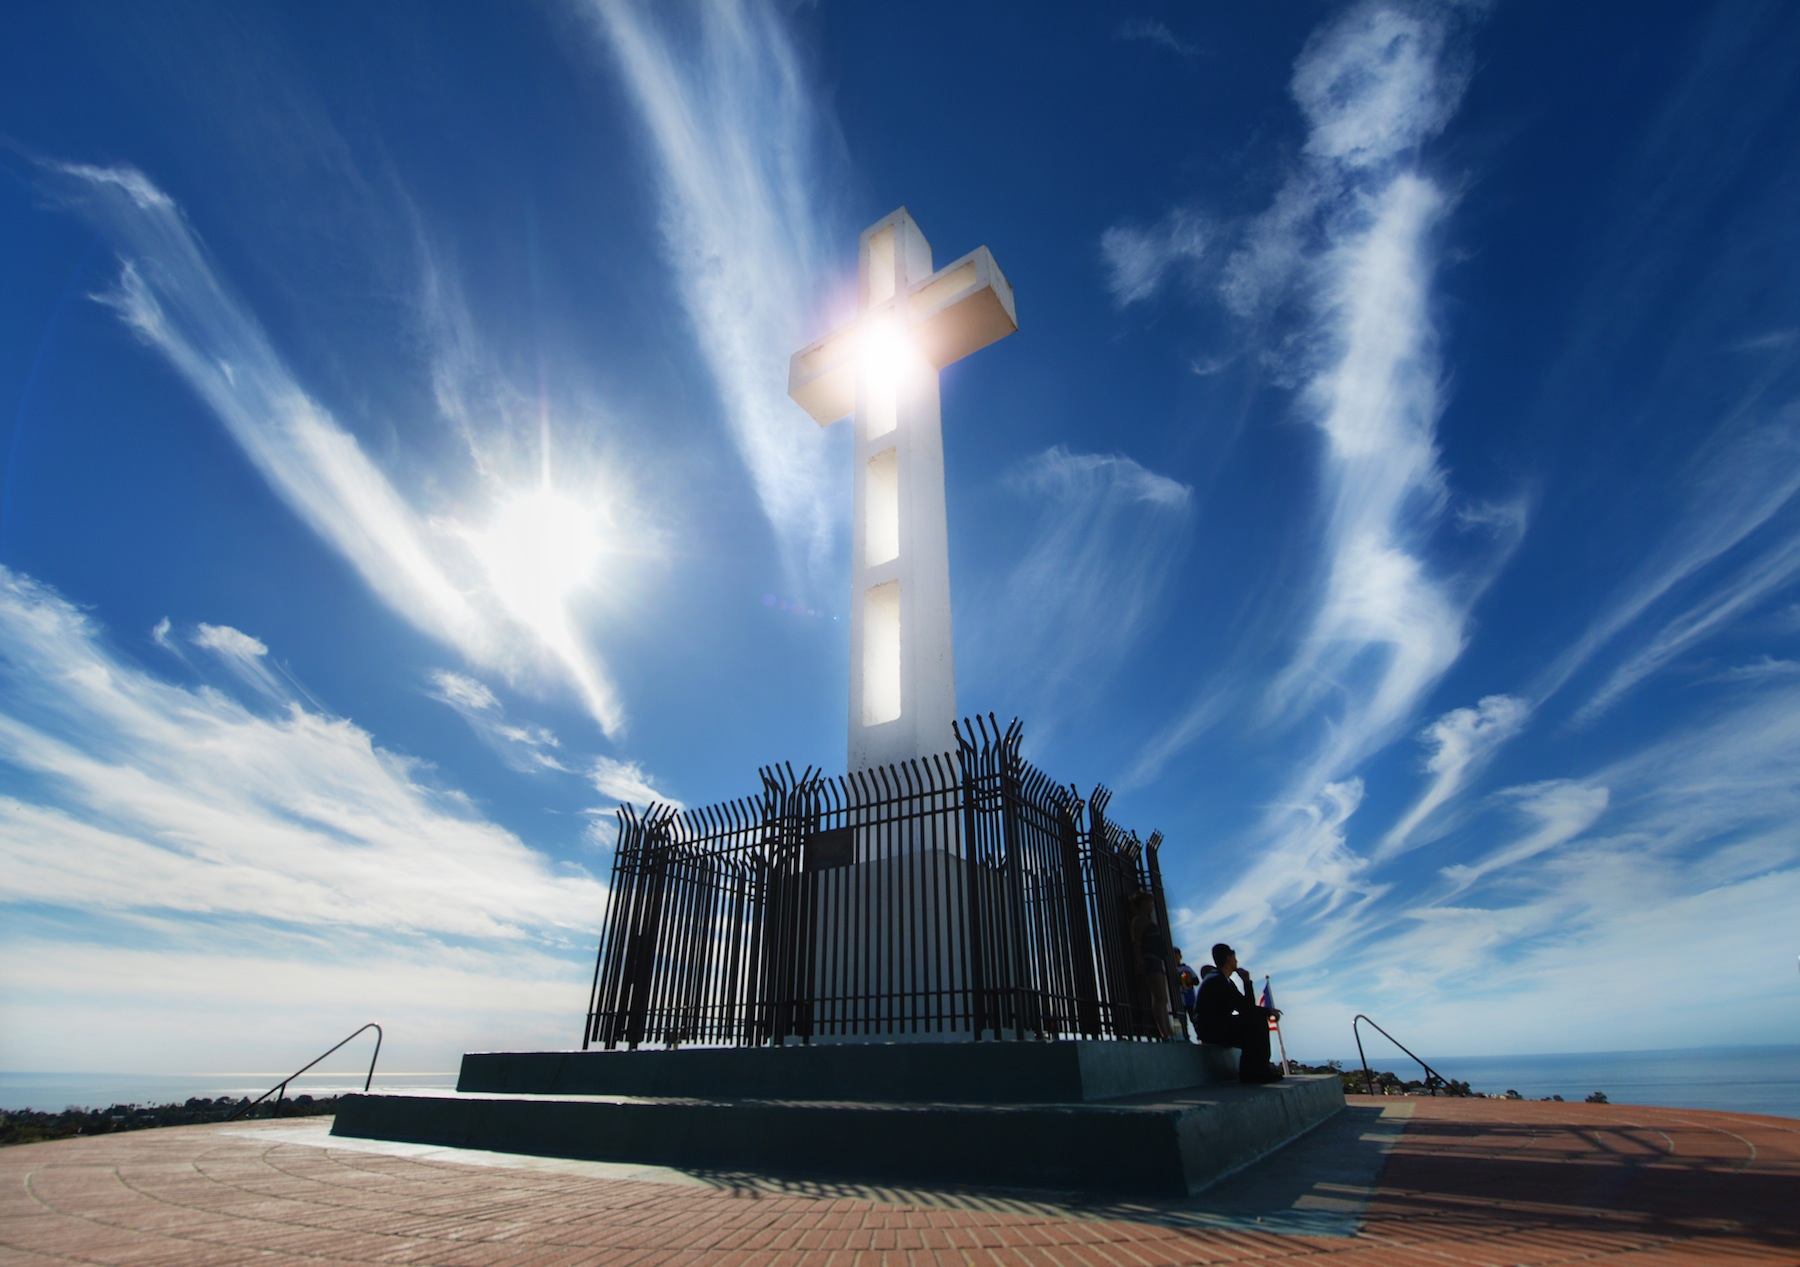
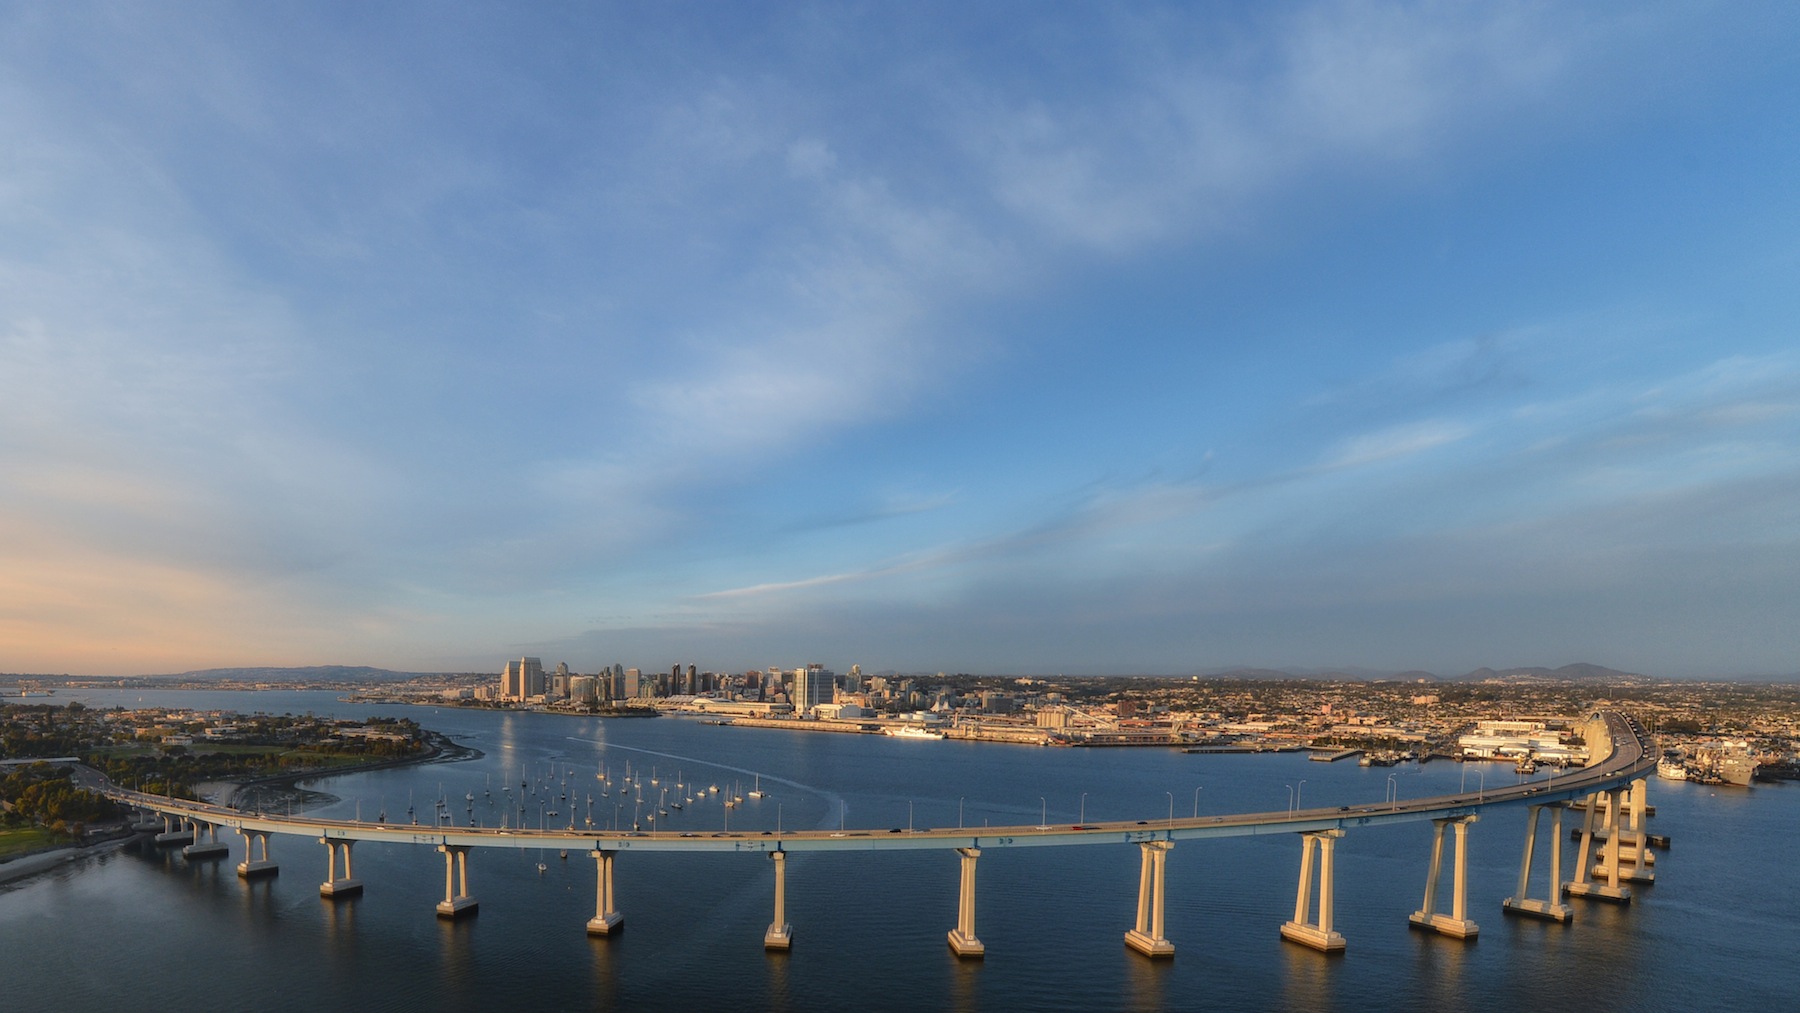
Spot #1 – San Diego California (google map it)
If you want to find the most beautiful locations to photograph in San Diego. Check out my blog post Top 15 Locations to Photograph in San Diego. From San Diego you can actually head into another country – Mexico! You can cross the border and see two countries in the same day. Tijuana is a bit dangerous so be careful.


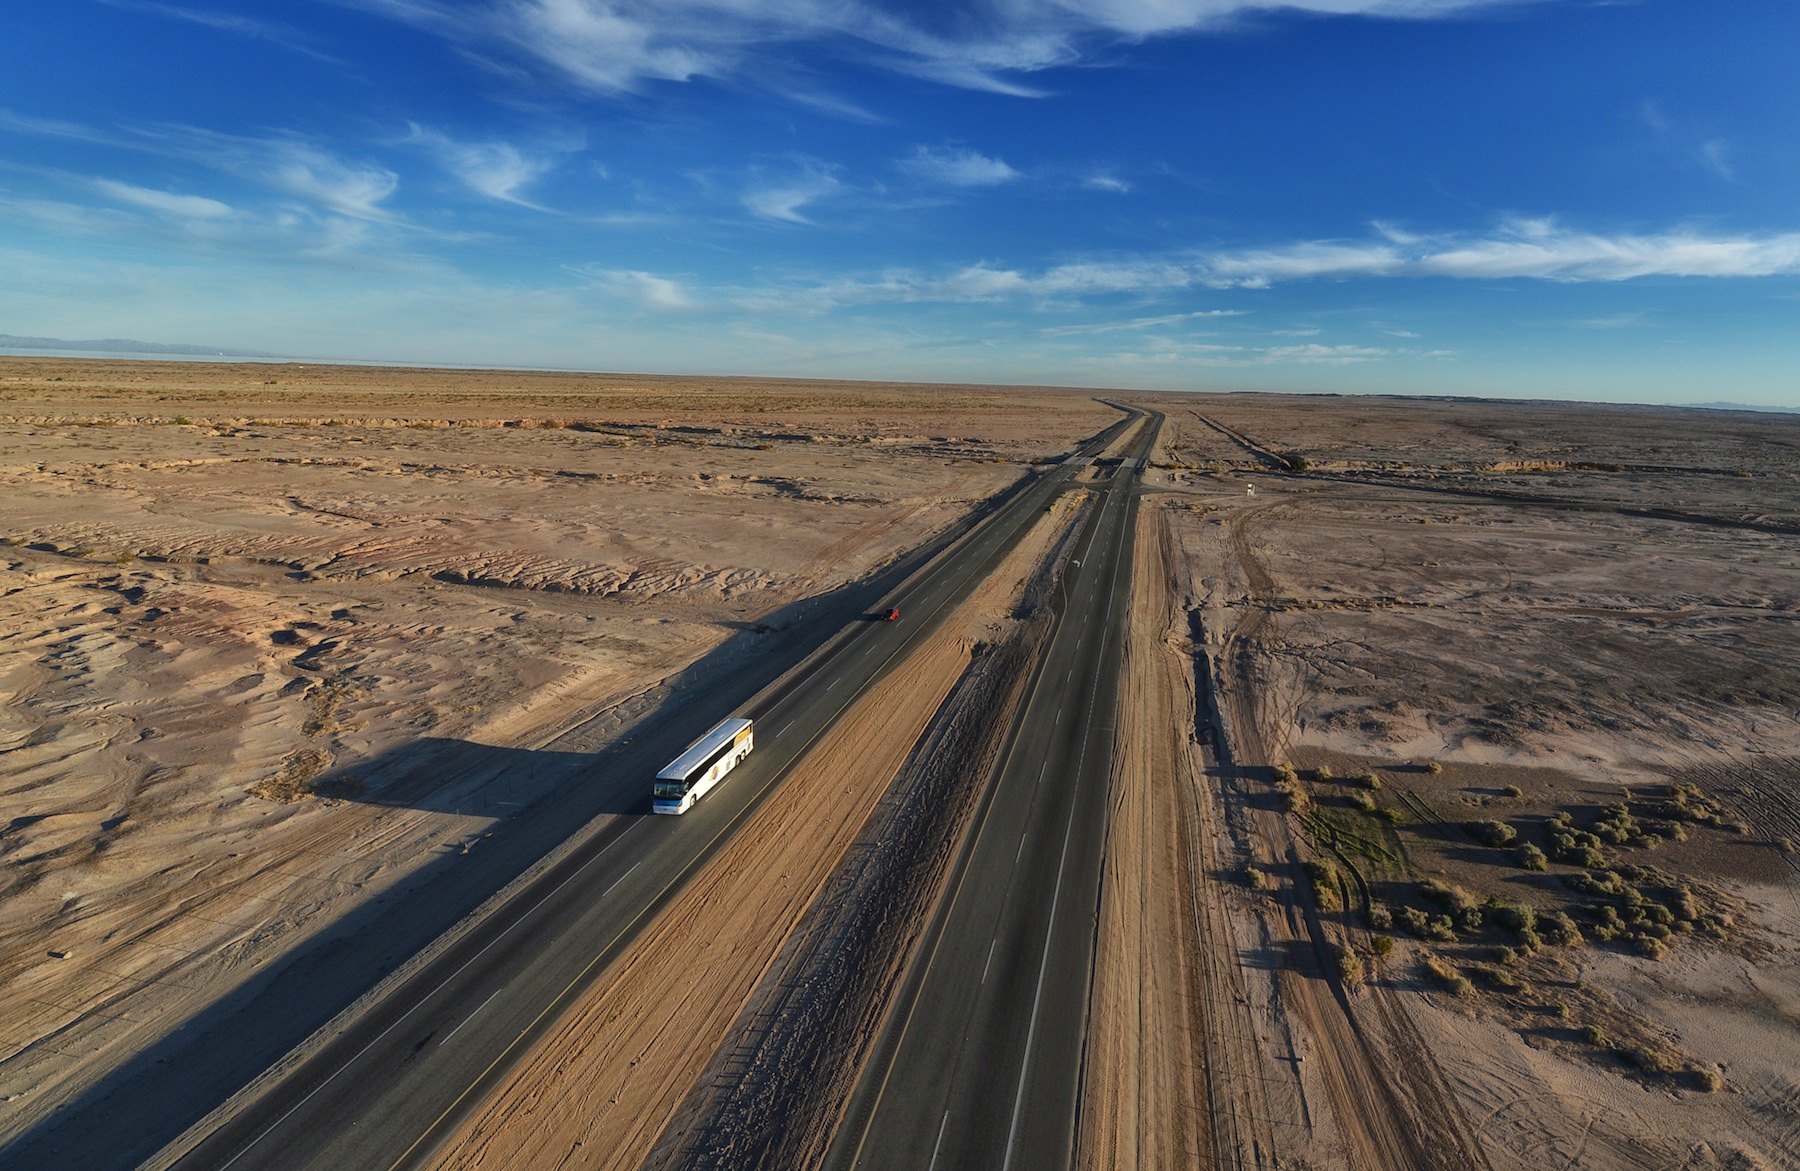
Spot #2 – Salton Sea (Google Map It)
After visiting the beauty of San Diego, hop in your rental car and head out to one of the most unusual places in the world. It takes about 2.5 hours to get to the Salton Sea from San Diego but you will get a very beautiful desert drive along some lonely roads and some great photography opportunities.
The Salton Sea is one of the oddest and off the beaten path day trips you can make from San Diego. If you like photographing quirky places, abandoned houses and desert life you have to check out this place. I wrote a blog on it since I like it so much. You can check out more photographs of it if you link to this site. The Weird Salton Sea. There is a road that can take you pretty much all the way around the sea but it is very large and takes a long time. My recommendation would be to check out the city of Bombay Beach, Niland and Salton City. Make sure you are here for sunset as it is extraordinary.


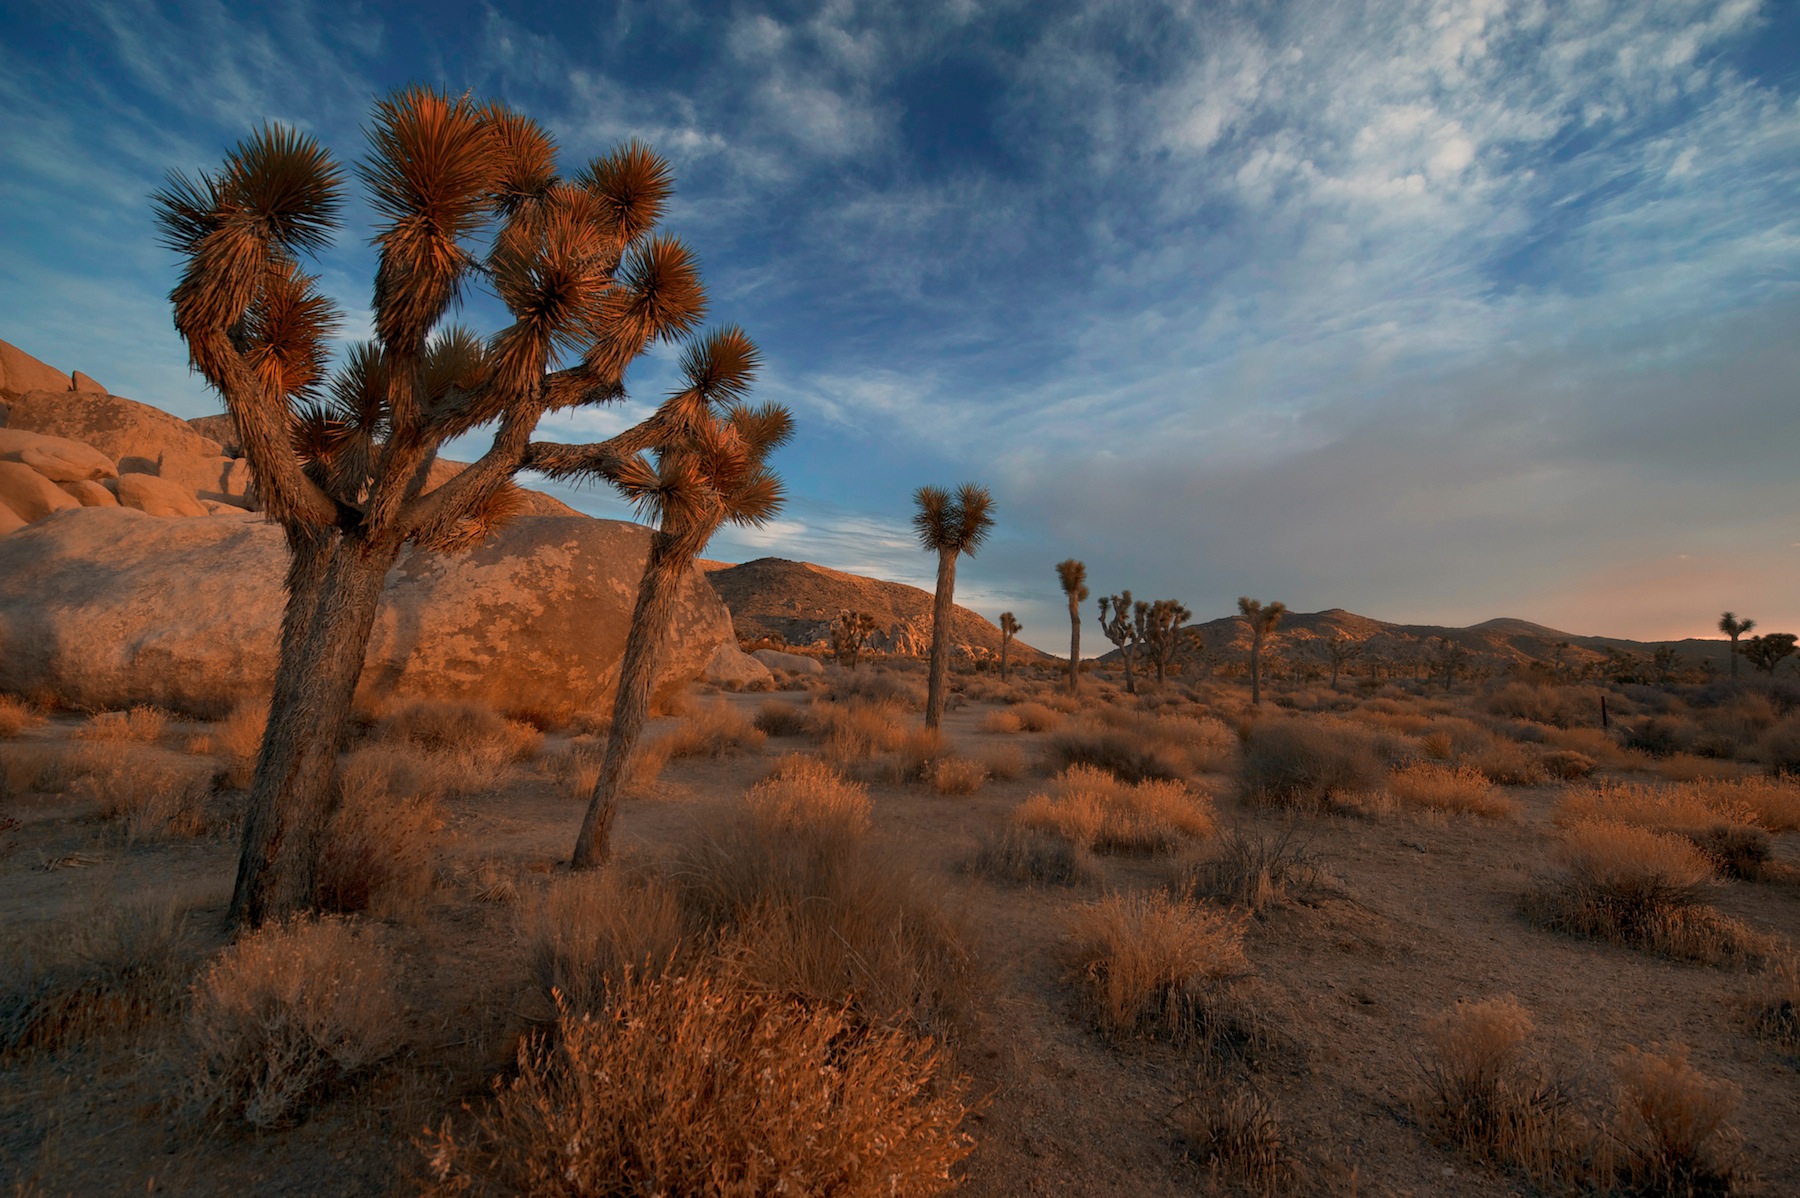
Spot #3 – Joshua Tree (Google Map it)
The drive from the Salton Sea to Joshua Tree California is about 1.5 hours so you can do it in the morning or evening. Joshua Tree National Park is an amazing and beautiful place. You could spend a whole day here photographing some of the beautiful Cholla Cactus that are here and the beautiful rock and sand formations. I would recommend planning your day so you have at least 6 hours at the location and you should be there at sunset since that is the best time of day to shoot. This place is gorgeous and it’s like your traveling to another world when you enter the park gates. Don’t get lost on the trails – it’s easy to. This location is famous as a location for photography shoots as well as movie shoots too.
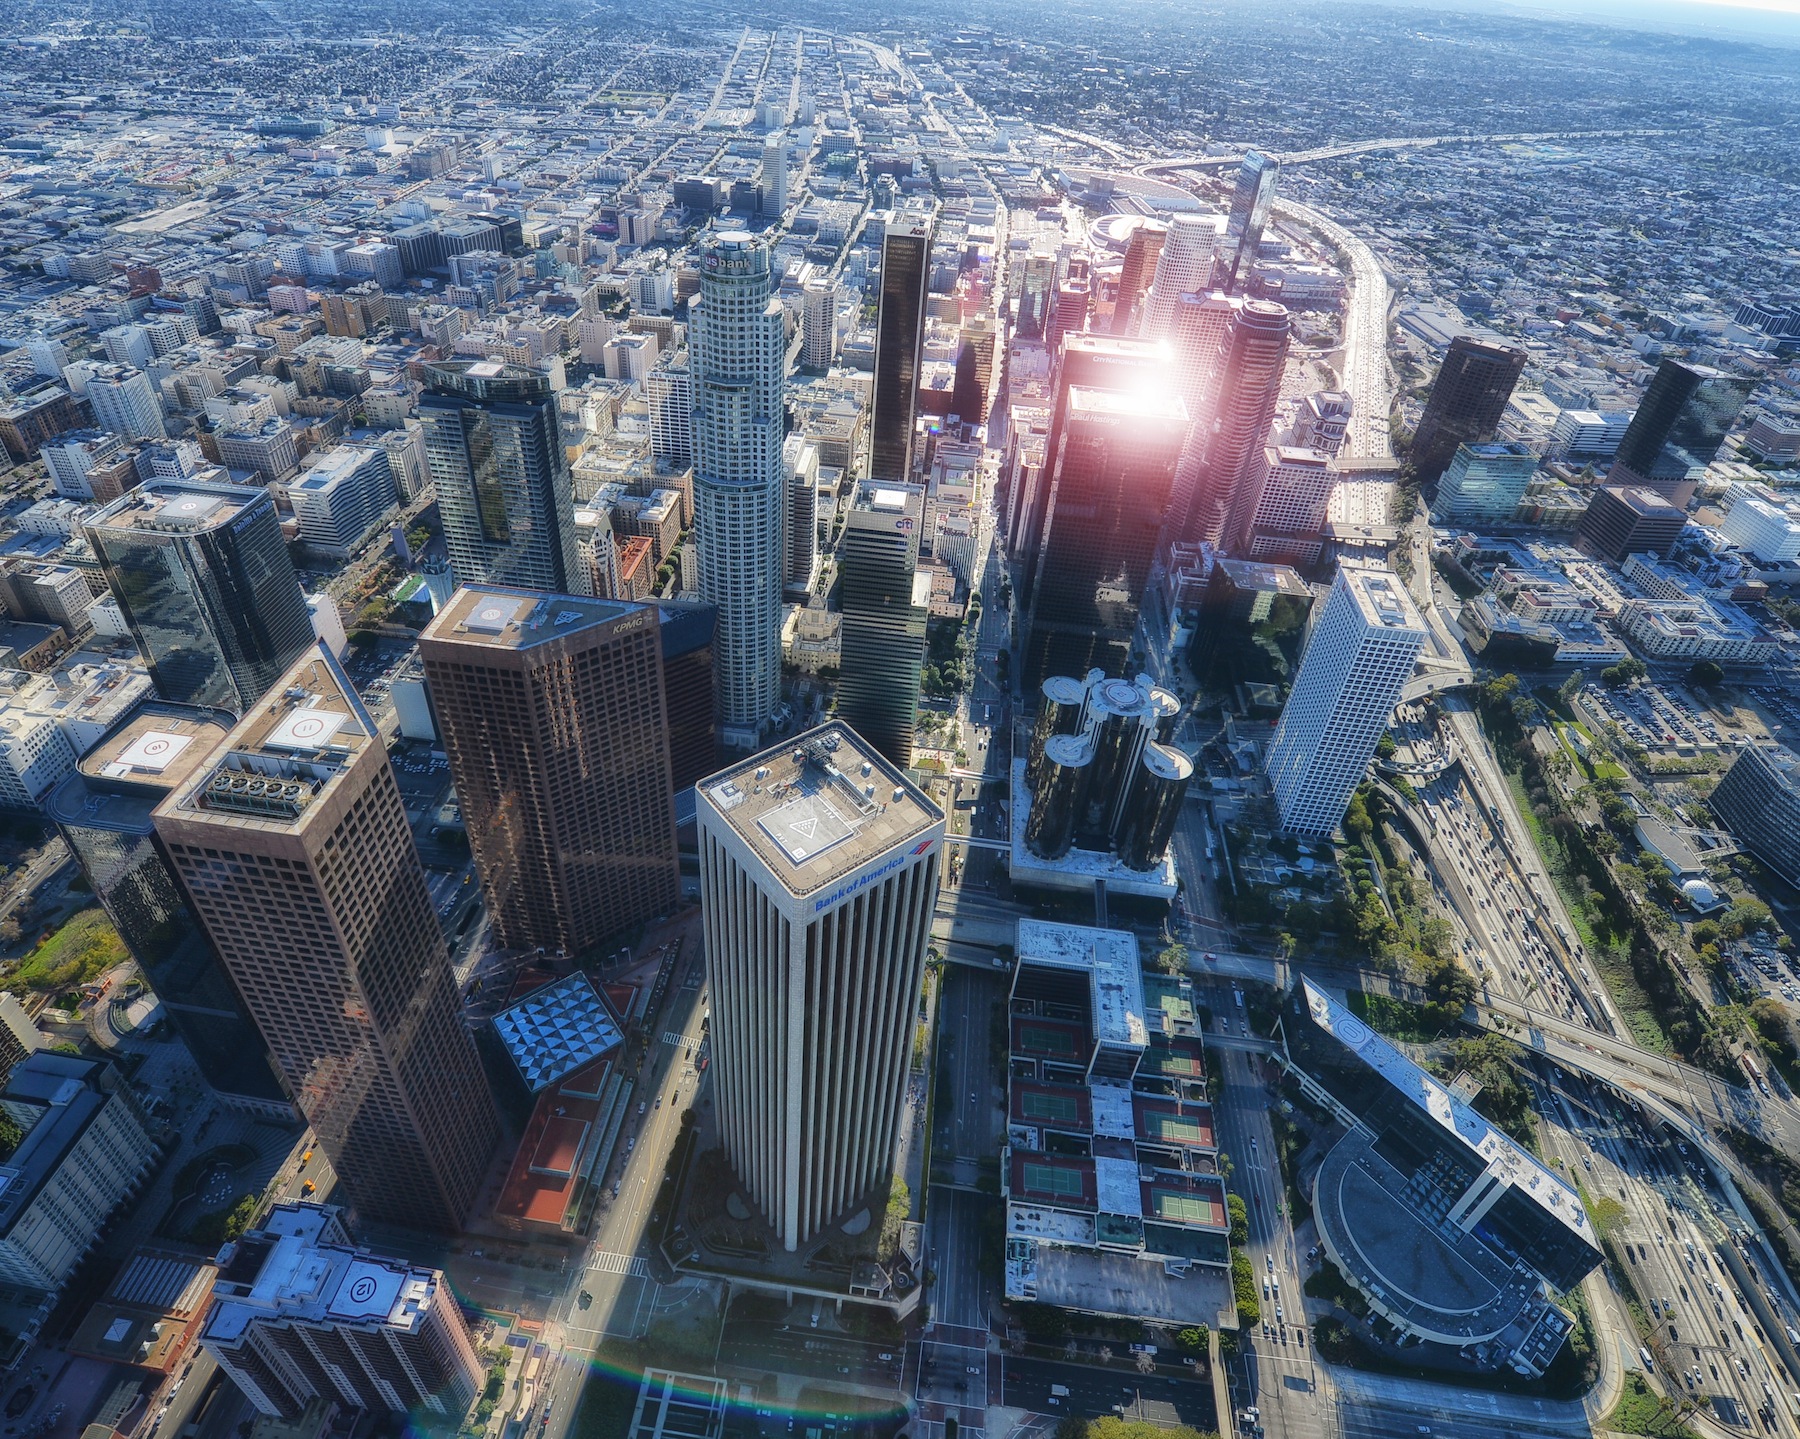
Spot #4 – Los Angeles (Google Map It)
Los Angeles California is a 2 hour drive from Joshua Tree National Park and it is one of the biggest cities in the United States. There are so many locations for you to visit in Los Angeles that you will probably need at the very least 2 full days to see them all. I recommend visiting Santa Monica, Venice Beach, Downtown Los Angeles, Beverly Hills, Hollywood and possibly even DisneyLand which is about 1 hour away. Los Angeles is amazing and so full of life.
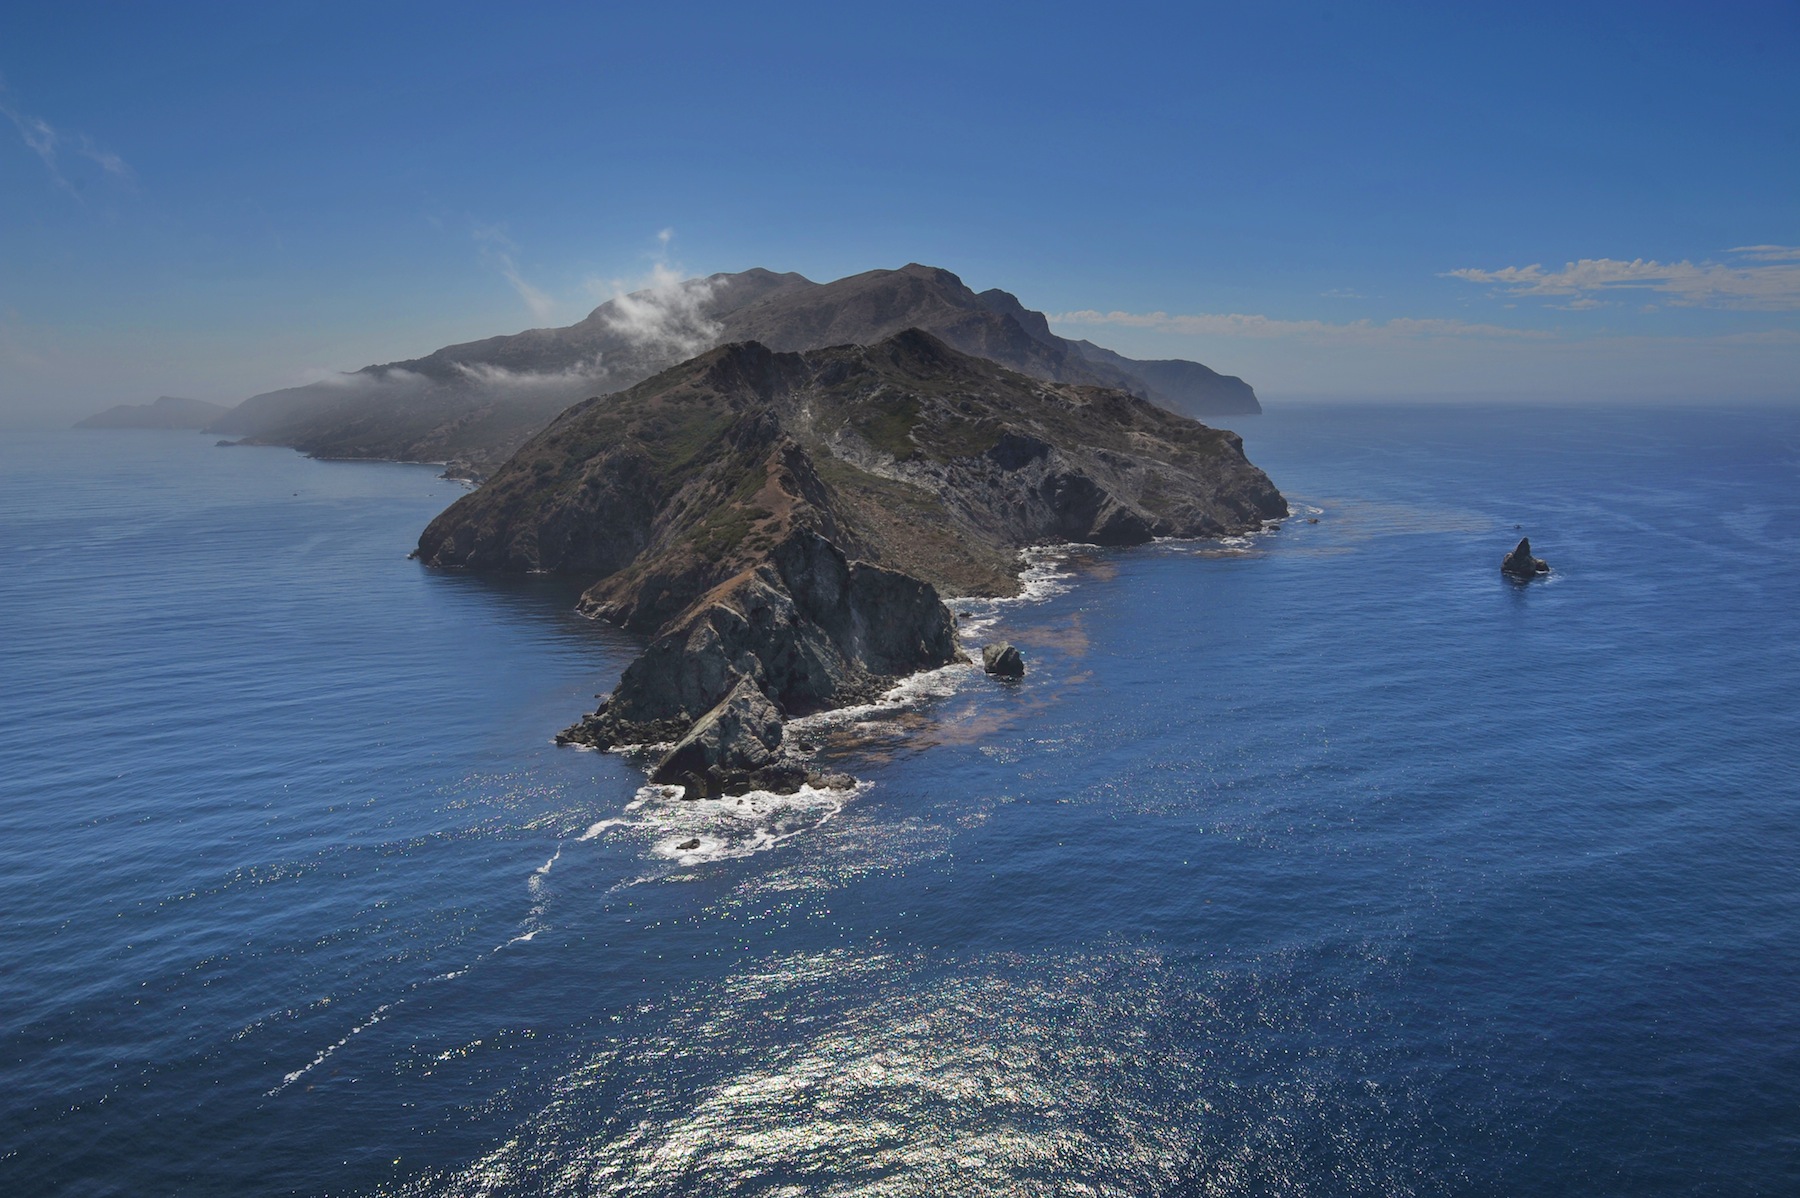
Spot #5 – Catalina Island (Google Map It)
Catalina Island is 26 miles off the coast of Los Angeles and a stunning place to visit and photograph. To get to Catalina you need to go to Long Beach Ferry and take a boat. The boats leave and return many times in a day and you can get there and back in a single day trip if you leave early. Here is a website for the company that runs the ferry service Catalina Island Express . Its called Catalina Express if the link changes. Get to the Ferry a couple of hours early if you want to tour the Queen Mary which is a beautiful ship and other photographic opportunities.
If you go in the winter, you will probably spot whales and dolphins during the boat ride over. In the summer you will probably see flying fish as they flee the fast moving boat. The island is quite small but you can rent a golf cart and then take fantastic photos all over the island.


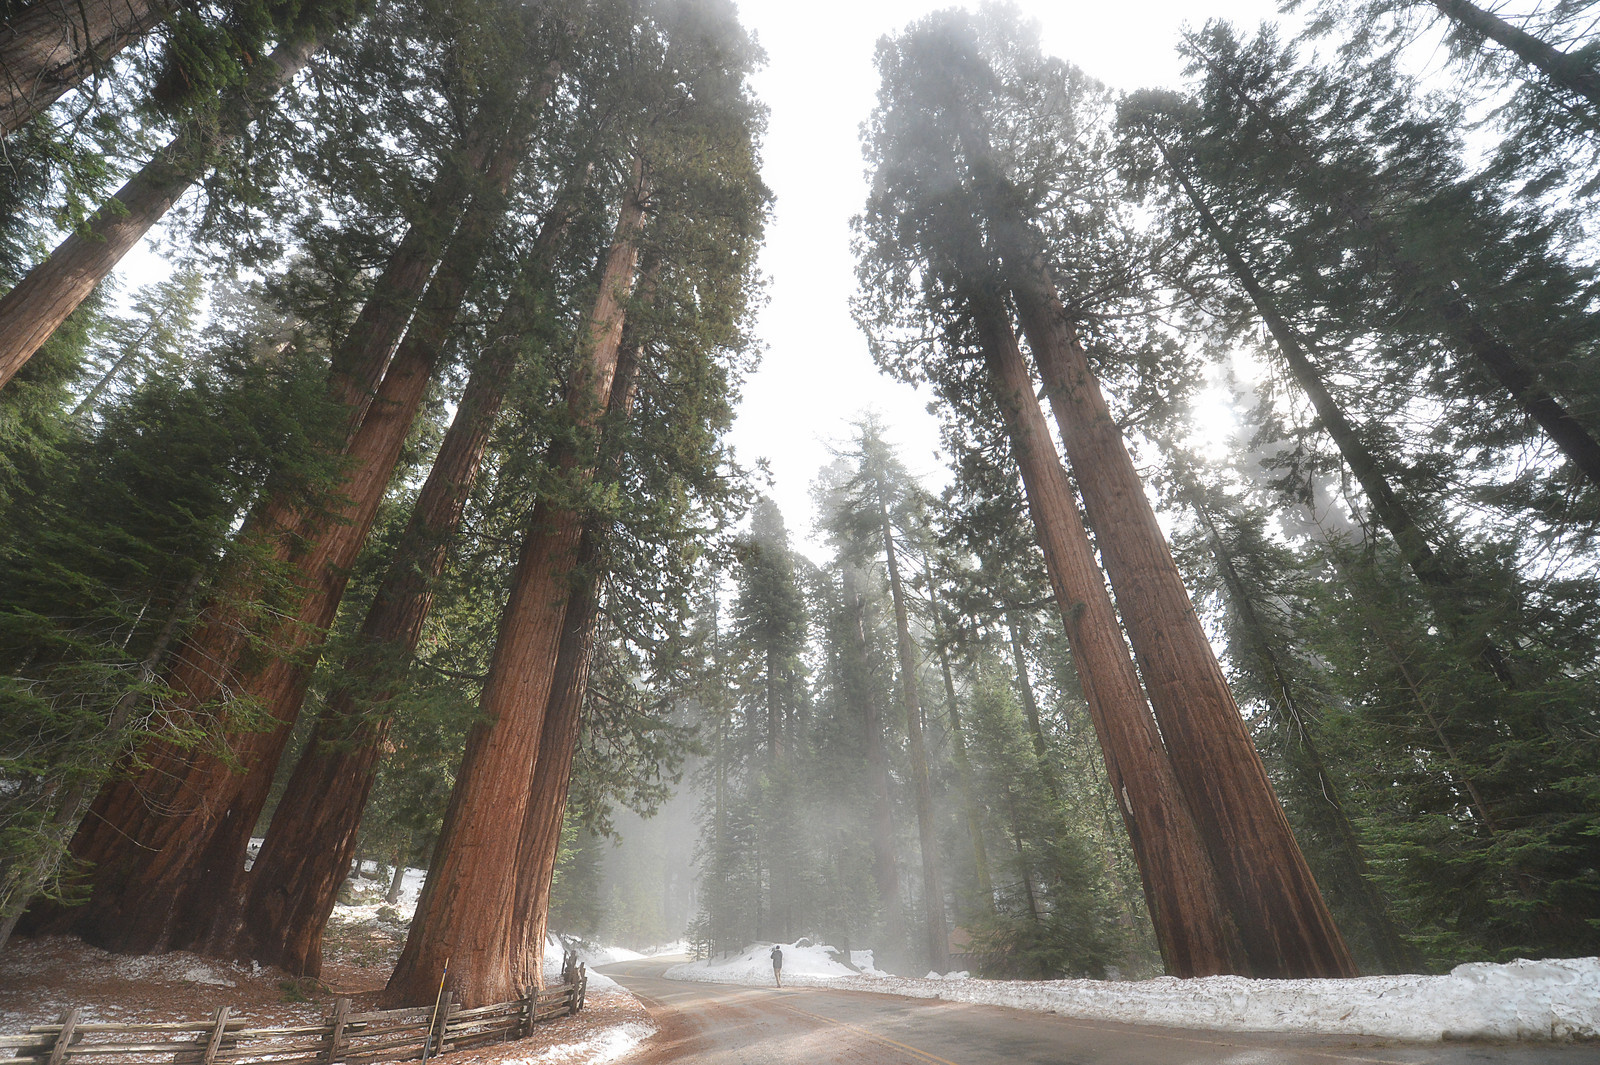
Spot #6 – Sequoia National Park (Google Map It)
From Los Angeles there are various routes you can take to San Francisco. The route I recommend with this itinerary is the route that requires the fewest driving miles for the whole trip. If you have more time in California, I would recommend taking the coastal route which will allow you to see all of the amazing cities and beach towns along the California Coast. This would mean more driving but if you have more time than head up the coast to San Francisco before heading out the National Parks I outline here. Here is the alternative scenic route and the places I would recommend going along the coast. It includes Los Angles to Santa Barbara, Santa Barbara to Avila Beach, Avila Beach to San Simeon, San Simeon to Big Sur, Big Sur to Carmel, Carmel to Monterey, Monterey to Half Moon Bay, Half Moon Bay to San Francisco, San Francisco to RedWood National Park, Redwood National Park to Yosemite and Yosemite to Sequoia National Park, Alternative Long Route along Coast. My recommendation if you take the long route is to skip Redwood National Park because it adds too many miles to the drive. But the drive I must tell you is absolutely gorgeous in many places.
Assuming you take the route I mentioned you can be in Sequoia National Park the next afternoon if leave Los Angeles early in the morning. Sequoia National Park contains 5 of the 10 largest trees in the world and it is astounding and beautiful. If you want to check out the pictures I took at this place you can go here to this blog – Sequoia National Park.

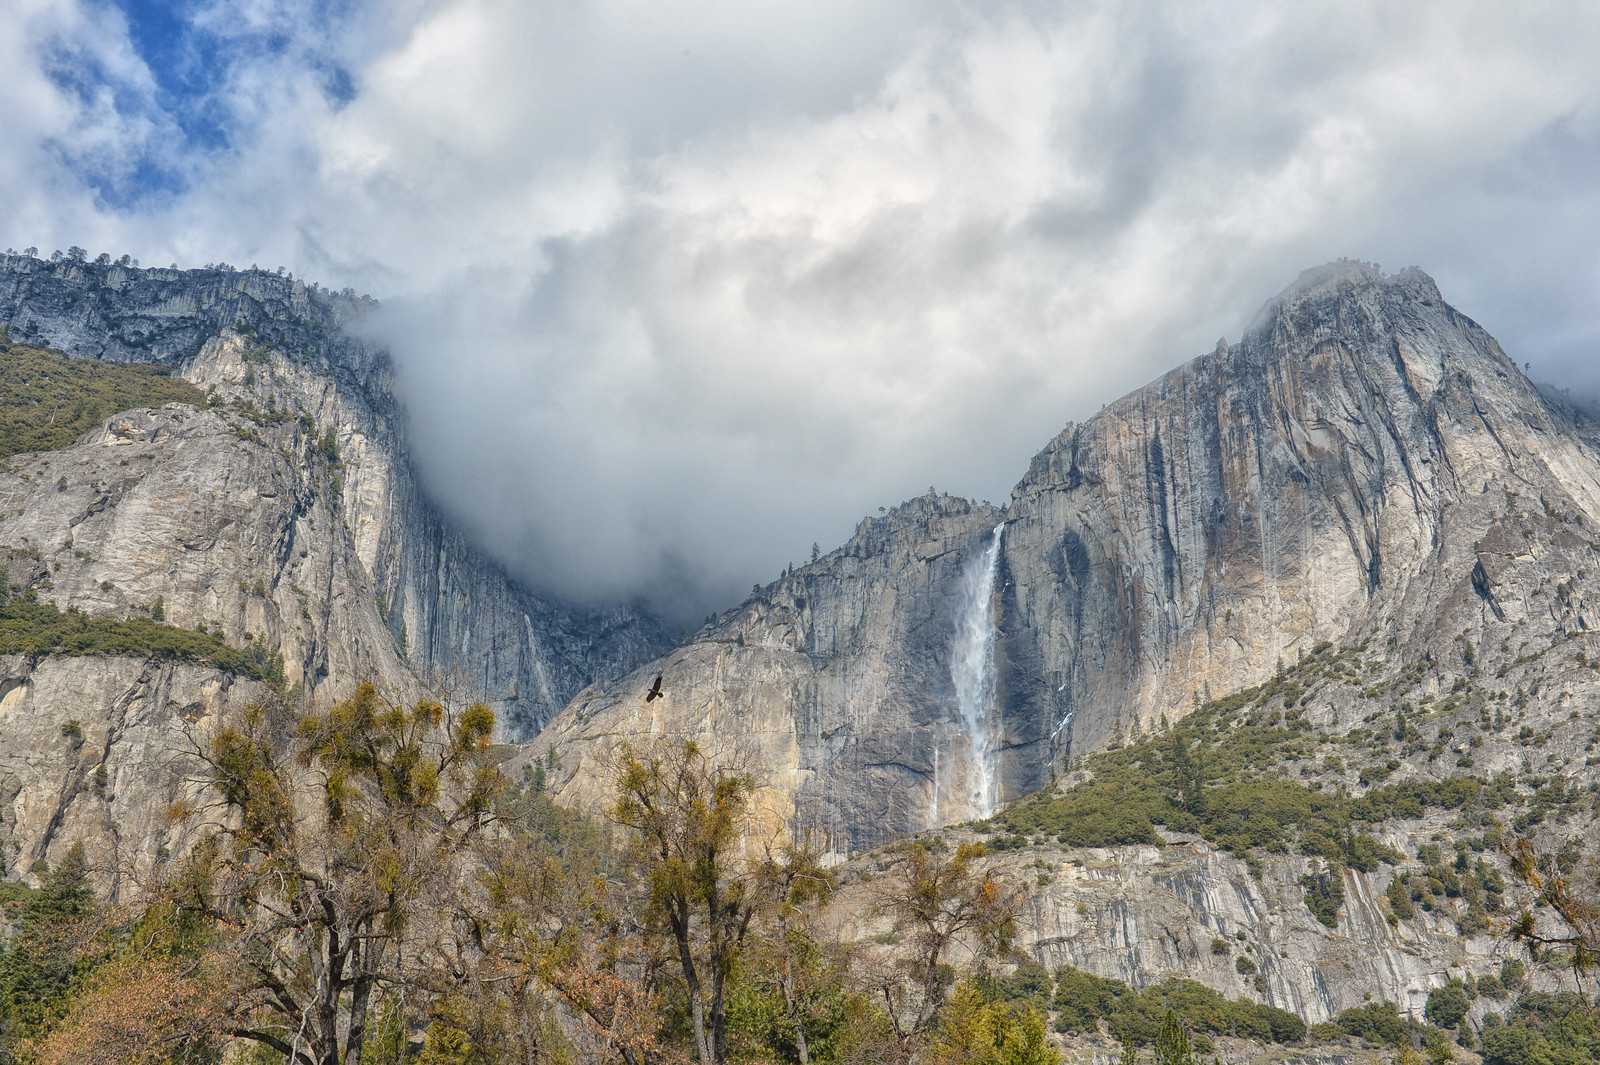
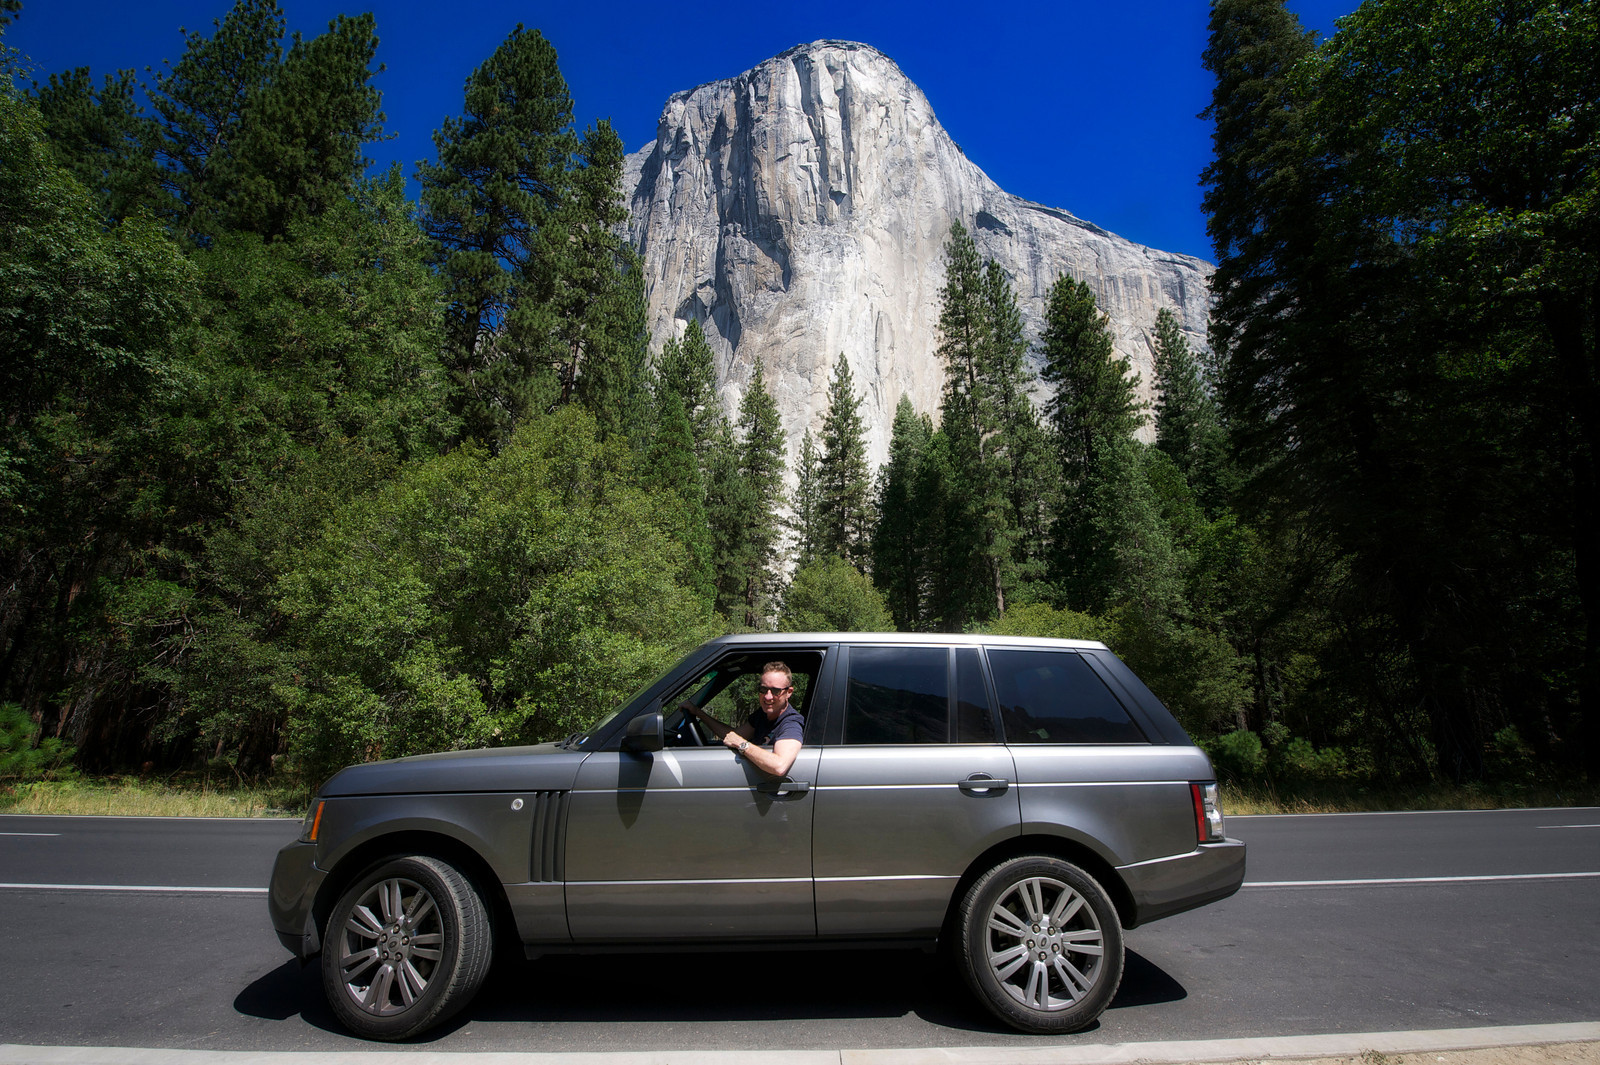
Spot # 7 – Yosemite National Park (Google Map It)
Yosemite National Park is one of the most awe inspiring places in the world. It is truly one of the wonders of the world and probably one of the best places in the world to capture iconic and well known images. Even if you don’t take pictures it is one of the most beautiful places you will ever visit and that is a guarantee. This place must not be missed if you are traveling within California. While you are traveling to Yosemite, you might pass through this small ghost town called Chinese Camp. I highly recommend you stop at this place too. Chinese Camp California The Most Haunted Town in America.

Spot #8 – San Francisco (Google Map It)
San Francisco is the best city in the United States. It has everything that New York has and more. You can’t miss coming to San Francisco when you are in California because this may be the place that you end up leaving your heart. You need at least 2 days to thoroughly enjoy San Francisco and you have to get to Fisherman’s Wharf to get the crab!

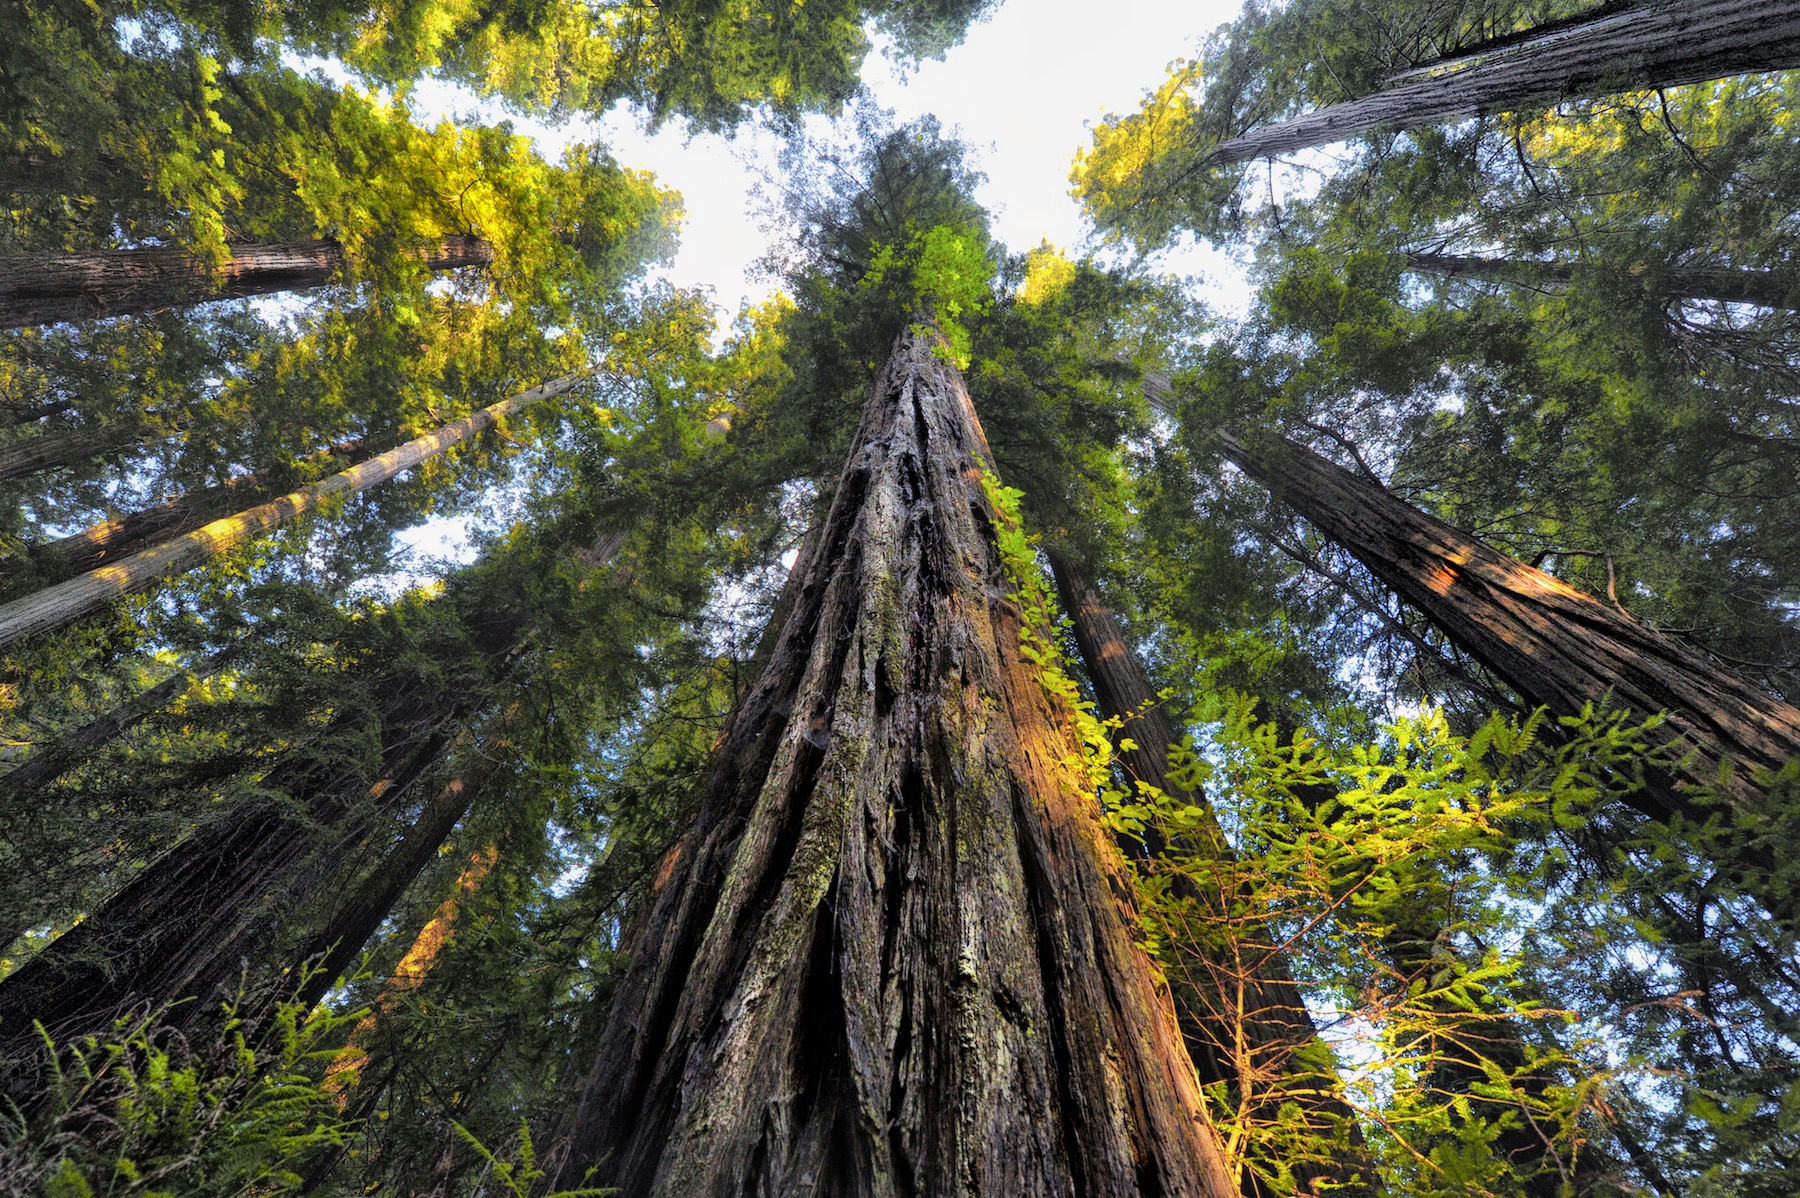
Spot # 9 – RedWood National Park – (Google Map It)
If your planning on heading up to Oregon from California than a trip to Redwood National Park is on the way and definitely worth your time. These trees are giants – so tall that you cannot even see the top and so large that you can drive your car through some of them. Going to Redwood National Park is an experience that you will never forget. If you are not headed to Oregon the 10 hour roundtrip from San Francisco to Redwood and back again might be a little tiresome but there are some interesting things you can see along the way.
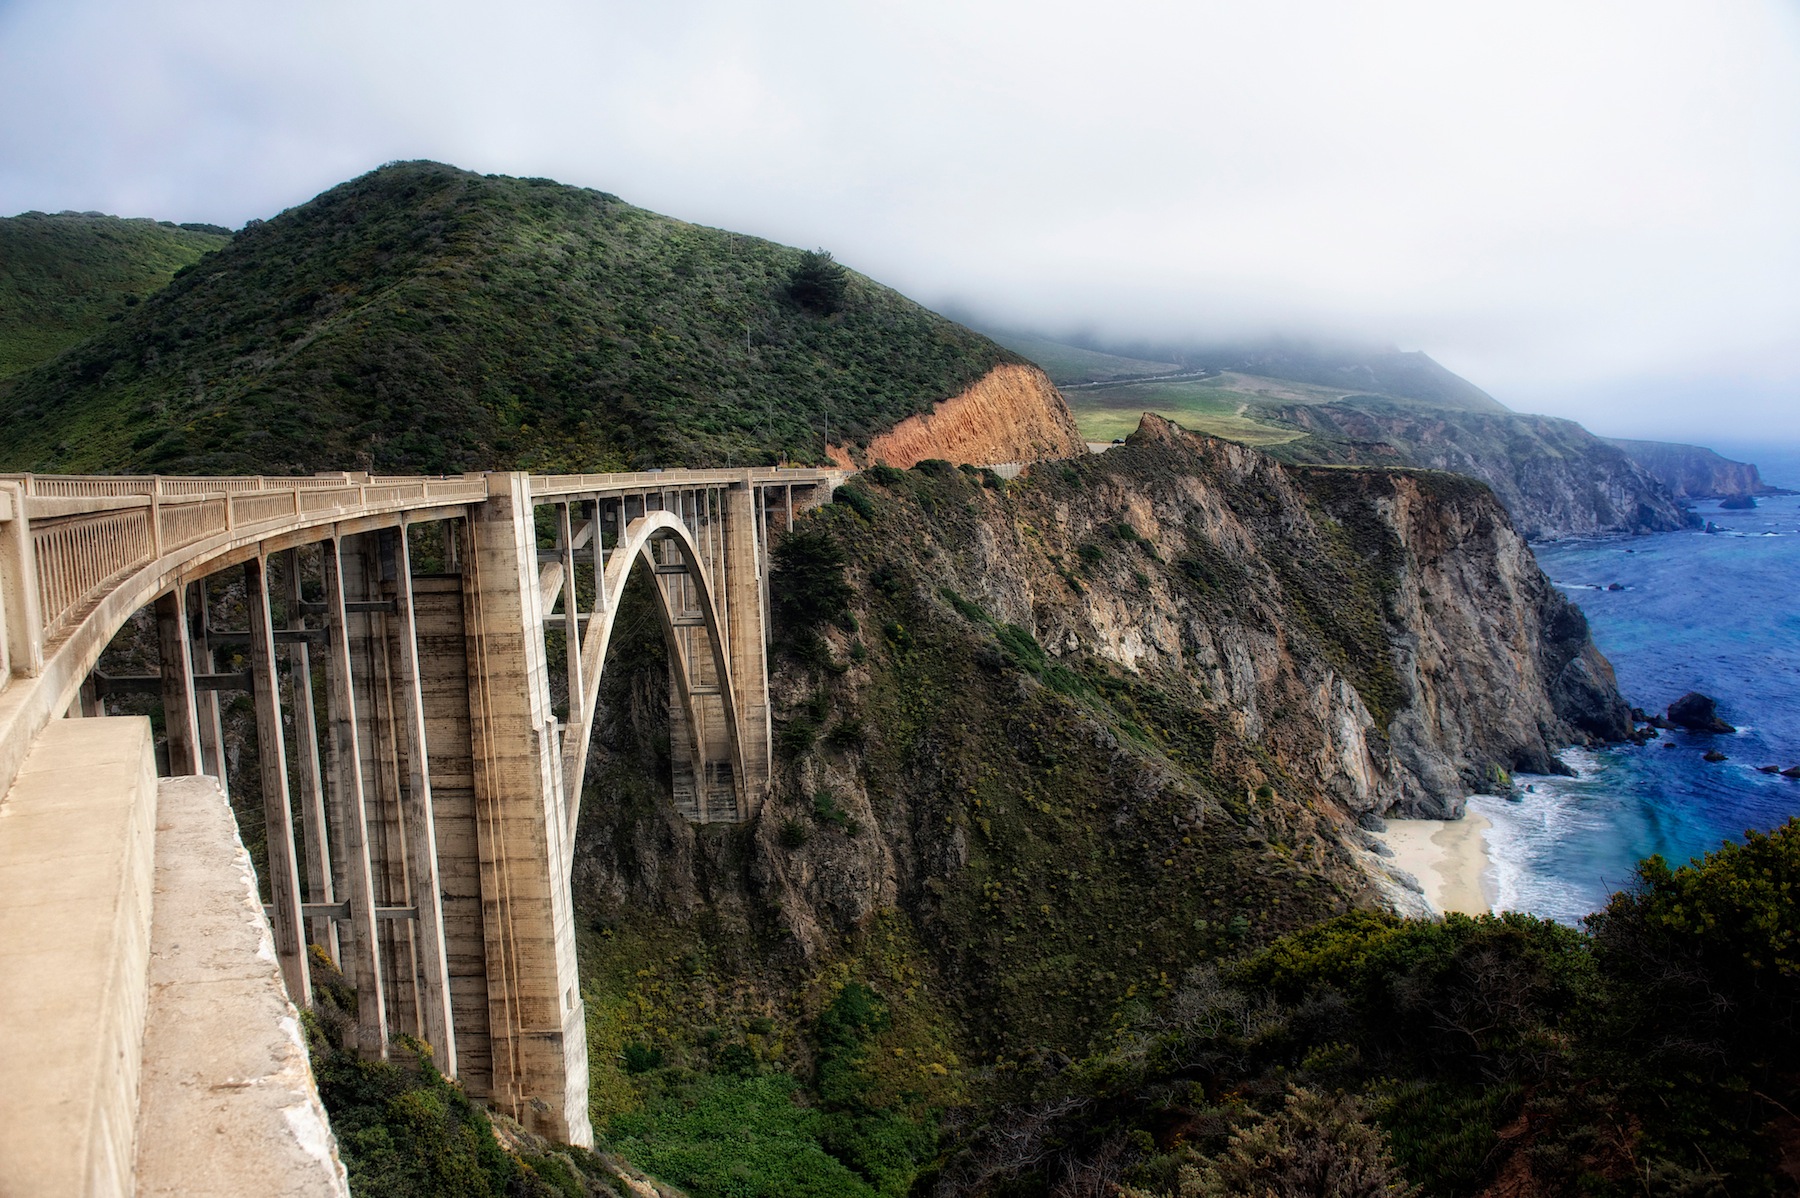
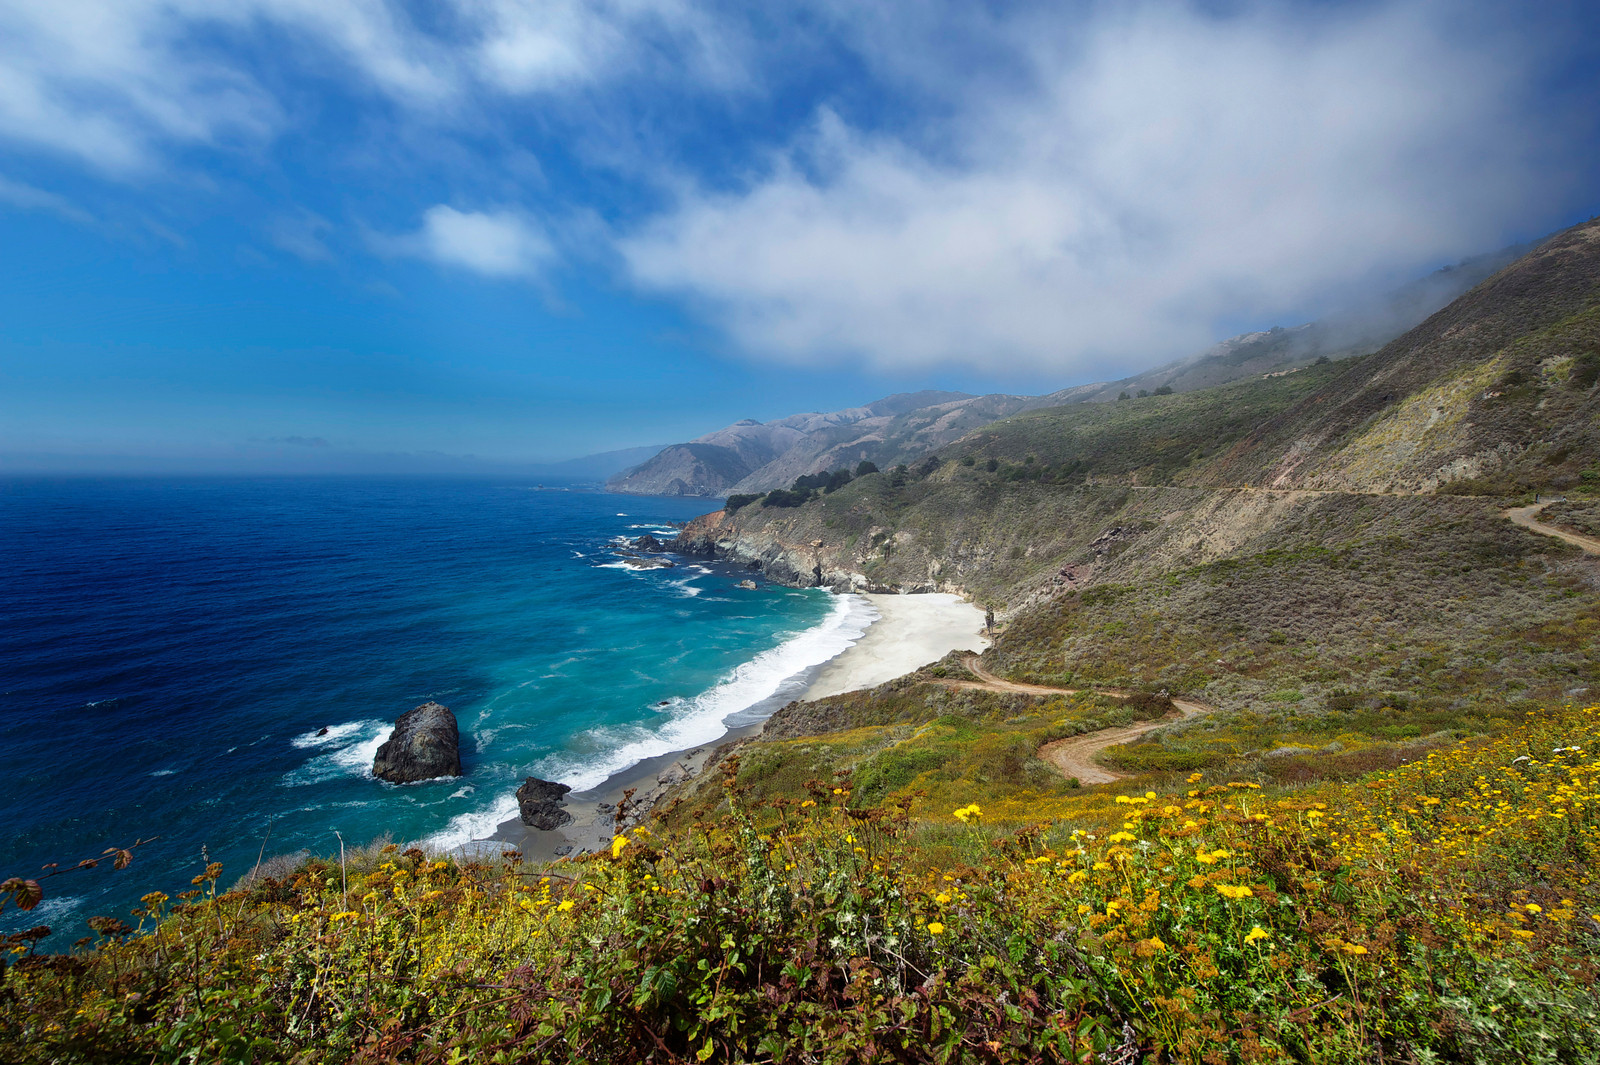
Spot #10 – Bixby Bridge and Big Sur (Google Map It)
Assuming you have not taken the coastal route up through California and want to see some of the most awe-inspiring coastline in the world than you need to head down to Big Sur and check out one of the most famous bridges – The Bixby Bridge along the way. Big Sur is over 40 miles of untouched coastline with some of the most amazing cliff views you will ever see. Big Sur is one of the most beautiful places in the world and the coastline is so rugged and dangerous that you will never experience a drive like this.
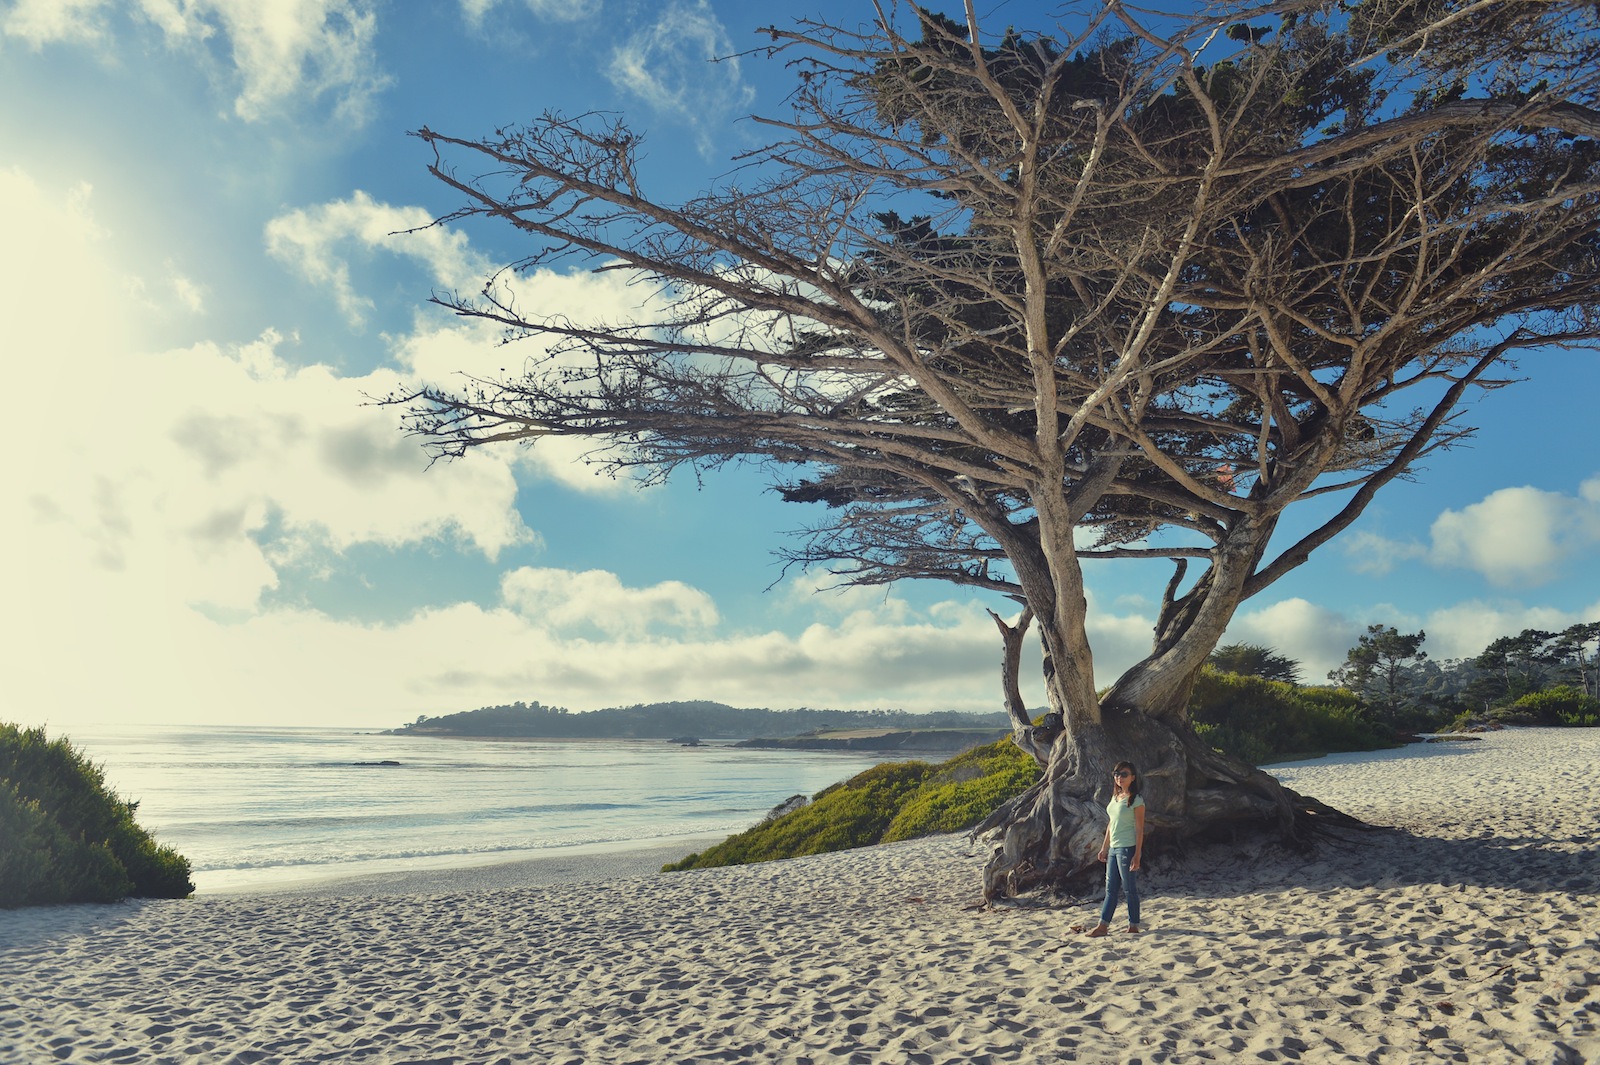
Spot #11 – Carmel by the Sea (Google Map It)
Ok, I know I said 10 spots but I had to add this last spot to the list because it is absolutely gorgeous. Carmel by the Sea is only about 30 minutes from Big Sur and it is an absolutely amazing place to stay if you have a night. This place will blow your mind. I recently wrote another blog about it which you can read about here – Carmel by the Sea.
Get in the car and go!
To truly experience California the way you want to. I recommend doing it all by car. Rent a jeep and get adventurous. There are so many hidden and tucked away beaches along the coastal route that you will want to stop off at. California is a world paradise and you want to experience every inch of it you can. You will come back with incredible pictures and a lifetime of memories.
If you have any questions, feel free to email me at [email protected]. Happy Photograph Hunting and enjoy your California Adventure!
How to get that Walking Dead Look in Photoshop

I was taking some pictures of Tu and she asked me to make it look like Zombies were chasing her in the pictures. As I played around a bit, I figured that other people might want to figure out how to get that Walking Dead Look in Photoshop so I created a tutorial. It’s kind of fun and something that you can do around Halloween to make your pictures look more like horror pictures.
First, I created a video tutorial so you can just click on this and watch it, or you can follow along with the rest of my blog to figure out how to do it. This is just a quick and dirty concept so I didn’t spend too much time trying to make the pictures look good. This is just meant to show you how to do it so you can create your own technique.
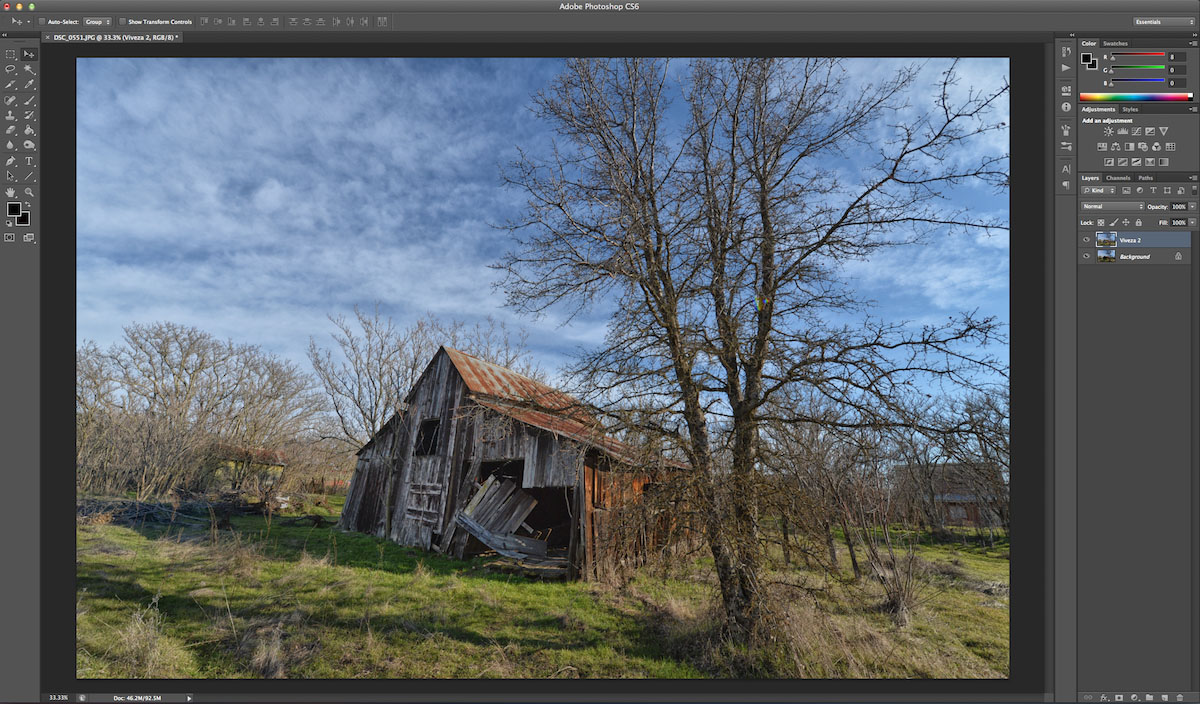
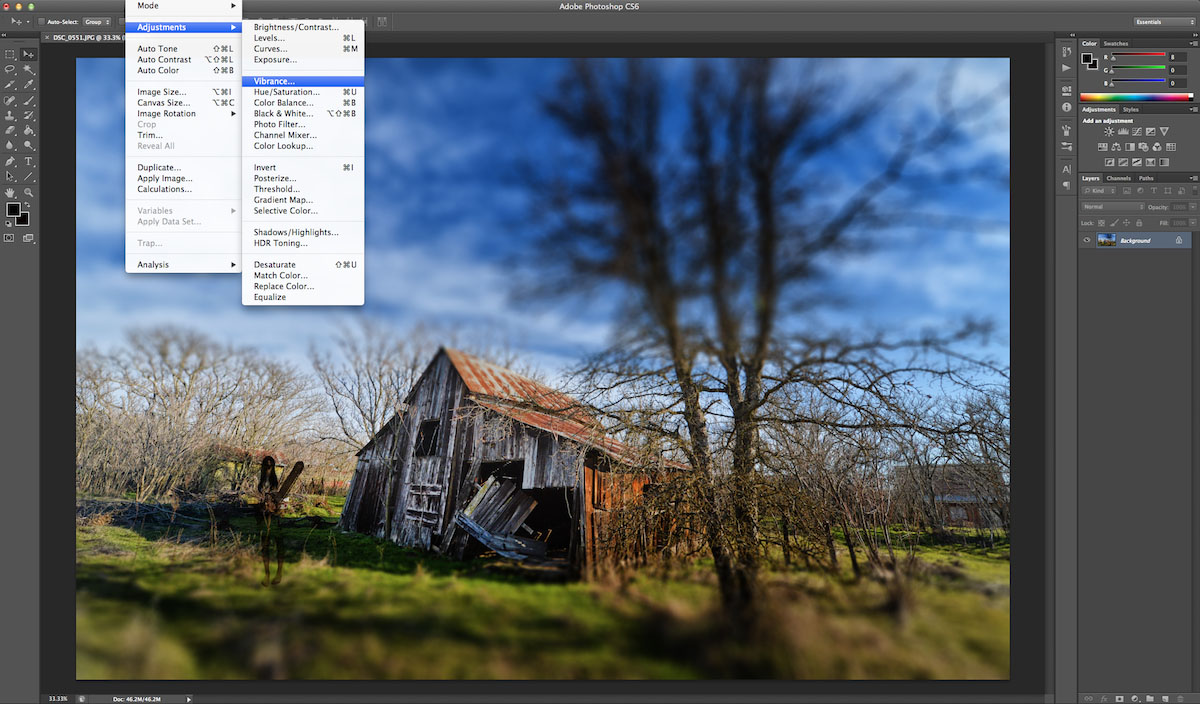
Step 1 – Choose a Good Image of Something Rustic Preferably out in Nature.
The first thing is to choose an image of something out in nature. A barn, an old house or even a picture of someone walking through the trees or something- anything that looks rustic. I chose this picture from a recent trip I took to Chinese Camp California. If you can go there I highly recommend it.
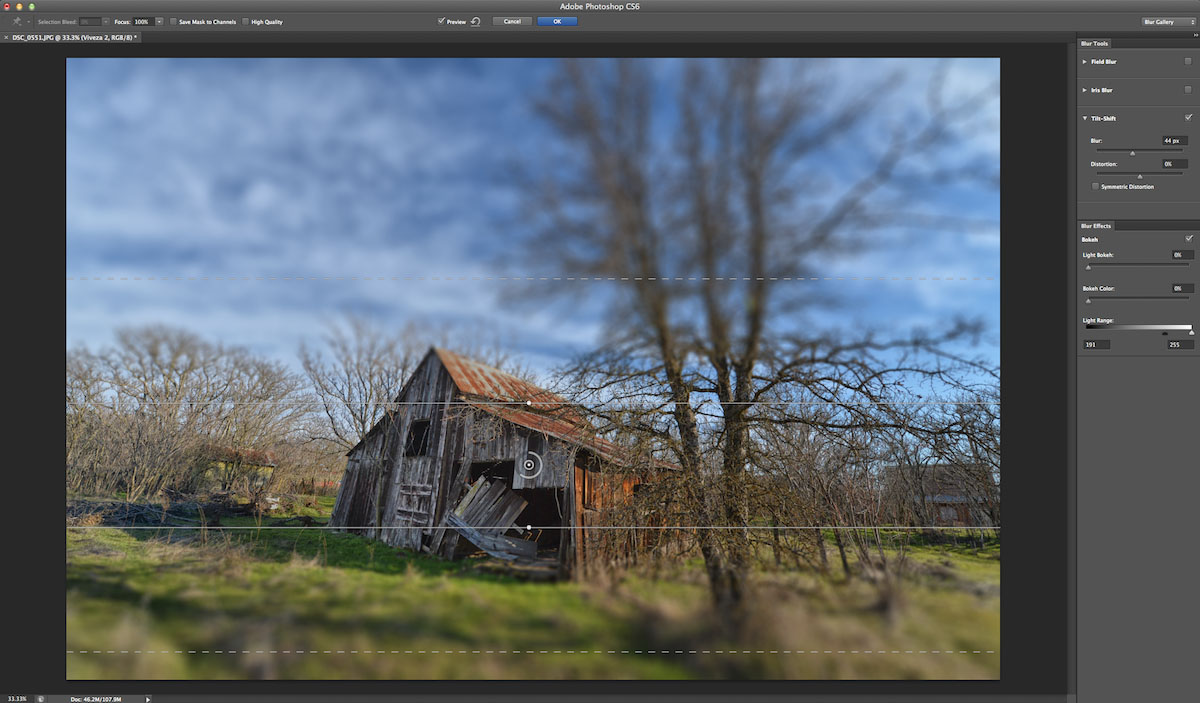
Step 2: Apply the Tilt Shift Blur, or the Guassian Blur Tool to the Photo.
Use the Tilt Shift Blur and focus in on the subject. I really like to blur it up so you can go all the way up to level 40 so it looks nice and blurry for the sky and the ground
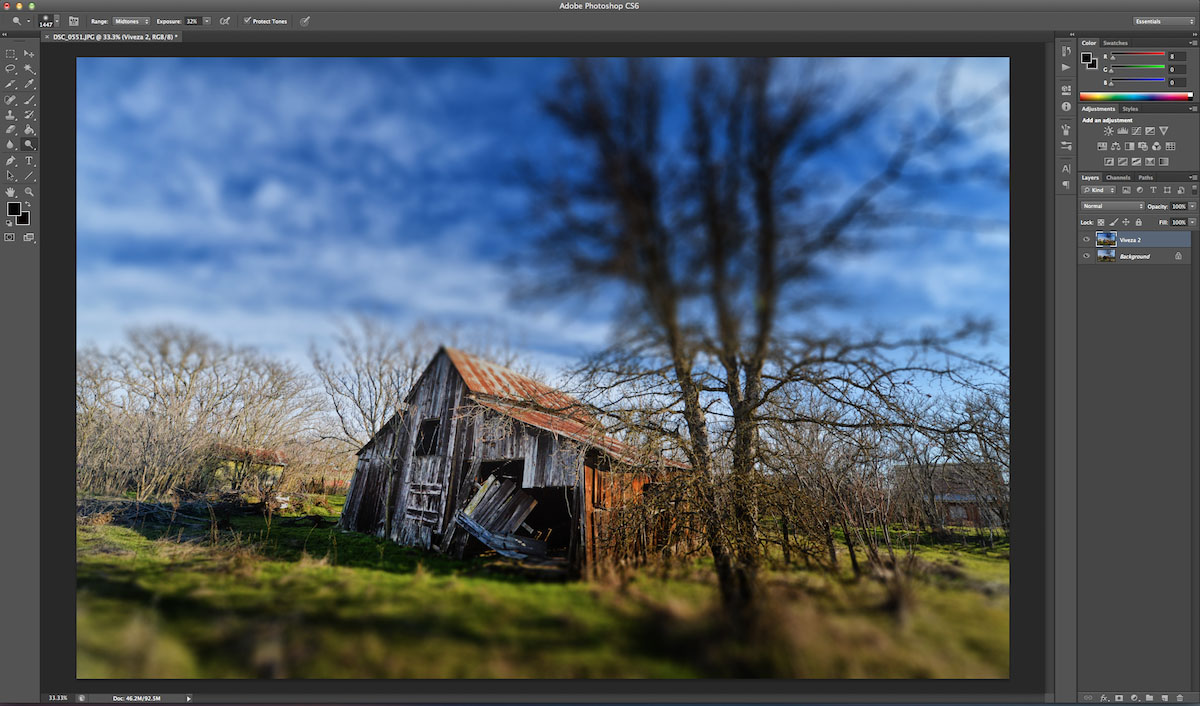
Step 3: Burn and Dodge the sky and ground
Using the burn tool (which you can set the exposure to 20-25) and use a large brush to darken up the sky and the ground. Don’t worry you can make it look pretty grungy and dark.
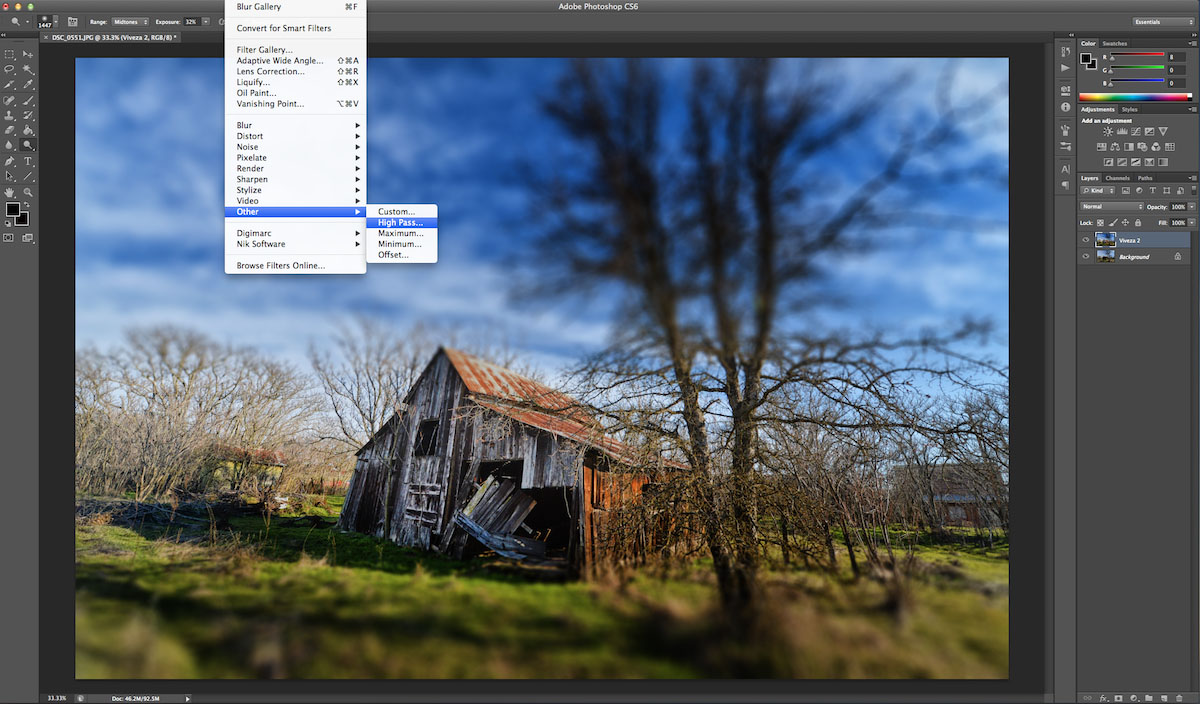
Step 4: Apply the high pass filter
Hit Command J to duplicate your existing layer. Choose the high pass filter which could be set to around 5. Then set Opacity to “Overlay” and then create a layer mask and just brush in the high pass filter to those areas that you want. This is an optional step just to add some details to the subject and make it look more old and gritty.
Step 5: Throw in a Zombie for the fun of it.
You can get a picture of a zombie and throw it in, or you can use the one here. I just drag and drop it on top of the photo. Set the Opacity to Multiply or Darken. You can even use screen. I just used multiply since it was easiest for the tutorial. Use the brush to make the zombie picture blend into the background.


Step 6: Color the Picture (Green or Black and White)
I basically just made the picture black and white by reducing the vibrance and saturation to zero. The black and white look works well with grungy Walking Dead Photos.
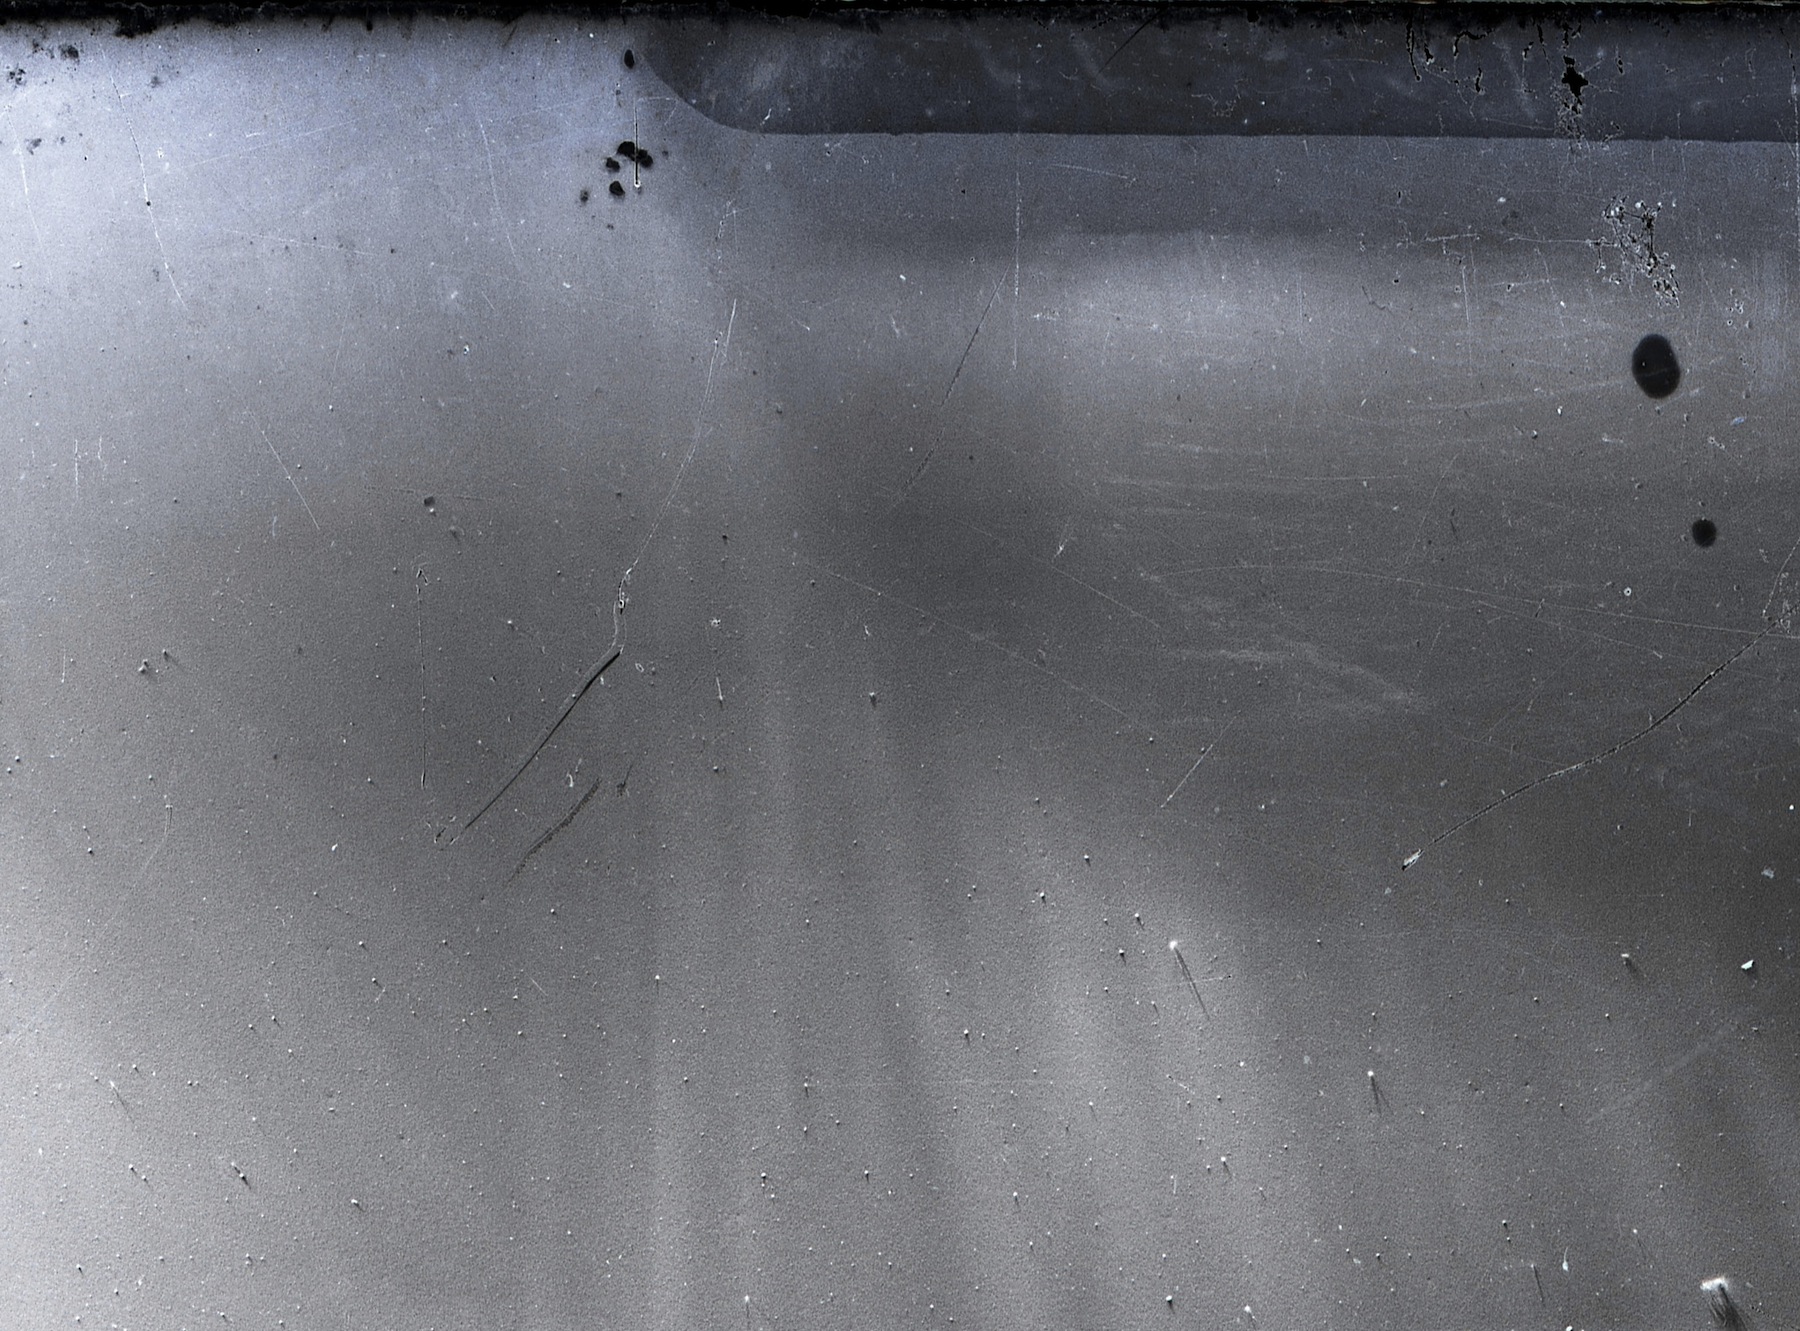
Step 7 – Drag and drop a scratchy pattern jpeg into the image.
Get any image that is scratchy so you can add the pattern on top of your zombie picture. I use the image below and you can just use that one since it works well. Use the screen tool to set the opacity to how little or much you want the scratchy pattern to show up on the picture. I usually bring mine down about 50%.
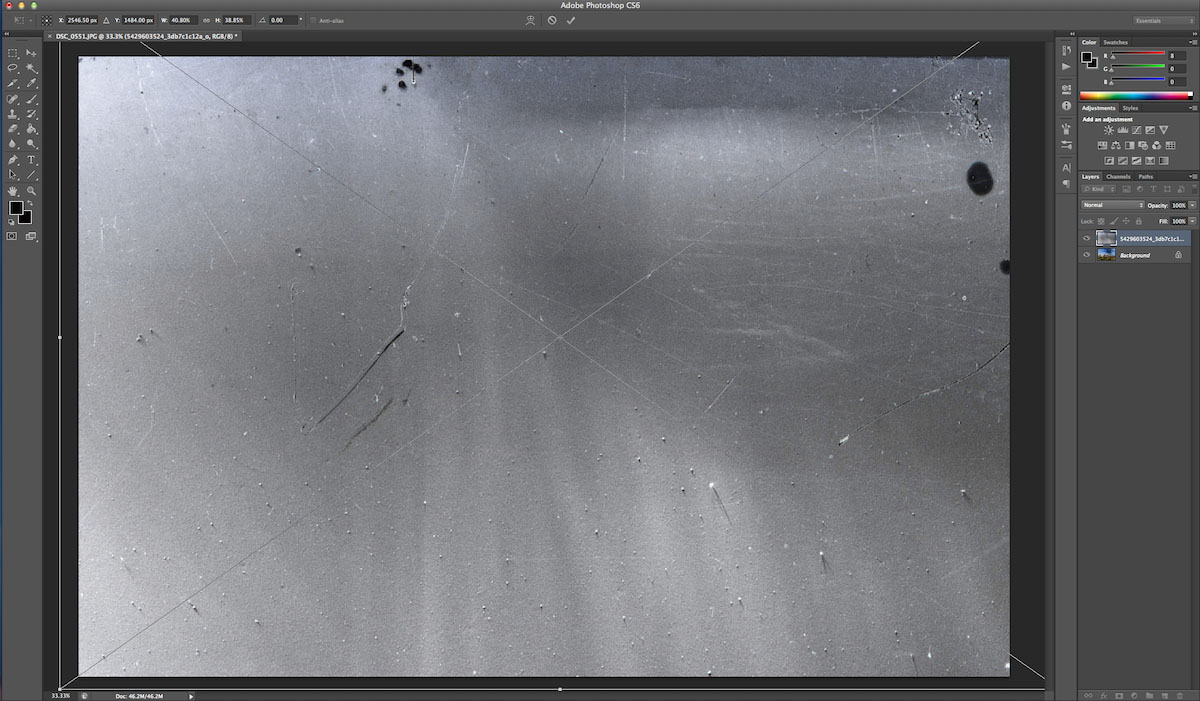
Here is the pattern I used.
The Final Step
The final step is just fine tuning the image. Dodge and Burn and color it until you get the effect that you want. I like to use this technique for my blog post sometimes. Here is the before and after picture after the complete effect is applied in Photoshop.

If you want to check out some zombified pictures that I did at Chinese Camp California, you can check out my blog post here. Chinese Camp California Blog Post.
If you want a gallery of a few overlays etc, you can check here. Zombie Like Overlays for Walking Dead Look.
Thank you for stopping by and checking out this tutorial. Please subscribe to my blog by adding your email address below!
The Best Wide Angle Lens Ever Made for Nikon
Nothing can be as confusing as trying to make your way through the infinite number of lenses available for your camera. Not only are there a bunch of camera manufacturers but each of those cameras has a portfolio of lenses that can be used. Now I have tried a lot of cameras and lenses over the last few years but I have pretty much found out that I prefer certain lens lengths to have in my backpack at any given time. I almost always, always carry a wide angle lens of some type. There are three types of wide angle lenses that you will probably find me with depending on the situation. I will either have a wide angle, super wide angle or fisheye with me at all times.
After all the lenses that I have tried one lens consistently stands head and shoulders beyond the rest. The Nikon 14mm- 24mm F/2.8 is in my mind the best wide angle lens of all time. Not only is this lens extremely fast, it zooms and it offers edge to edge sharpness that I have not been able to duplicate with any other wide angle lens. Almost every picture you take through this lens will blow you away when you look at it through your view-finder. When you first attach it to your camera, you will probably giggle with excitement when you preview the pictures.
The Nikon 14mm-24mm f/2.8 lens. The best wide angle lens ever made.
Why choose this lens?
At about $1,700 why would someone choose this lens. It’s expensive and frankly for a wide angle lens it’s pretty heavy. There are a few reasons I highly recommend this lens.
Best Lens for Shooting Landscapes- I just don’t think there is any other lens out there that can shoot landscapes the way that this lens can. It’s wide enough to capture the stunning scene in context but not fisheye so you warp the edges of the photo. You truly get a photo that looks even better than what you saw with your eye. That rarely happens straight out of the camera with any lens but it does with this lens.
Great lens for Parties and Weddings – If you put a flash on your camera and head out to shoot shots of a wedding in action or a party you will absolutely love this lens. You can capture a super wide view of the action and if you need to zoom in to 24mm you can as well. So this lens goes from super wide to wide right on the camera. If your using some of the new Nikon Cameras you can actually turn your DX Crop factor on and effectively turn this into a 35mm lens as well. I mean this lens runs the gamut and the quality is always superb.
Great lens for Architecture and Real Estate Photos – I am not very proficient in architecture or real estate photos but I do know this lens makes buildings, rooms and architecture look absolutely stunning. This would be my lens of choice is I was going to do real estate photos since you can capture the whole room and not make it look totally fisheye distorted. It’s amazing.
Auto Focus is Lightning Fast – I almost never miss a shot with this lens. The autofocus is lightning fast and always tack sharp. That is not the case with all my lenses but with this lens it always is. It’s focus is always tried and true.
Aperture Settings give you so much control – If you like to do alot of slow shutter landscape photos then you want to set your aperture really high on your camera so you can bleed the light in slowly with little light pollution from surrounding areas. I absolutely love the Nikon 14mm to 24mm because it allows me to put the camera on the tripod, set the Aperture to F/22 and then take a super long slow shutter shot. It gives me the absolute right effect. This camera will also go all the way up to F2.8 which means I can do great depth of field shots as well. The Aperture settings are so flexible.
Photos are professional quality – The biggest benefit to this lens is that they make my photos look semi professional. I mean when you buy a lens that is what you want and that is exactly what this lens does for me. It is totally worth the $1,700 to buy this lens.
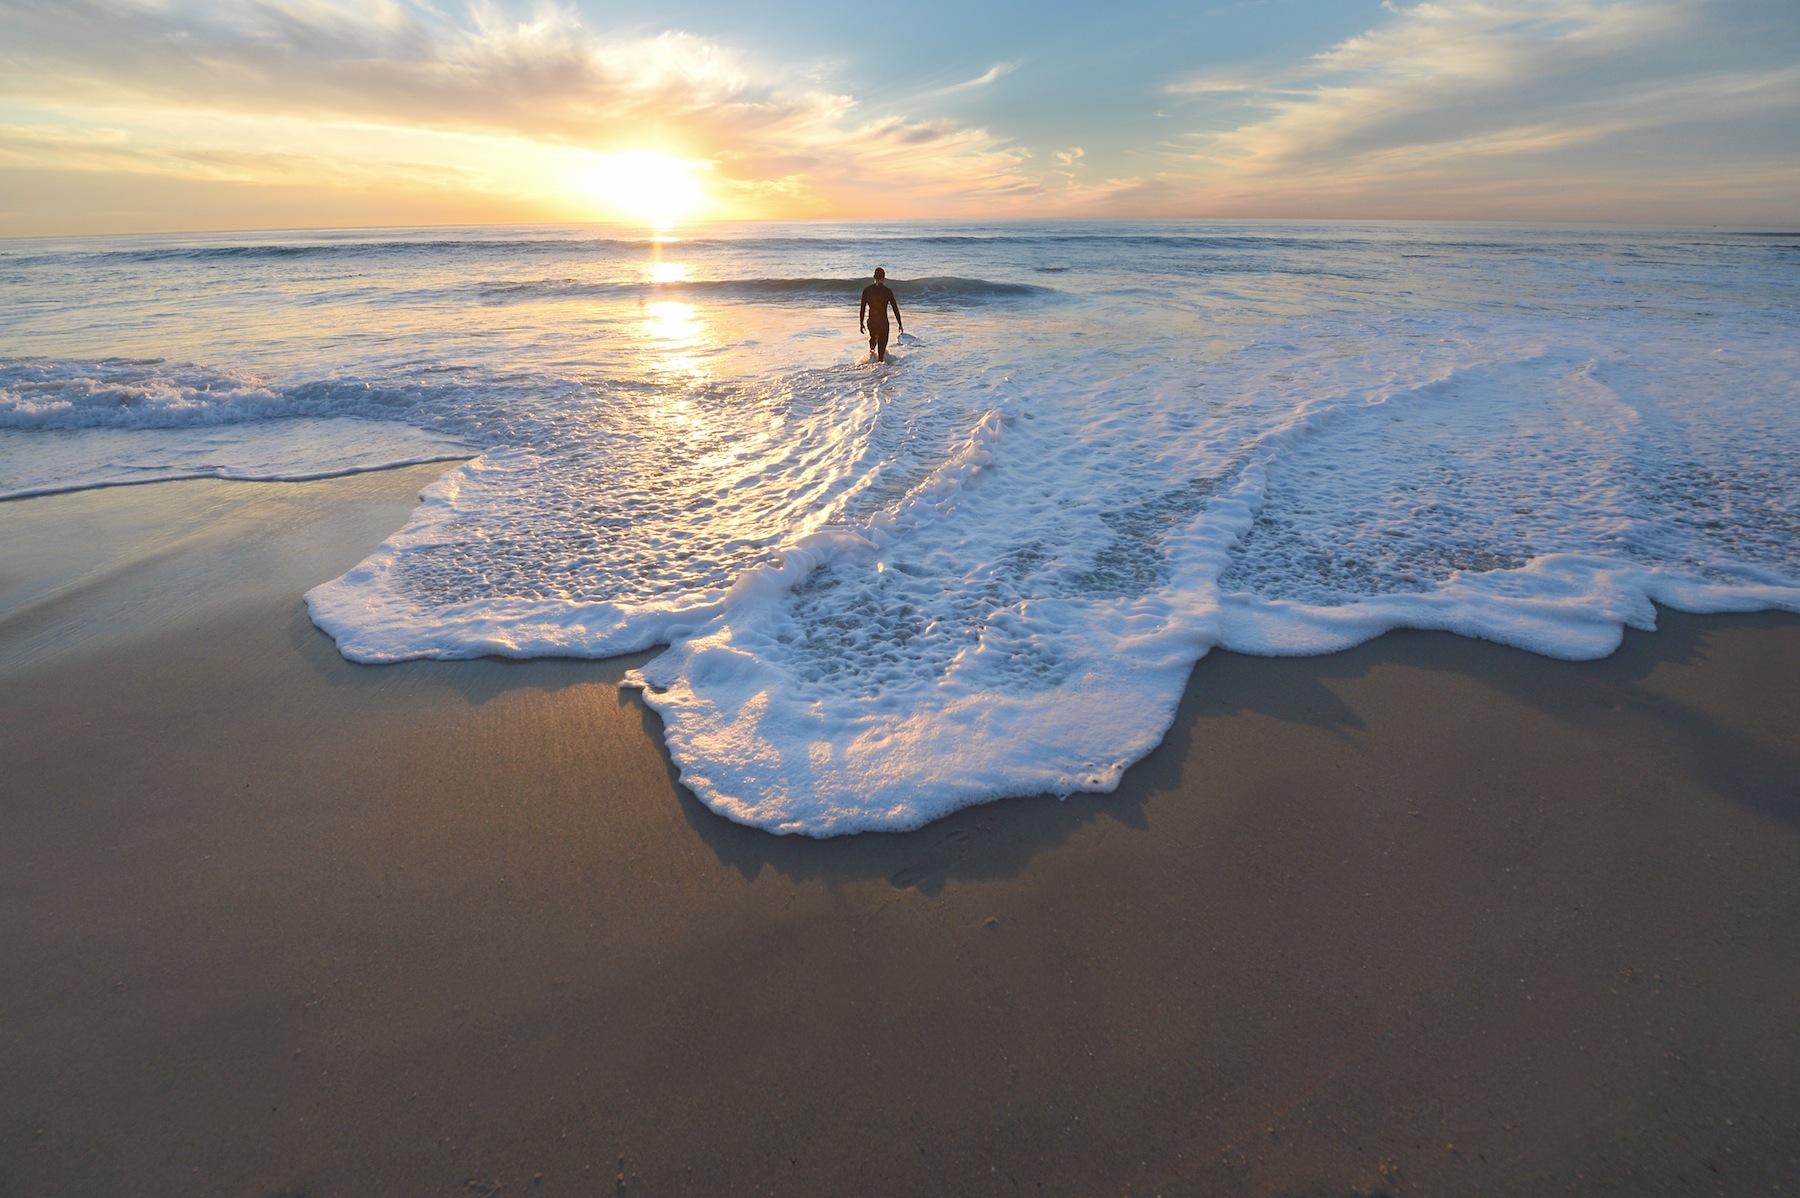
Some Sample Images from the Nikon 14mm-24mm
Here are some sample images I have taken with the lens.
The Only Downside to the 14mm to 24mm Lens
There is only 1 caveat to this lens. You have to be super careful with it. There are no screw on filters for this lens so if you are careless you could scratch the front and you are pretty much screwed. I did it once and I had to buy a new one. Now I did sell the old scratched lens for $1,000 on Ebay so I only lost about $700 but still that is a downside to this lens.
Try or buy the Nikon 14MM-24mm Lens
Companies like borrower lenses or camera lens rentals will let you rent out these lenses before you buy. My recommendation however is to just buy the lens. This is one purchase you will never regret if you love photography.